
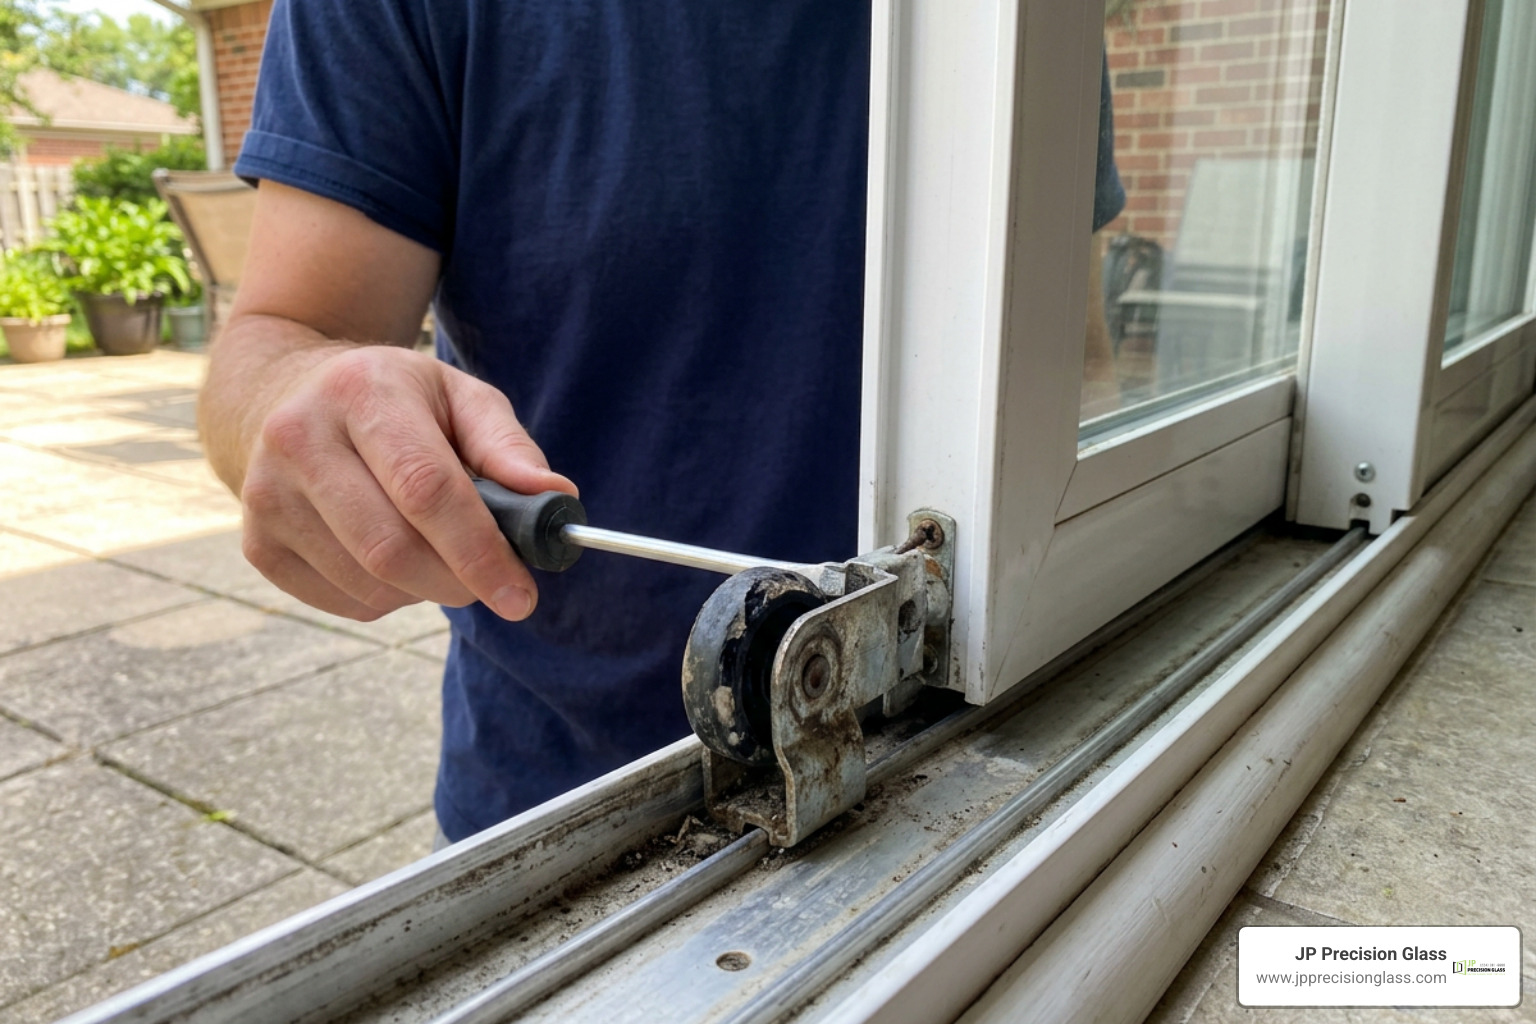
Change Sliding Door Rollers to Restore a Smooth Glide
If your patio door drags, grinds, wobbles, or will not latch cleanly, first vacuum the lower track and try small, even adjustments to the height screws near the bottom corners. If the wheels are cracked, rusted, flat-spotted, or still bind after cleaning and adjustment, change sliding door rollers by removing the panel with a helper, matching the old roller assembly exactly, replacing both sides, and then leveling the door again.
Most problems come from worn rollers, debris, or a bent track – not a door that needs to be replaced. Because glass panels can be heavy, protect the floor, use a second person for lifting, and stop if the track is crushed or the panel uses heavy impact glass.
Change sliding door rollers word list:
Diagnosing Sliding Door Issues: Adjustment vs Replacement
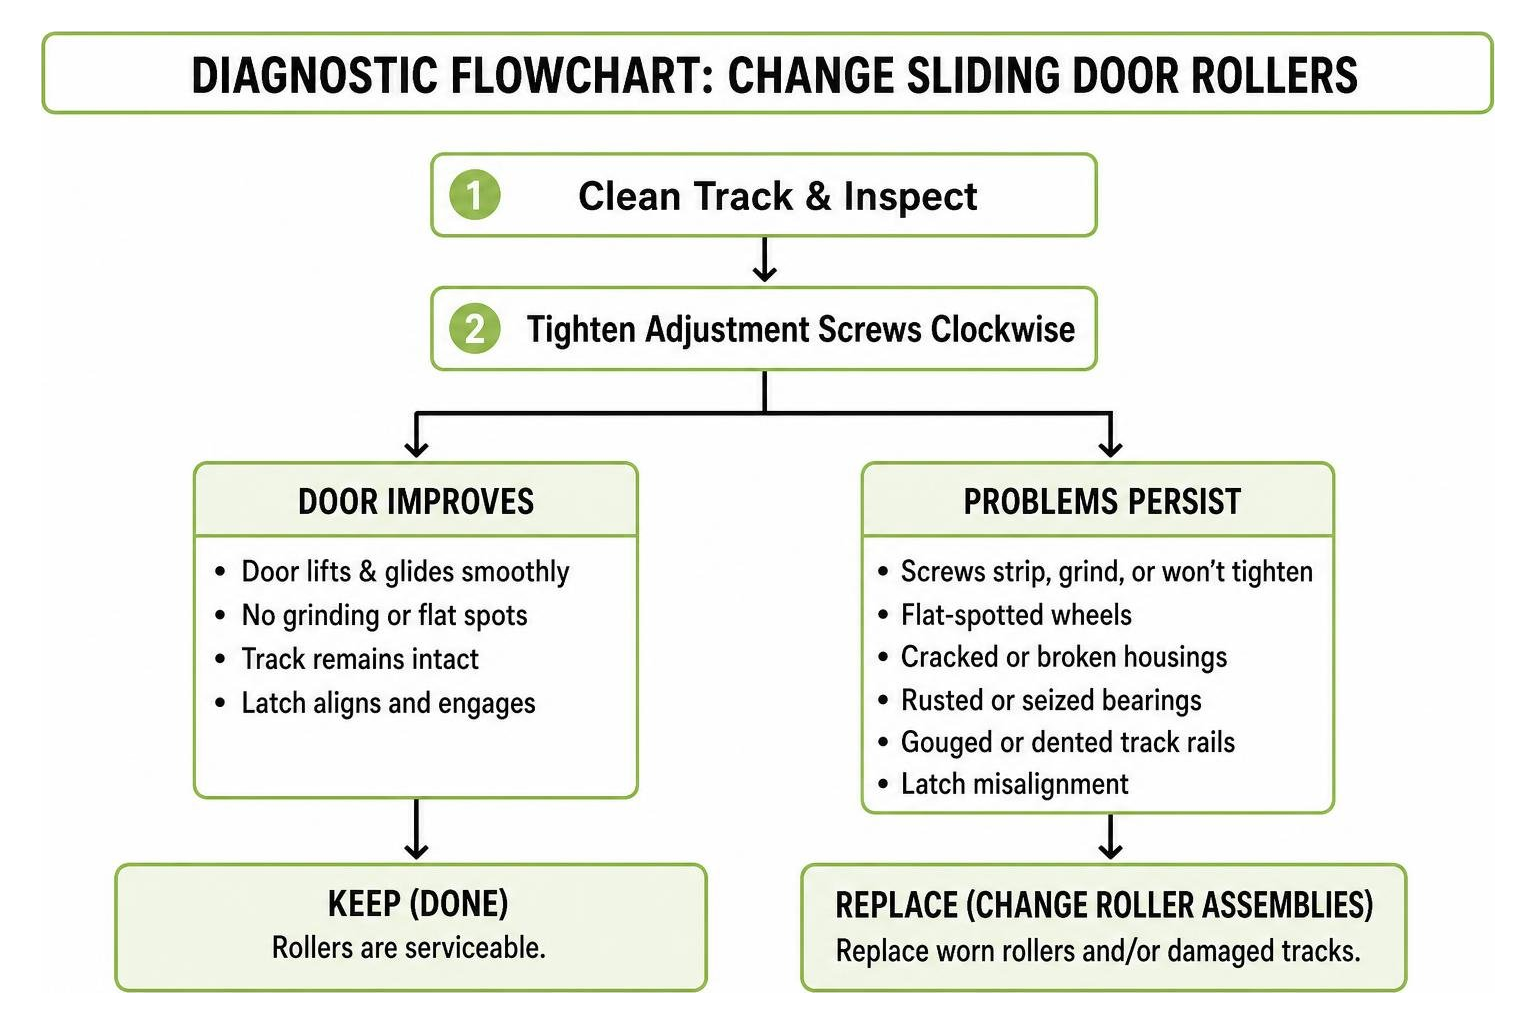
A sliding door should glide with minimal effort. When opening the door turns into a workout involving two hands and a hip check, the rolling mechanism is almost always screaming for help. Before tearing down your frame, it helps to distinguish between a simple height misalignment and mechanical failure.
Doors naturally settle over time. Daily use, structural shifting, and vibrations can cause the height adjustment screws at the base of the door to loosen. When this happens, the bottom aluminum rail drops down and drags directly across the raised metal track rib. This metal-on-metal contact produces a loud, harsh screech and shaves off aluminum dust.
To determine if you only need an adjustment, locate the small access holes near the bottom edge of the door frame (often hidden under plastic snap-in caps). Using a screwdriver, turn the screws clockwise a quarter-turn to raise the panel. If raising the door lifts the rail clear off the track and restores a smooth, quiet glide, an adjustment was all you needed.
However, if turning the adjustment screws causes the screw head to spin freely without lifting the panel, or if the door continues to rumble, shudder, and bind, the roller internals are compromised. In that case, tackling a sliding-into-savings with diy aluminum glass door repair project by replacing the internal wheel assemblies is the proper course of action.
Signs of Worn Rollers and Damaged Tracks
When sliding door wheels reach the end of their service life, they leave clear physical symptoms:
- Flat-Spotted Wheels: If a ball bearing seizes from corrosion or grit, the wheel stops rotating and slides across the metal track. Friction quickly grinds a flat spot onto the wheel circumference, creating a rhythmic bumping sensation whenever the door moves.
- Cracked or Broken Nylon Housings: Constant downward pressure can fracture the wheel flange or split the outer roller housing, making the door wobble from side to side.
- Internal Rust and Seized Bearings: Exposure to condensation, cleaning chemicals, or outdoor rain causes carbon steel bearings to rust solid.
- Gouged or Dented Track Rails: Running flat-spotted or seized rollers over time will chew through the soft aluminum track crown, creating sharp gouges, metal burrs, or wavy valleys that catch the rollers.
- Latch Misalignment: When one roller fails, that corner of the door sags. This creates an uneven reveal against the side jamb, preventing the door lock hook from engaging the strike plate properly.
Roller Materials Compared: Steel, Nylon, and Stainless Steel
Selecting the proper roller material ensures longevity and protects your track from premature wear. Different materials offer unique trade-offs in weight capacity, operating sound, and environmental resistance:
| Roller Material | Load Capacity | Operating Noise | Corrosion Resistance | Best Application |
|---|---|---|---|---|
| Standard Carbon Steel | High (100–200+ lbs per pair) | Moderate to High | Low (Prone to rust in damp environments) | Standard interior or mild-climate exterior patio doors |
| Molded Nylon / Delrin | Medium (50–100 lbs per pair) | Whisper Quiet (Reduces noise by up to 30%) | High (Impervious to rust; chemically inert) | Lightweight panels, screen doors, and interior partitions |
| Stainless Steel | Very High (150–300+ lbs per pair) | Moderate | Superior (Resists salt spray, humidity, and standing water) | Heavy patio doors, coastal zones, and high-moisture spaces |
Builder-grade carbon steel rollers often last only 3 to 5 years before moisture causes their open bearings to degrade. For standard residential exterior doors, premium tandem rollers with sealed bearings and engineered Delrin or stainless steel wheels can deliver 10 to 15 years of smooth operation.
Pre-Repair Checklist: Tools and Roller Identification
A standard residential glass patio door panel weighs between 80 and 150 pounds, while double-pane thermal or impact-resistant panels can easily exceed 200 pounds. Proper preparation is essential to protect both your back and the glass panel.
Always conduct this repair with a helper. Never attempt to lift, maneuver, or balance a heavy glass sliding door panel alone. Make sure you have a clear, flat resting space ready before you start lifting.
Essential Tools Needed to Change Sliding Door Rollers
Gather these tools before beginning your project:
- Screwdrivers: #2 and #3 Phillips head screwdrivers, along with a sturdy flathead screwdriver.
- Prying and Tapping Tools: A non-marring rubber mallet, a wooden block (no thicker than 3/4 inch), and a stiff putty knife.
- Pliers: Needle-nose pliers or a balance hook to extract internal roller cartridges.
- Safety Equipment: Heavy-duty work gloves with grip palms and impact-rated safety glasses.
- Track Maintenance Supplies: A shop vacuum with a narrow crevice attachment, a stiff nylon bristle brush, and a can of dry silicone spray lubricant (avoid oil-based lubricants like standard WD-40 or thick wheel grease, which attract dust).
- Staging Materials: Two heavy moving blankets or a set of padded sawhorses to support the door panel horizontally during hardware swaps.
How to Measure and Identify Replacement Rollers
Hardware manufacturers have produced hundreds of distinct roller variations over the decades. Universal roller kits exist, but matching the original equipment manufacturer (OEM) dimensions ensures a drop-in fit without needing to drill new mounting holes.
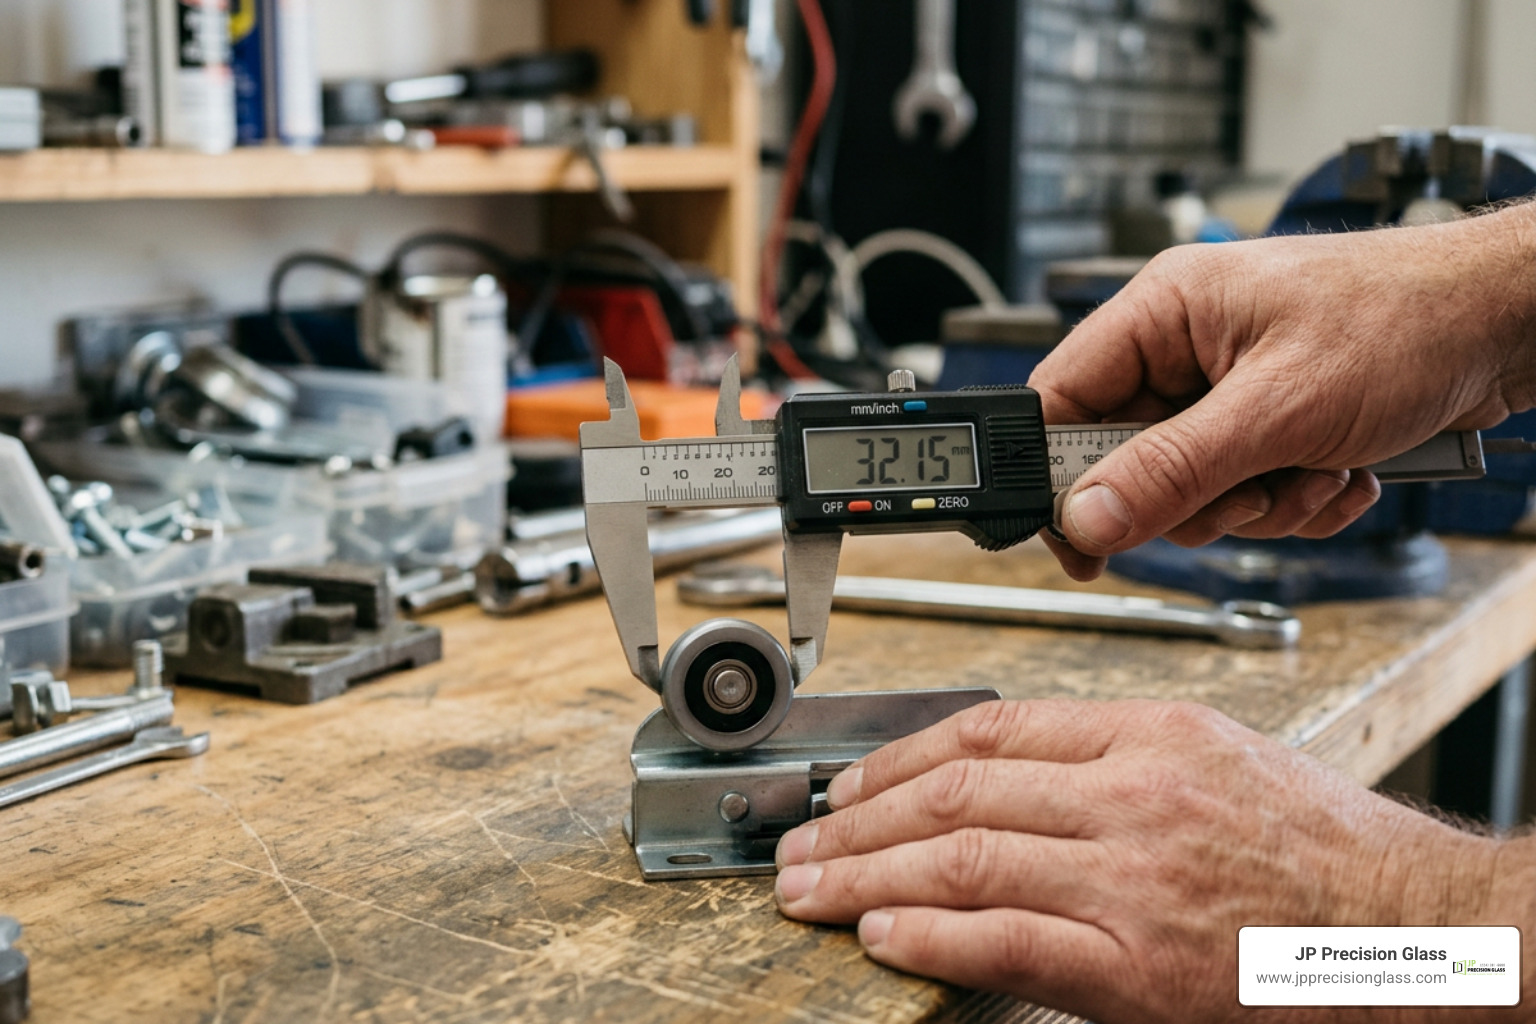
Because subtle differences can affect fit, consult a comprehensive DIY roller replacement guide or take your old roller assembly directly to a local hardware specialist.
When measuring your existing roller assembly, check these four critical dimensions:
- Wheel Diameter: Measure the outside diameter of the wheel (common sizes include 1″, 1-1/8″, 1-1/4″, and 1-1/2″).
- Housing Dimensions: Measure the width, height, and overall length of the metal cartridge housing that slots into the door stile.
- Mounting Hole and Screw Locations: Note whether the assembly mounts through the side of the housing, the top, or the end, and measure the center-to-center distance between screw holes.
- Wheel Profile and Edge: Determine if the wheel has a concave (grooved) edge designed to sit on top of a raised track rail or a flat/convex edge.
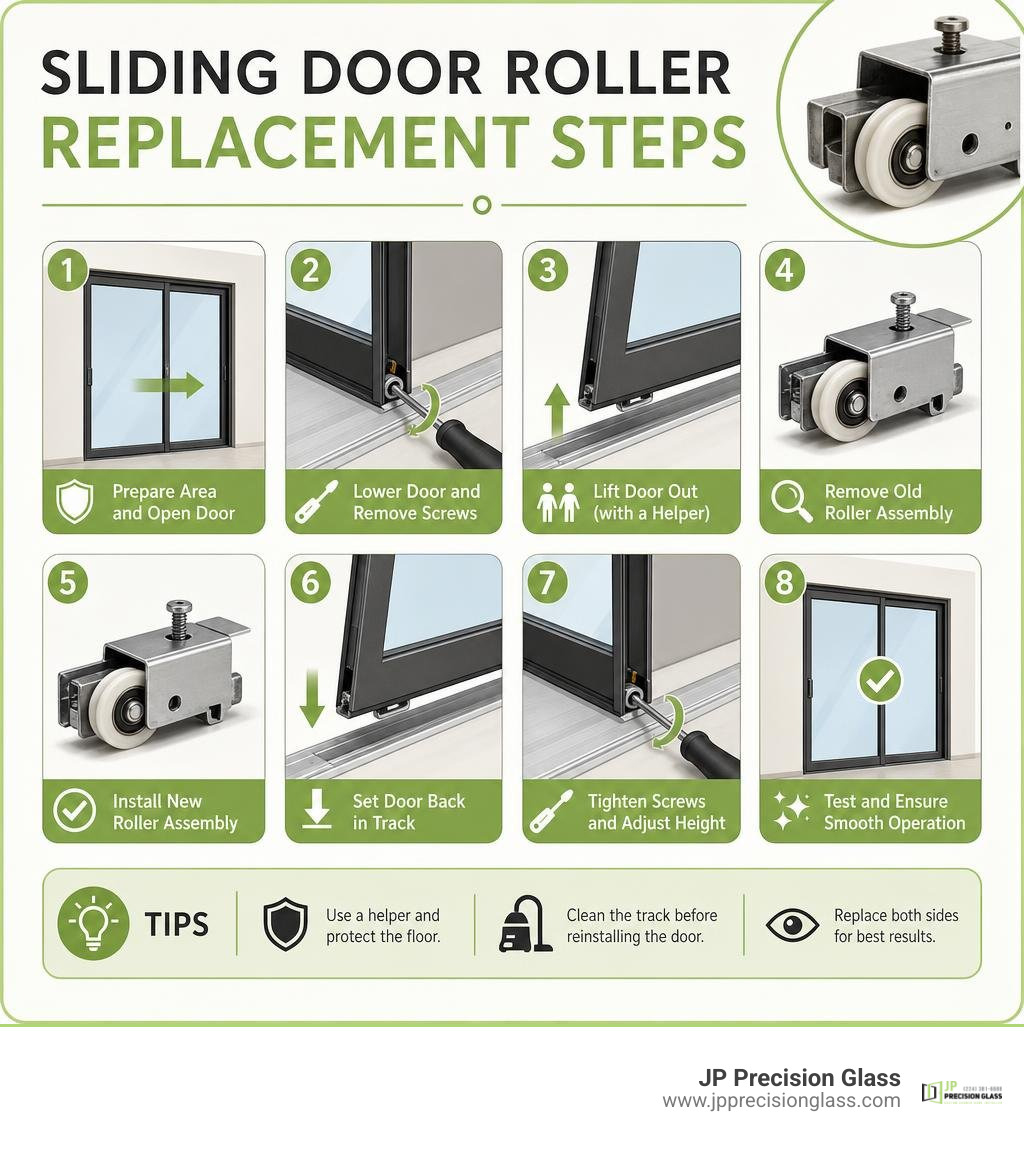
Step-by-Step Guide: How to Change Sliding Door Rollers Safely
With your workspace cleared, moving blankets laid out on the floor, and tools within reach, you are ready to begin the replacement process.
Removing the Sliding Panel and Extracting Old Rollers
- Retract the Rollers Completely: Locate the adjustment screw access holes at the bottom outer corners of the door. Turn both adjustment screws counter-clockwise until the internal rollers retract fully into the bottom rail. This lowers the door frame and creates the maximum vertical clearance between the top of the door and the head track.
- Remove Head Stops or Anti-Lift Blocks: Inspect the upper track channel. Many modern sliding doors feature small aluminum or plastic anti-lift blocks screwed into the top channel to deter intruders. Unscrew and remove these blocks.
- Lift and Tilt the Panel: Stand facing the door with your helper, placing one person on each side of the panel. Firmly grip the vertical stiles. Lift the entire panel straight up into the deep upper track pocket until the bottom edge clears the raised bottom track rail. Swing the bottom of the door outward into the room and gently lower the panel down.
- Stage the Door Securely: Carry the panel carefully and set it down horizontally across your padded sawhorses or flat on the moving blankets. Never rest the bare glass directly on hard concrete or tile.
- Extract the Old Roller Assemblies: Inspect the bottom rail cavity. Depending on your door model, the roller may be secured by an end screw through the vertical stile or by a side mounting screw. Back out the retaining screws. If the roller is stuck from years of accumulated grime, insert a flathead screwdriver or hook tool into the housing notch and pry the assembly outward.
Installing New Roller Assemblies and Rehanging the Door
- Clean the Internal Pockets: Vacuum loose dirt, metal shavings, and insect debris out of the hollow bottom door rail pockets.
- Insert the New Assemblies: Slide the replacement roller cartridges into the cavity, ensuring the adjustment screw aligns perfectly with the access port on the door edge.
- Secure the Mounting Hardware: Thread the mounting screws into place. Hand-tighten them securely, taking care not to cross-thread or strip the aluminum channels.
- Pre-Set Roller Height: Before rehanging, turn the adjustment screws until both wheels are drawn halfway into their housings. This provides baseline clearance while allowing room for fine-tuning once the door is back in its frame.
- Inspect the Track System: Before lifting the door back into place, take a moment to vacuum, scrub, and wipe down the bottom track rail. Similar to how you how to install and maintain sliding glass shower doors, keeping sliding pathways clean prevents premature hardware wear.
- Rehang the Sliding Door: With your helper, lift the door panel, insert the top edge into the deep upper frame channel, swing the bottom inward until the wheels hover over the raised rail, and slowly lower the wheels directly onto the track crown.
Height Adjustment and Track Alignment
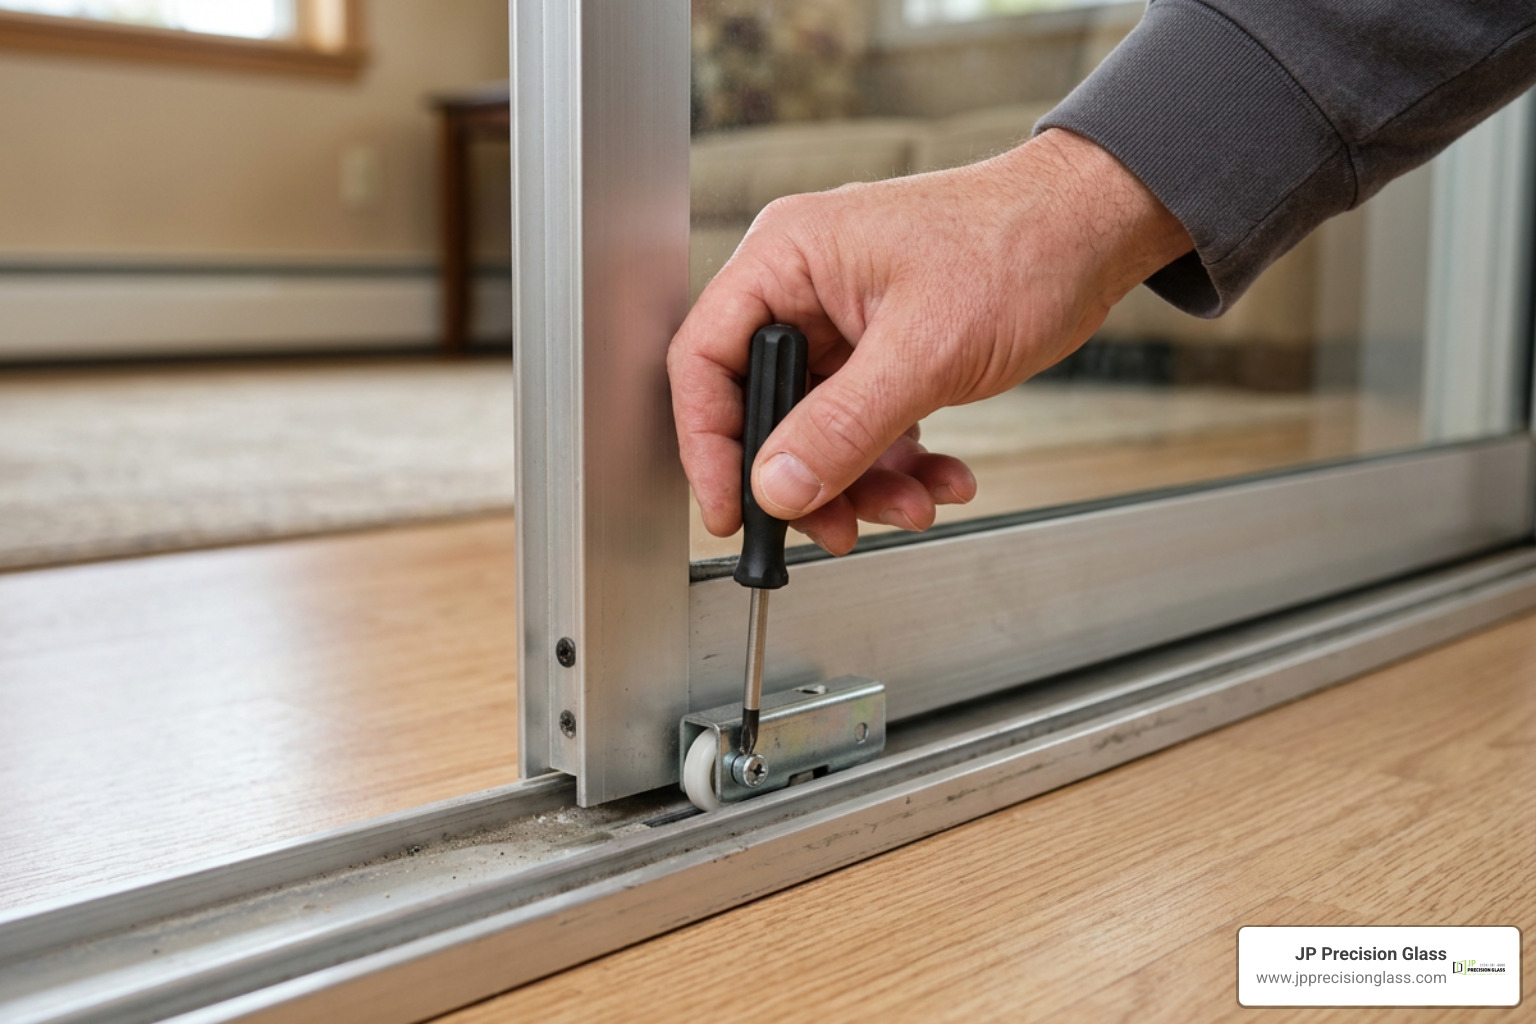
Once the door sits securely in the track, you must level the panel to achieve an airtight seal:
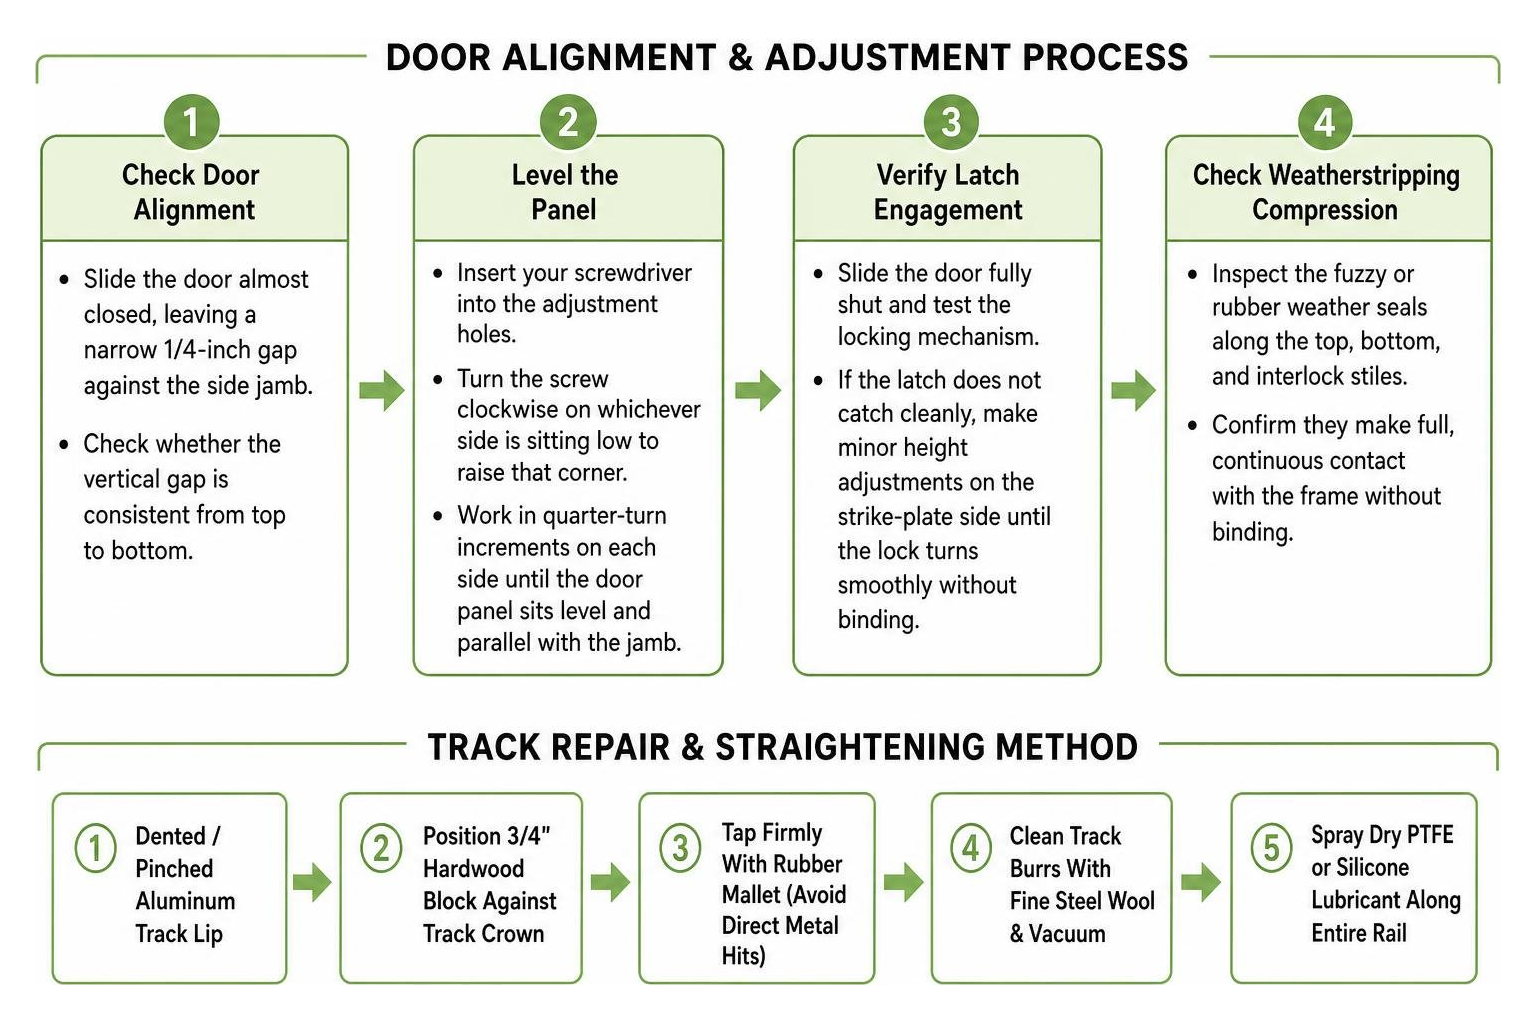
- Check Door Alignment: Slide the door almost closed, leaving a narrow 1/4-inch gap against the side jamb. Check whether the vertical gap is consistent from top to bottom.
- Level the Panel: Insert your screwdriver into the adjustment holes. Turn the screw clockwise on whichever side is sitting low to raise that corner. Work in quarter-turn increments on each side until the door panel sits level and parallel with the jamb.
- Verify Latch Engagement: Slide the door fully shut and test the locking mechanism. If the latch does not catch cleanly, make minor height adjustments on the strike-plate side until the lock turns smoothly without binding.
- Check Weatherstripping Compression: Inspect the fuzzy or rubber weather seals along the top, bottom, and interlock stiles to confirm they make full, continuous contact with the frame without binding.
Common Troubleshooting and Long-Term Maintenance
Even with brand-new hardware, surrounding track deformities or improper maintenance habits can cause premature roller failure. Addressing these common issues keeps your door gliding smoothly year-round.
Correcting Sagging, Jumping Tracks, and Uneven Slides
If a door continues to jump the track or drag unevenly after roller replacement, check these trouble spots:
- Straightening Bent or Pinched Track Rails: Heavy foot traffic can bend the raised aluminum track crown inward or outward. If the track is pinched, place a 3/4-inch block of wood against the damaged section and tap the wood firmly with a rubber mallet. This reshapes the metal without denting or cracking the aluminum rail. Detailed structural techniques can be found in this troubleshooting guide for sliding door repairs.
- Installing a Track Cap / Cover: If previous seized rollers wore deep grooves into the track crown, new wheels will drop into those ruts and stick. You can snap a stainless steel track cover (repair cap) over the existing damaged rail to create a fresh, smooth surface without replacing the entire outer threshold.
- Frame Misalignment: Misaligned frames cause approximately 70% of premature roller failures. If your home’s foundation or door frame has settled out of square, adjusting the rollers to their maximum height might not fully compensate. In that case, the outer frame may need shimming.
Cleaning and Lubrication Best Practices
To maximize the life of your new rollers, perform basic maintenance every six months:
- Deep Clean the Tracks: Vacuum pet hair, loose sand, and outdoor dirt from the sill. Use an old toothbrush and warm soapy water to break up hardened grime and mineral deposits, then dry the track thoroughly with a microfiber towel.
- Apply Dry Lubricants Only: Never spray standard penetrating oils, automotive grease, or cooking sprays into sliding tracks. Wet lubricants attract dirt and sand, forming an abrasive paste that grinds down bearing seals and wheel profiles. Always use a dry silicone spray or PTFE dry lubricant.
- Maintain Overhead Systems: Just as you regularly clean and protect sliding shower doors from soap scum and hard water scale, keeping patio tracks dry and free of debris prevents moisture from corroding lower wheel assemblies.
When to Call a Pro vs Change Sliding Door Rollers Yourself
While changing standard patio rollers is a manageable DIY task for handy homeowners, certain situations call for professional glass technicians:
- Impact-Resistant Laminated Glass: Coastal impact doors feature thick, laminated glass panes that often weigh between 200 and 350 pounds. Lifting these panels requires specialized vacuum suction cups and mechanical equipment to avoid dropping the door or warping the structural frame.
- Crushed or Split Frame Thresholds: If the bottom sill is crushed flat or structural rot has softened the subfloor beneath the track, simply replacing the rollers will not fix the issue. The door assembly must be removed to rebuild the structural foundation.
- Seized Frame Stile Screws: Older aluminum or vinyl frames may have corroded assembly screws that strip or snap when loosened, requiring specialized extractors and re-tapping tools.
Frequently Asked Questions About Sliding Door Roller Replacement
How do I know if my rollers need adjustment or complete replacement?
If your door is difficult to slide, first clean the track and turn the adjustment screws to raise the panel. If the door lifts, stays level, and slides easily, an adjustment was all that was needed.
If the adjustment screw turns without lifting the door, the roller makes a continuous grinding sound, the wheels have flat spots, or the door continues to wobble and scrape the sill, the internal bearings are worn and the rollers must be replaced.
Can I replace sliding door rollers without removing the entire door panel?
On certain aluminum sliding door designs, you can access the rollers by loosening the bottom corner assembly screws and tapping the bottom rail down with a wood block and mallet while the door remains upright.
However, this method carries substantial risk. If you tap the frame unevenly, you can twist the metal stile or apply point-load stress to the tempered glass edge, shattering the entire panel. Removing the door panel onto a flat, padded surface is far safer and allows you to inspect the track and clean the roller pockets thoroughly.
Why does my sliding door still drag after installing new rollers?
If your door still drags after installing new rollers, check these four common culprits:
- Rollers Adjusted Too Low: The new rollers may be retracted too far into the housing, allowing the bottom aluminum frame to drag on the track. Turn the adjustment screws clockwise to raise the door.
- Damaged Track Crown: If the track has dips, deep gouges, or flat spots from previous failed rollers, the new wheels will drop into those depressions. Installing a stainless steel track cap will fix this.
- Debris in the Upper Guide Track: Dirt, spider webs, or failing top weatherstripping in the head channel can bind the top edge of the panel.
- Out-of-Square Door Frame: If the rough opening has settled, the top or side frame may pinch the panel as it slides open.
Conclusion
A sticky, stubborn sliding glass door does not mean you need to replace your entire door assembly. In most cases, removing the sliding panel, cleaning out years of track debris, and installing a fresh pair of matched tandem rollers will restore a smooth, quiet glide.
Taking the time to measure your replacement assemblies accurately, leveling the panel evenly with the corner adjustment screws, and applying dry silicone lubricant every season protects your hardware against premature wear.
When dealing with extra-heavy impact glass, structural subfloor settling, or intricate bathroom enclosures, working with professional glass specialists guarantees safe handling and precise alignment. If your home features specialized custom glass installations or requires professional shower door repair chicago services, precision-crafted hardware and professional expertise ensure your glass installations operate safely, cleanly, and effortlessly for years to come.