

How to Adjust a Frameless Shower Door
Start by checking the gaps around the closed door with a level. If the glass tilts, scrapes the curb, or leaves an uneven gap, identify the hinge, pivot, or roller that controls its position. Have another person support the glass before you loosen any hardware. Make small adjustments, tighten the fasteners evenly, and test the door after each change.
Do not force the glass into place. If a hinge pulls away from the wall, the door keeps sagging, or the glass is chipped or cracked, stop and call a shower-door professional. The guide below shows how to find the cause and choose the right adjustment for your door.
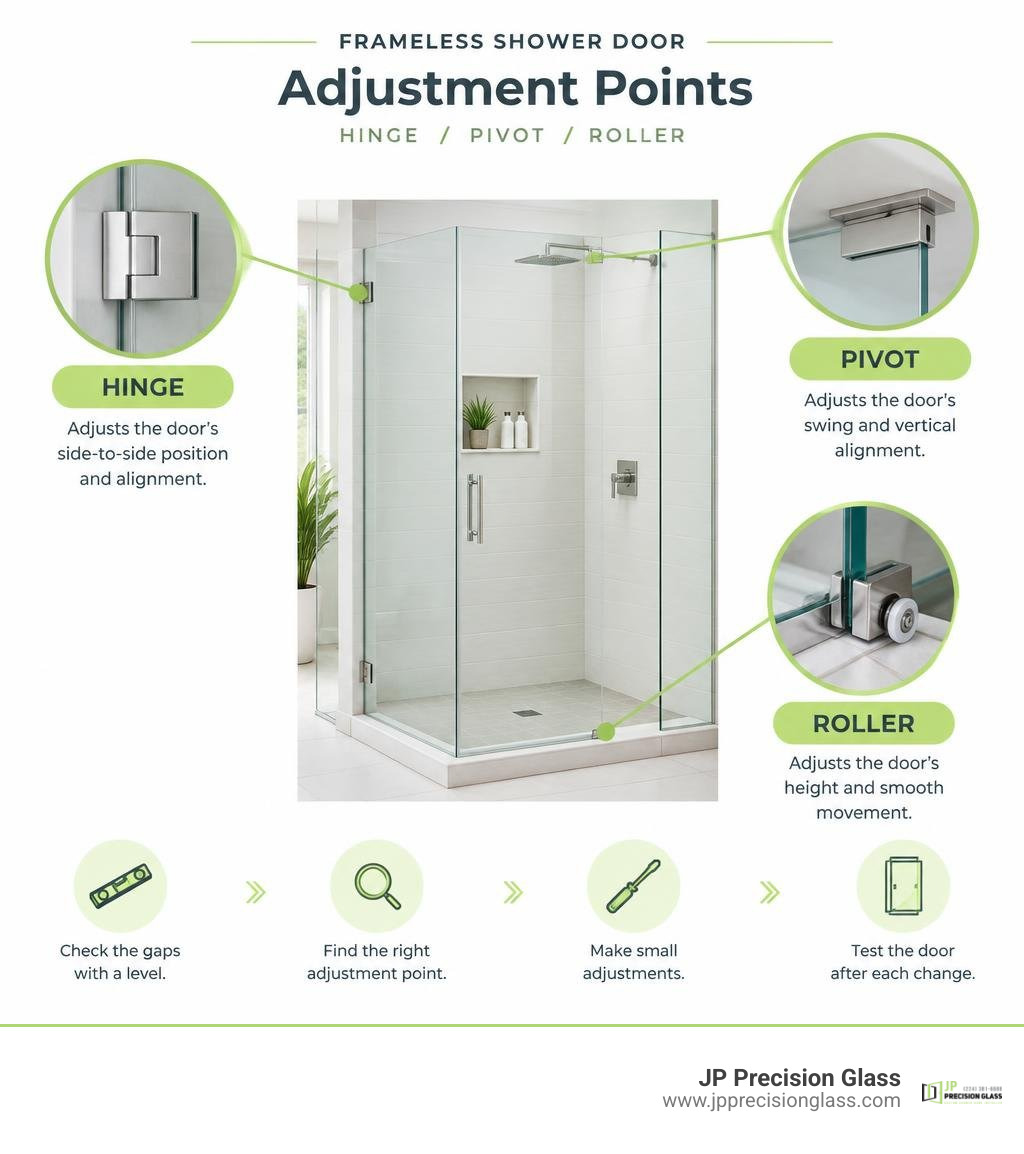
Frameless shower door adjustment terms made easy:
Signs and Causes of an Out-of-Plumb Shower Door
A frameless glass shower door is a gorgeous addition to any modern bathroom, but its sleek look depends on tight physical tolerances. When a heavy glass panel shifts even a fraction of an inch, everyday operation becomes frustrating.
Recognizing early warning signs prevents water damage and stops unnecessary stress on the glass:
- Uneven Gaps: The vertical gap between the door and the wall (or strike jamb) is noticeably wider at the top than at the bottom, or vice versa.
- Scraping or Dragging: The bottom edge or vinyl sweep catches aggressively against the shower threshold, tile curb, or stationary panel.
- Ghost Swinging: The door refuses to stay closed or drifts open on its own due to gravity pulling on an off-axis hinge.
- Mysterious Water Leaks: Water pools on the bathroom floor because seals no longer compress evenly against contact surfaces.
- Rattling Hardware: Handles or hinge assemblies feel loose, click during movement, or exhibit noticeable play.
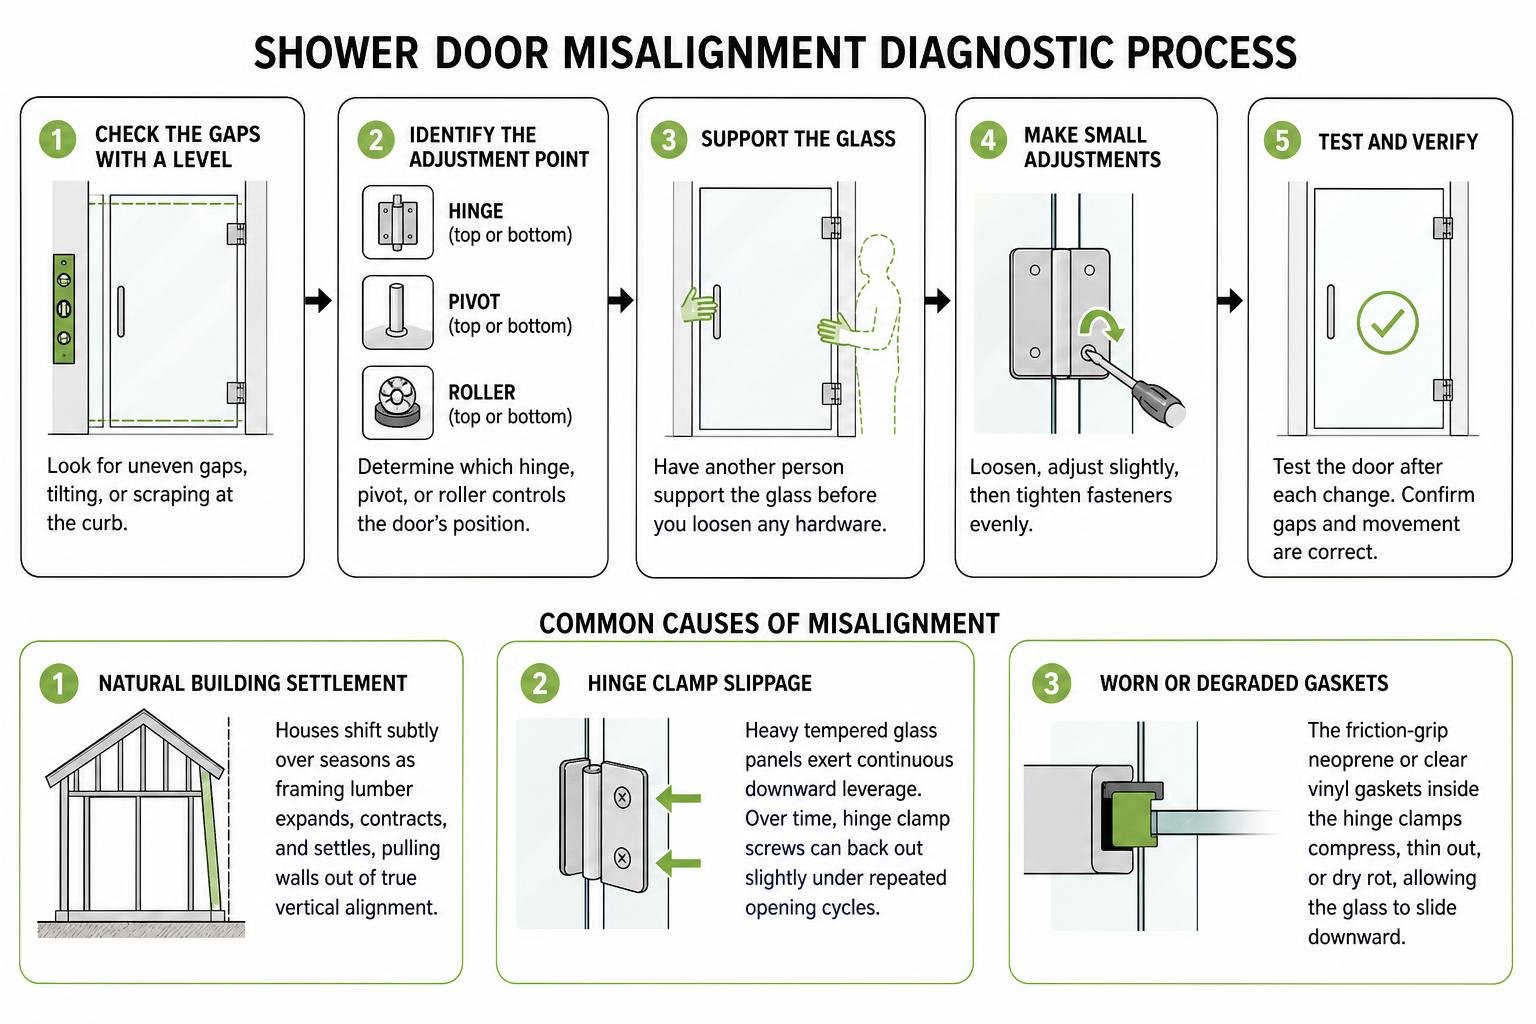
What causes these alignment headaches in the first place? Several factors can throw a shower door off balance:
- Natural Building Settlement: Houses shift subtly over seasons as framing lumber expands, contracts, and settles, pulling walls out of true vertical alignment.
- Hinge Clamp Slippage: Heavy tempered glass panels exert continuous downward leverage. Over time, hinge clamp screws can back out slightly under repeated opening cycles.
- Worn or Degraded Gaskets: The friction-grip neoprene or clear vinyl gaskets inside the hinge clamps compress, thin out, or dry rot, allowing the glass to slide downward.
- Out-of-Level Shower Curb: If the shower curb slopes away from the drain or sits unevenly, door sweeps will bind on high spots.
- Fixed Panel Shifting: When a door mounts glass-to-glass, any movement in the adjacent stationary panel immediately throws the swinging door out of plumb. If you are troubleshooting an enclosure layout, understanding different glass shower door configurations can help you identify how your specific panel arrangement interacts.
Essential Tools and Safety Precautions for Door Alignment
Before touching a single screw, prepare the right equipment. Tempered safety glass is remarkably strong on its face, but its edges and corners are vulnerable to impact. Direct contact with metal tools, stone tile, or dropped hardware can cause catastrophic shattering.
Gather the following items:
- Long Spirit Level (24-inch to 48-inch): Essential for checking the door edge, wall jamb, and curb.
- Non-Metallic Shims (Wood or Plastic): Never use metal shims. Plastic leveling wedges protect glass edges when supporting weight.
- Hex (Allen) Keys and Manual Screwdrivers: Use exact-fit hand tools. Avoid power drills, which strip fastener heads and crack glass from sudden over-torquing.
- Heavy-Duty Suction Handles: Provide safe, reliable grip points for lifting and micro-positioning heavy panels.
- Painter’s Tape and Soft Padding: Cardboard or thick moving blankets placed over the floor and curb prevent accidental corner strikes.
- Personal Protective Equipment: Safety glasses, work gloves with non-slip grip, and closed-toe footwear.
Taking the time to protect your glass panels is essential; for advice on keeping glass surfaces pristine, review our tips on protecting bathroom glass from scratches.
Step-by-Step Frameless Shower Door Adjustment for Common Hardware
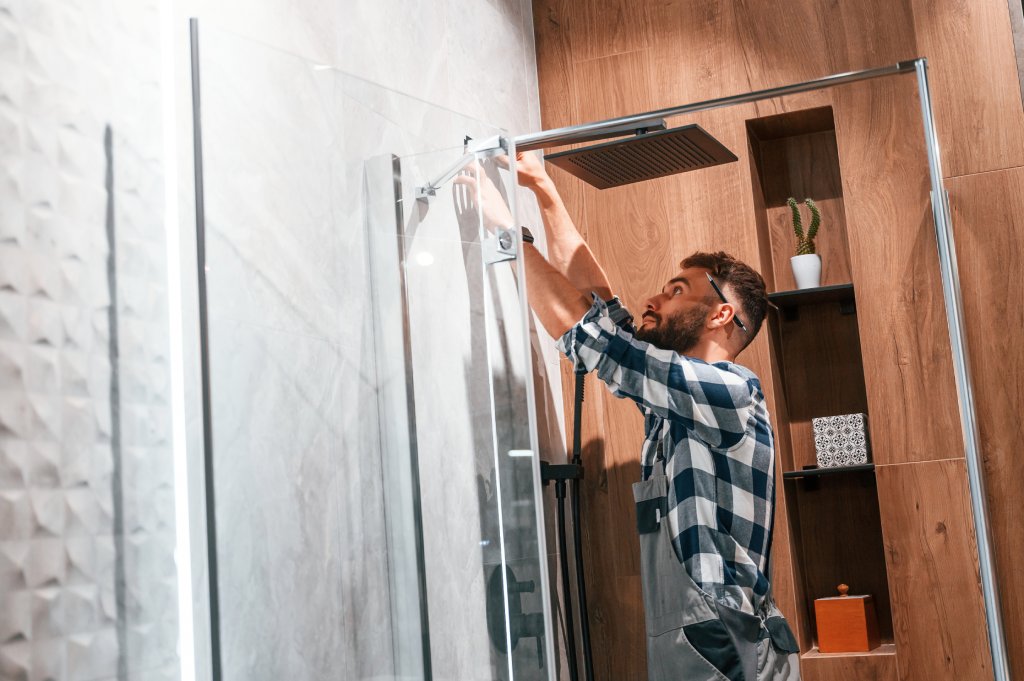
Adjusting a frameless shower door requires precision and patience. Never attempt this project alone; heavy glass doors weigh anywhere from 60 to over 100 pounds, requiring one person to support and align the glass while the other adjusts the hardware fasteners.
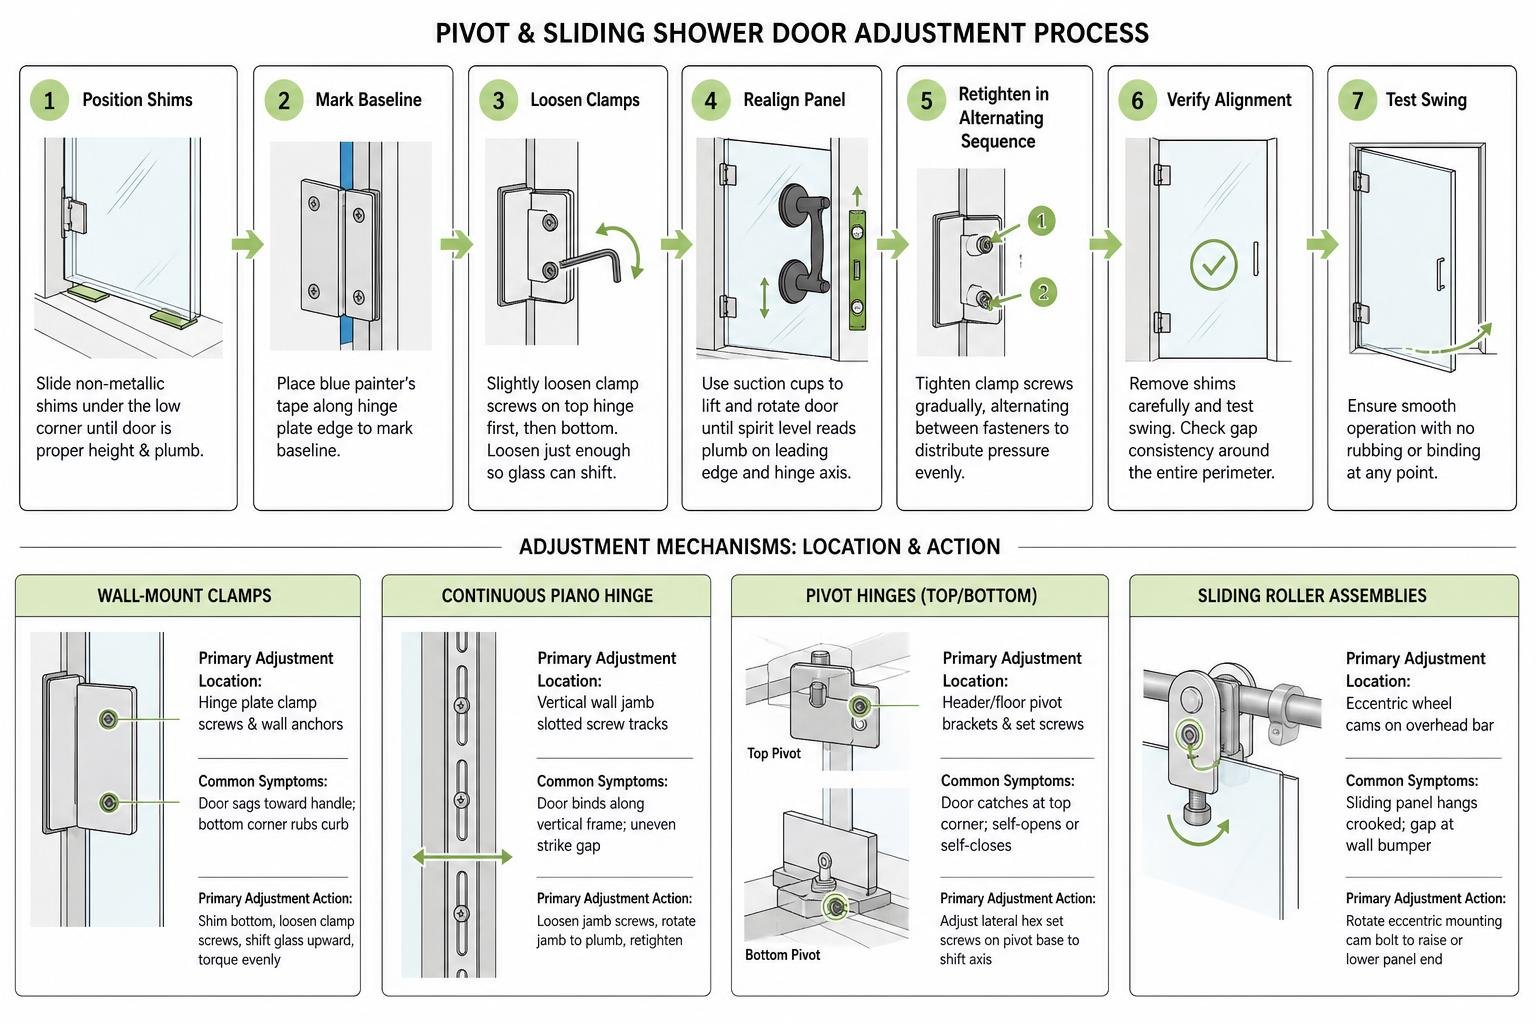
Use this general method for standard clamping systems:
- Pad the Base: Place cardboard or folded towels across the shower threshold to protect the bottom edge of the glass.
- Position Shims Beneath the Door: Slide non-metallic shims under the low corner of the glass panel until the door rests at the proper height and plumb orientation.
- Mark the Baseline: Place a strip of blue painter’s tape along the edge of the hinge plate to give yourself a clear visual marker of any glass movement.
- Loosen Clamps Incrementally: Slightly loosen the clamp screws on the top hinge first, followed by the bottom hinge. Loosen them just enough so the glass can shift without slipping free.
- Realign the Panel: Use glass suction cups to lift and rotate the door until your spirit level reads plumb along both the leading vertical edge and the hinge axis.
- Retighten in Alternating Sequence: Tighten clamp screws gradually, alternating back and forth between fasteners to distribute clamping pressure evenly across the internal gaskets.
- Verify Alignment: Remove the shims carefully and test the swing. Check gap consistency along the entire perimeter.
| Hinge/Mounting Mechanism | Primary Adjustment Location | Common Symptoms of Misalignment | Primary Adjustment Action |
|---|---|---|---|
| Wall-Mount Clamps | Hinge plate clamp screws & wall anchors | Door sags toward the handle; bottom corner rubs curb | Shim bottom, loosen clamp screws, shift glass upward, torque evenly |
| Continuous Piano Hinge | Vertical wall jamb slotted screw tracks | Door binds along vertical frame; uneven strike gap | Loosen jamb screws, rotate jamb to plumb, retighten |
| Pivot Hinges (Top/Bottom) | Header/floor pivot brackets & set screws | Door catches at top corner; self-opens or self-closes | Adjust lateral hex set screws on pivot base to shift axis |
| Sliding Roller Assemblies | Eccentric wheel cams on overhead bar | Sliding panel hangs crooked; gap at wall bumper | Rotate eccentric mounting cam bolt to raise or lower panel end |
Wall-Mount and Continuous Hinge Frameless Shower Door Adjustment
Wall-mounted side hinges are the most common hardware style for frameless swinging doors. They rely entirely on clamp pressure over protective rubber or neoprene gaskets. If the glass has slipped downward within the clamp cutouts, verify that the gaskets are intact and clean. When retightening, ensure clamp screws are torqued down firmly by hand. Typical set screw torque for smaller hardware fittings is roughly 0.5–0.8 Nm, but heavy structural hinge clamps must be snug and rigid without forcing the metal against bare glass.
For continuous hinge systems—often found on lighter frameless or semi-frameless enclosures—the adjustment method shifts from glass clamping to frame positioning. The continuous vertical track typically utilizes slotted mounting holes.
To realign a continuous hinge:
- Loosen the mounting screws running along the vertical wall jamb.
- Shift the jamb assembly laterally until the vertical glass edge sits plumb, maintaining a consistent 1/4-inch clearance along the strike jamb.
- Retighten the frame screws into the wall anchors.
- If necessary, adjust the strike latch up or down to align the magnetic catch.
Pivot and Sliding Mechanism Frameless Shower Door Adjustment
Pivot hinges mount at the extreme top and bottom corners of the glass panel rather than along the side wall. These assemblies shift the load directly onto the shower curb or header bar.
To adjust a pivot door:
- Inspect the top and bottom pivot brackets for concealed hex set screws.
- Support the door with shims underneath the base.
- Loosen the lateral adjustment screws on the upper pivot fitting.
- Shift the top edge of the glass inward or outward to square the panel with the opening.
- Ensure the bottom pivot pin is fully seated in its base cup without grit or debris, then retighten the set screws.
For sliding frameless barn-door style enclosures, height and tilt are controlled at the roller wheels. Most sliding systems utilize an eccentric roller cam—an offset mounting bolt that changes the glass height as it rotates.
To correct a crooked sliding panel:
- Loosen the center fastener on the roller disk.
- Insert an Allen wrench into the adjustment cam and rotate it clockwise or counterclockwise to raise or lower that side of the glass.
- Retighten the center locking bolt once the panel hangs parallel to the wall bumper.
For a deeper dive into smooth slider maintenance, explore our guide on maintaining sliding glass shower door systems, and read our breakdown on replacing worn sliding glass door rollers when hardware begins to wear out.
How to Fix Sagging Panels and Out-of-Plumb Wall Variations
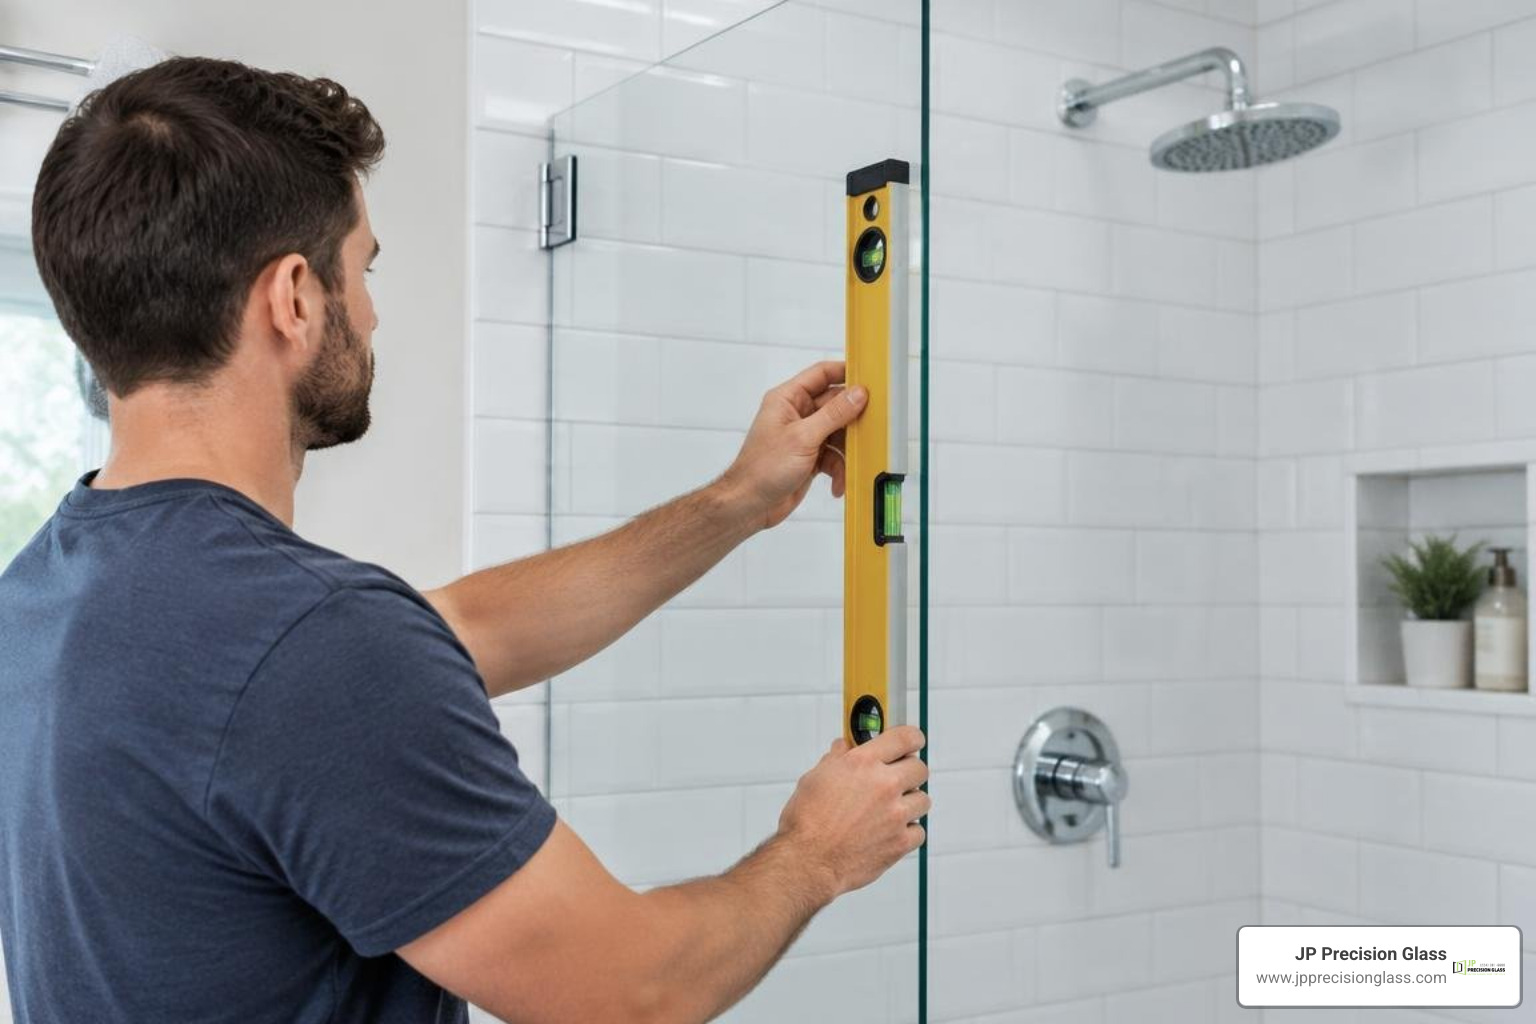
When a shower door begins to sag, the handle side drops lower than the hinge side, resulting in a classic diagonal tilt. In severe cases, homeowners worry the glass might suddenly fail. While tempered glass handles structural loads well, persistent rubbing against tile or metal creates localized edge stress that must be addressed promptly.
To correct a sagging door:
- Identify the Drop: Check the bottom clearance. If the handle side is 1/8-inch from the sill while the hinge side is 3/8-inch, the panel has sagged.
- Elevate the Strike Side: Place non-slip shims under the handle side to lift it back to horizontal alignment.
- Reset the Top Hinge First: The top hinge bears the majority of the tensile pulling force. Loosen the top clamp slightly, allow the glass to settle against the shims, and re-torque the clamp screws.
- Examine the Wall Anchors: If the entire hinge body pulls away from the tile wall, the issue is not clamp slippage—it is a failed wall anchor. You must remove the door, install heavy-duty structural anchors into solid wall blocking, and remount the hardware.
Dealing with Out-of-Plumb Walls
Sometimes the door is aligned perfectly to true plumb, but the tiled wall leans inward or outward. When walls run crooked, standard gaps become uneven from top to bottom. Homeowners have several practical solutions:
- Adjustable Wall Hinges: Certain premium hinge models offer built-in micro-adjustment screws that compensate for up to 5 degrees of wall deviation.
- Deep U-Channels: For stationary panels next to a door, a deep aluminum or brass U-channel allows the glass to sit slightly deeper at the top or bottom, hiding wall variance.
- Tapered Clear Filler Strips: Clear polycarbonate vertical strike jambs can be installed with a slight taper to bridge uneven wall gaps while keeping the magnetic seal watertight.
- Custom-Cut Glass: When walls lean significantly, rectangular off-the-shelf panels will not fit cleanly; the glass must be custom-fabricated with an out-of-square edge to match the wall angle.
For optimal water containment around irregular openings, check our recommendations on proper sealing techniques for glass enclosures.
Replacing Worn Gaskets and Door Sweeps
Even a properly aligned door will leak if the protective vinyl seals and friction gaskets are worn out. Over time, hard water deposits, soap scum, and mechanical friction degrade these components.
To replace these critical parts:
- Hinge Gaskets: Never mount bare metal against glass. When resetting slipped hinges, replace flattened gaskets with fresh neoprene or high-grade PVC pads cut specifically for your hinge profile.
- Bottom Sweeps: Slide off the old, yellowed sweep from the bottom edge of the glass. Clean the glass edge thoroughly with rubbing alcohol. Measure and cut the new sweep with a deflector fin, notching the ends around hinge clearances to ensure the sweep contacts the threshold with light, even pressure.
- Magnetic Jamb Seals: Ensure the polarity matches before pressing new magnetic profiles onto the glass edges. If the seals repel each other, reverse one side to achieve an effortless closure.
When to Call a Professional for Shower Door Realignment
While basic hinge tightening is a manageable weekend DIY task, certain structural issues require professional intervention. Working with heavy, unsupported tempered glass carries inherent safety risks.
You should contact an expert glass technician if you encounter:
- Stripped or Loose Wall Mounts: If hinge screws spin freely without gripping the wall framing, the backing structure has failed or anchors have pulled out of the tile.
- Chipped or Scratched Glass Edges: Any visible nick or deep scratch on the edge of a tempered panel compromises structural integrity and increases breakage risk during adjustment.
- Fixed Panel Instability: If the stationary glass panel supporting your door moves, wobbles, or has failed structural silicone joints, the entire enclosure must be reseated.
- Severe Wall Out-of-Plumb: If wall run-out exceeds 1/2-inch, off-the-shelf adjustment ranges are insufficient. The opening requires precise laser measurement and custom-fabricated glass.
If your enclosure requires structural repairs or a brand-new layout, our team at JP Precision Glass provides precision-engineered solutions across the Chicagoland area. Explore our tailored custom frameless shower solutions or learn more about complete expert shower door replacement to transform your bathroom.
Frequently Asked Questions About Shower Door Alignment
Can I adjust the hinges on a frameless shower door myself?
Yes, you can perform minor hinge adjustments yourself if you have basic hand tools, steady patience, and a helper. However, you must never attempt to adjust a heavy frameless glass panel alone. Always support the bottom of the glass with wooden or plastic shims before loosening any screws, use manual hand tools rather than power drivers, and tighten clamp screws evenly to prevent pinching or twisting the glass.
Why does my frameless shower door keep sagging after adjustment?
If an adjusted door continues to sag after being realigned, the root cause is usually one of three things:
- The internal rubber or neoprene hinge gaskets are worn out, oily, or crushed, preventing the metal clamps from developing enough friction grip on the glass.
- The clamp screws were not torqued down evenly.
- The wall screws have loosened inside the wall studs, causing the entire hinge plate to tilt forward under the door’s weight.
Can tempered glass shower doors be trimmed if the wall is uneven?
No. Tempered architectural safety glass cannot be cut, drilled, shaved, or filed after the manufacturing and tempering process. Any attempt to cut tempered glass will immediately cause the entire panel to shatter into thousands of small, granular pieces. If your bathroom walls are out of plumb, the problem must be solved using adjustable hinges, deep channel profiles, or a custom glass panel fabricated to match the wall’s specific angle.
Conclusion
A properly aligned frameless shower door provides effortless operation, reliable water containment, and a clean, luxurious aesthetic. Routine maintenance—such as inspecting hinge clamp tightness every six months, keeping sliding roller tracks clean, and replacing brittle bottom sweeps—ensures your shower enclosure performs reliably for years to come.
If your shower door continues to drag, leaks persistently, or requires structural wall anchoring, do not take chances with heavy tempered glass. Let our skilled team at JP Precision Glass deliver flawless, durable results. For dependable service and precision alignment throughout the Chicago area, reach out to us for expert shower door repair and alignment.