

Planning and Measuring Before Your Installation
Before opening any boxes or drilling into your bathroom walls, precision planning is essential. A bathtub enclosure requires tight tolerances. Even a fraction of an inch of variance across your tub opening can result in sliding doors that drift open or gaps where water escapes onto your bathroom floor.
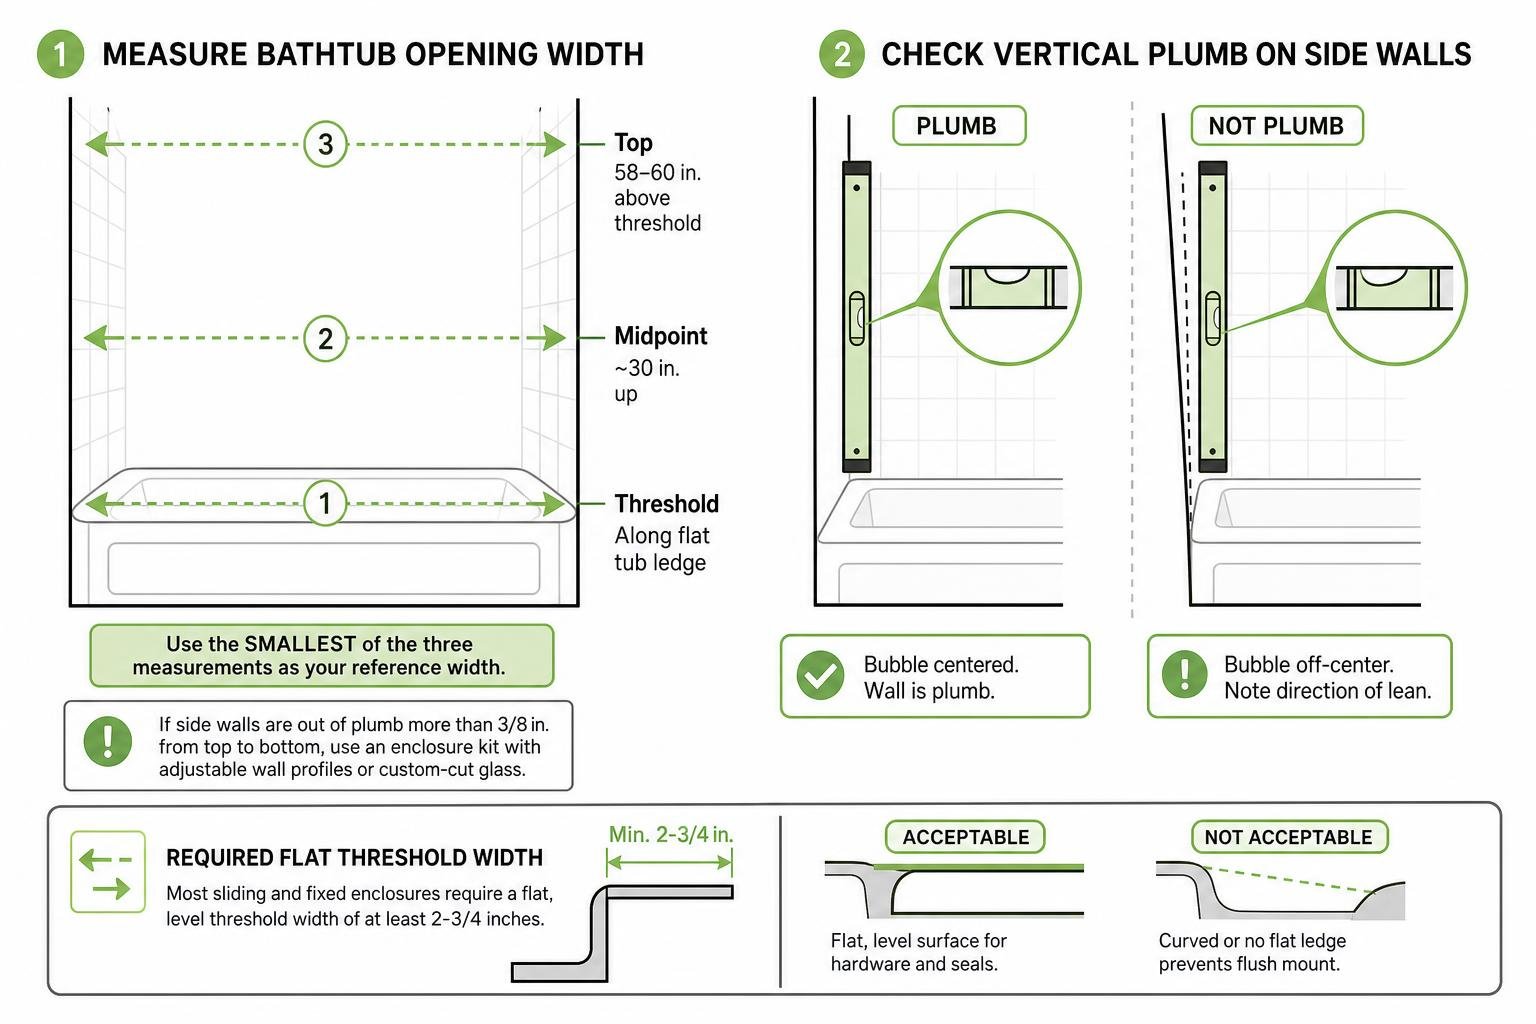
Start by measuring the opening width in three distinct locations:
- Along the flat tub threshold.
- At the midpoint of the intended door height (typically around 30 inches up).
- At the top height where your upper guide rail or wall headers will rest (usually 58 to 60 inches above the threshold).
Take the smallest of these three measurements as your primary reference width when sizing your kit. If your walls are severely out of plumb—more than 3/8 inch from top to bottom—you will need an enclosure kit designed with adjustable wall profiles or custom-cut glass to compensate.
Next, examine your tub deck. Most modern sliding and fixed enclosures require a flat, level threshold width of at least 2-3/4 inches. If your tub’s outer rim curves sharply inward or lacks a flat resting area, hardware clips and water-deflection strips cannot sit flush.
Checking vertical plumb is just as critical. Hold a 4-foot level against both side walls where the glass or wall jambs will mount. If the bubble is not dead-center, note which way the wall leans. Knowing your wall profile helps you decide between a fully framed system, a semi-frameless sliding rail, or how to choose the perfect glass tub enclosure tailored to your bathroom’s exact geometry.
Essential Tools and Prep for Your Bathtub Glass Enclosure Install
Gathering the right tools before you begin prevents mid-project scrambles that risk damaging heavy glass panels. Standard household tools are not enough; drilling into porcelain tile or marble requires specialized bits, while handling tempered glass panels demands proper safety gear.
| Tool / Equipment | Purpose | Key Specification / Tip |
|---|---|---|
| Diamond / Carbide Drill Bits | Drilling anchor holes in wall finishes | 1/8″, 1/4″, and 5/16″ masonry/tile bits; use water cooling |
| 4-Foot Aluminum Level | Checking threshold and wall plumb | Must be rigid and verified accurate |
| Glass Suction Cups | Lifting and positioning heavy glass panels | Dual-pad suction lifters rated for at least 100 lbs |
| Cut-Resistant Gloves & Goggles | Personal protection during handling | ANSI-rated safety glasses and Level 3+ grip gloves |
| Rubber Mallet | Tapping wall jambs and anchors flush | Non-marring white or grey rubber head |
| 100% Sanitary Silicone Sealant | Waterproofing joints and perimeter glass | Anti-microbial, kitchen-and-bath formulation |
| Hacksaw / Metal Chop Saw | Trimming aluminum or stainless upper guide rails | 32 TPI hacksaw blade or fine-tooth metal cutting wheel |
| Painter’s Masking Tape | Marking drill locations and protecting surfaces | Blue delicate-surface painter’s tape |
Clear the entire bathroom of rugs, decorative items, and toiletries. Lay thick moving blankets or heavy cardboard over the tub interior and across the bathroom floor to create safe landing zones. Tempered glass should never rest directly on bare tile, porcelain, or metal.
Fiberglass vs. Tile Wall Structural Considerations
The substrate behind your tub surround dictates how you anchor the enclosure. The two most common wall surfaces—fiberglass/acrylic units and hard tile—handle structural loads differently.
Fiberglass and Acrylic Surrounds: A fiberglass tub wall flexes slightly under pressure. Because of this flex, you cannot rely on standard hollow-wall plastic anchors. For fiberglass surrounds, structural studs must sit directly behind the panel mounting locations. When sliding doors roll across the top track, they exert dynamic shear forces that pull outward and downward against the top wall brackets. Fastening into bare fiberglass without stud backing will crack the gelcoat and pull the hardware loose over time.
Tiled Walls (Ceramic, Porcelain, Natural Stone): Tile over cement backer board offers a firm, rigid surface. Use a diamond hole saw or carbide masonry bit run at low speeds. Keep the bit wet with a water spray bottle to prevent overheating, which can crack the surrounding tile. Once through the tile and backer board, drive your mounting screws directly into the wall studs whenever possible.
If you are dealing with tight spaces where a full enclosure might feel too heavy, exploring partial glass tub enclosures can give you an open look while reducing the overall mounting footprint on your walls.
Step-by-Step Bathtub Glass Enclosure Install Guide
Installing a glass enclosure requires a methodical, step-by-step approach. Follow this sequence carefully to ensure a secure, watertight setup. For model-specific details and dimensional checks, consult the manufacturer’s detailed shower enclosure installation guide.
Measuring and Trimming the Guide Rail
Most top-hung sliding enclosures use an aluminum or stainless steel overhead guide rail that spans the full width of the opening. Because tub alcoves vary, these rails often come slightly oversized and must be cut to fit your specific opening.
- Measure the exact wall-to-wall distance at the rail’s mounting height.
- Deduct the manufacturer’s specified clearance allowance (typically 1/8 to 1/4 inch overall) to accommodate wall mounting brackets and end caps.
- Apply blue painter’s tape around the cut line on the metal rail to protect the finish from scratches and chipping.
- Cut the rail square using a fine-tooth hacksaw (32 TPI) or a metal-cutting chop saw equipped with a non-ferrous blade.
- Use a metal deburring tool or fine metal file to remove all burrs and sharp edges from the cut end. A clean, smooth edge ensures the rail slides fully into the wall mounting brackets.
Taking the time to trim the rail precisely prevents binding, which is why sliding glass tub enclosures operate with such effortless, quiet gliding when installed correctly.
Setting Fixed Glass Panels and Mounting Hardware
Once the upper track and wall brackets are prepared, you can set the stationary glass panel.
- Mark the Base and Wall Locations: Place the bottom floor clip or channel onto the tub threshold, aligned with your layout line. Hold the fixed panel wall clips against the wall, check plumb with your 4-foot level, and mark the screw holes through the tape.
- Drill and Anchor: Drill pilot holes through your marked tile or fiberglass locations. Insert wall anchors if you are not hitting direct timber studs, or drive stainless steel screws directly into structural backing.
- Position Rubber Setting Blocks: Place the supplied clear neoprene or rubber setting blocks inside the bottom threshold clips and wall brackets. Never let the glass edge contact metal hardware directly.
- Set the Fixed Panel: With two people using suction lifters, carefully lift the stationary panel and rest it onto the setting blocks in the floor bracket. Slide the vertical edge into the wall clips. Reference the manufacturer’s fixed panel mounting specifications to ensure clip spacing and torque limits match engineered safety guidelines.
- Plumb and Secure: Check the panel for plumb along its vertical leading edge. Tighten the clamping screws through the brackets until snug, making sure the rubber gaskets cushion the glass on both sides.
If your layout calls for a minimalist fixed barrier rather than a full sliding system, installing a bathtub glass half door follows this same secure mounting process.
Hanging and Aligning the Sliding Glass Door
With the stationary panel locked into place and the overhead guide rail anchored securely, you are ready to hang the sliding door.
- Attach Roller Assemblies: Bolt the upper roller wheels to the pre-drilled holes near the top edge of the sliding glass panel. Ensure the clear plastic protective sleeves are inside the glass holes so the metal bolts never touch the interior glass edges.
- Mount the Panel: Have your helper assist you in lifting the sliding panel inside the tub alcove. Carefully hoist the roller wheels up and set them onto the overhead track.
- Engage the Floor Guide: While supporting the glass, feed the bottom edge of the sliding panel into the bottom floor guide mounted on the threshold. This guide prevents the door from swinging in or out during travel.
- Adjust Roller Cams: Most quality rollers feature eccentric mounting shafts. Rotating these shafts with an Allen wrench raises or lowers either side of the door, allowing you to square the door edge perfectly against the wall jamb or rubber bumper seal.
- Fasten Anti-Jump Pins: Screw the anti-jump disks or pins into the bottom of the roller brackets beneath the rail. These safety pins prevent the door from accidentally jumping off the track during vigorous sliding.
- Set Door Stoppers and Handle: Slide the rubber-cushioned rail stoppers to the desired open and closed limits and tighten their set screws. Finally, mount the door handle or towel bar, ensuring all plastic washers are seated on both sides of the glass.
Critical Safety Practices and Sealing Techniques
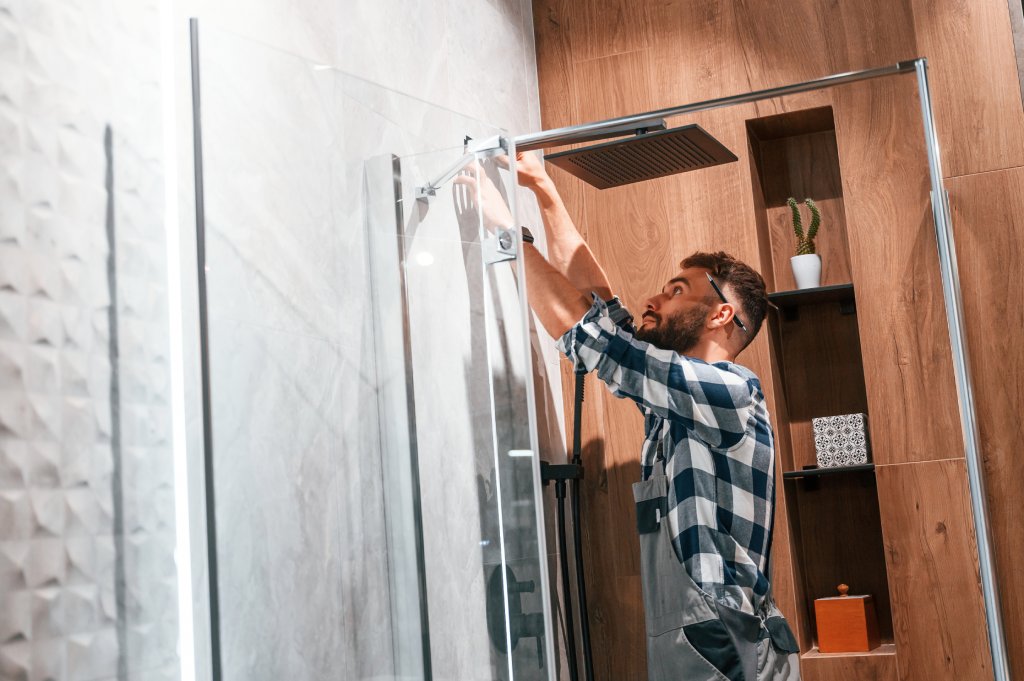
A glass enclosure should be both visually striking and structurally sound. Water containment depends entirely on proper seal positioning and high-grade silicone work.
Tempered Glass Handling and Common Pitfalls
All modern bathtub enclosures use architectural tempered safety glass, certified to SGCC and ANSI Z97.1 standards. Tempered glass is engineered with high surface compression, making it up to five times stronger than standard annealed glass. However, this internal tension makes the perimeter edges—especially the four corners—exceptionally sensitive to impact.
- Never Rest Glass on Hard Surfaces: Always rest panels on thick cardboard, rubber blocks, or moving blankets. Setting a panel down hard on bare ceramic tile or a metal screw head can chip the corner and cause the entire sheet to shatter instantly into thousands of small, blunt pebbles.
- Never Force Hardware: If a mounting bolt or bracket hole does not align perfectly, never force, pry, or hammer the hardware through the hole. Adjust the brackets or re-check your wall plumb.
- Avoid Edge Stress: Spontaneous breakage can occasionally happen hours or days after installation if a panel was installed with internal twist or resting unevenly against metal screws. Ensure all rubber gaskets and setting blocks are seated correctly.
Applying Silicone Sealant and Floor Brackets for Watertight Performance
Once all mechanical adjustments are complete, seal the enclosure against leaks:
- Install the Threshold Splash Strip: Clean the tub deck thoroughly with 70% isopropyl alcohol to remove all soap scum, dust, and oils. Dry completely. Lay down the slim aluminum or acrylic anti-splash threshold strip directly beneath the sliding door path, securing it with a thin bead of silicone along its base.
- Apply 100% Silicone Sealant: Apply a steady, continuous 1/8-inch bead of 100% sanitary silicone along the outside perimeter where the fixed glass meets the tub deck and side walls.
- Seal the Wall Brackets: Caulk around the exterior seams of all wall clips and guide rail mounting brackets.
- Do Not Caulk the Inside Bottom Edge: In most configurations, leave the inside bottom edge of the glass panel uncaulked, or follow the manufacturer’s specific weep-hole layout. This allows any water that enters the frame channels to drain naturally back into the bathtub rather than pooling inside the hardware.
- Tool the Bead: Smooth the silicone line with a caulk profiling tool or a gloved finger misted with soapy water for a clean, professional finish.
If you want an enclosure that stays crystal clear with minimal upkeep, glass treated with protective hydrophobic coatings can cut routine cleaning time by up to 90% by actively repelling hard water and soap scum. To learn more about modern barrier designs, check out our guide on how a glass bathtub shield simplifies bathroom maintenance.
Frequently Asked Questions About Bathtub Glass Doors
Troubleshooting Wall Anchors During a Bathtub Glass Enclosure Install
What if there is no wall stud behind my mounting bracket location?
When mounting into standard drywall with tile over top and no stud is present, standard plastic ribbed anchors are insufficient for sliding door tracks. Use heavy-duty 1/4-inch stainless steel toggle bolts (such as pull-toggles or snap-toggles) that expand flat against the structural backside of the backer board.
For fiberglass units without backing, the best practice is to open the drywall on the reverse side of the wall during rough-in to install horizontal 2×4 or 2×6 wood blocking between the studs. If the wall is already closed, high-strength structural toggle anchors paired with commercial-grade mounting tape behind the jamb can handle the shear load, though you should always verify that your hardware setup satisfies the enclosure’s warranty guidelines.
How Long Does Silicone Need to Cure Before Using the Shower?
While silicone sealant may become skin-dry to the touch within 1 to 2 hours, it takes a minimum of 24 hours to set and 36 to 48 hours to fully cure and achieve maximum tensile strength and water resistance. Exposing fresh silicone to hot water, high humidity, or chemical soaps before the 36-hour mark can cause the sealant bead to soften, blister, turn cloudy, and pull away from the tub deck, leading to hidden leaks behind your walls.
Which Side Should the Sliding Door Panel Be Positioned?
As a general rule, the sliding door panel should be positioned on the same side as the showerhead and controls.
This configuration offers two distinct advantages:
- Water Deflection: The overlap between the inner sliding panel and the outer fixed panel points away from the direct water stream, preventing forceful spray from blowing through the vertical center gap.
- Easy Access: It allows you to reach in and turn on the water controls to adjust temperature without stepping fully into the tub.
Conclusion
Installing a bathtub glass enclosure transforms your bathroom into an open, modern retreat. With precise measurements, proper diamond drill bits, and careful handling of tempered glass, a DIY install delivers dependable, leak-free results.
If your tub layout features unusual angles, out-of-plumb walls, or you simply prefer a guaranteed custom fit, partnering with experienced professionals is the best way to get long-lasting results. At JP Precision Glass, we design, fabricate, and install custom glass enclosures engineered to the exact dimensions of your space. Explore our innovative 3-panel shower doors for bathtubs to discover flexible layout options tailored to your bathroom remodel.