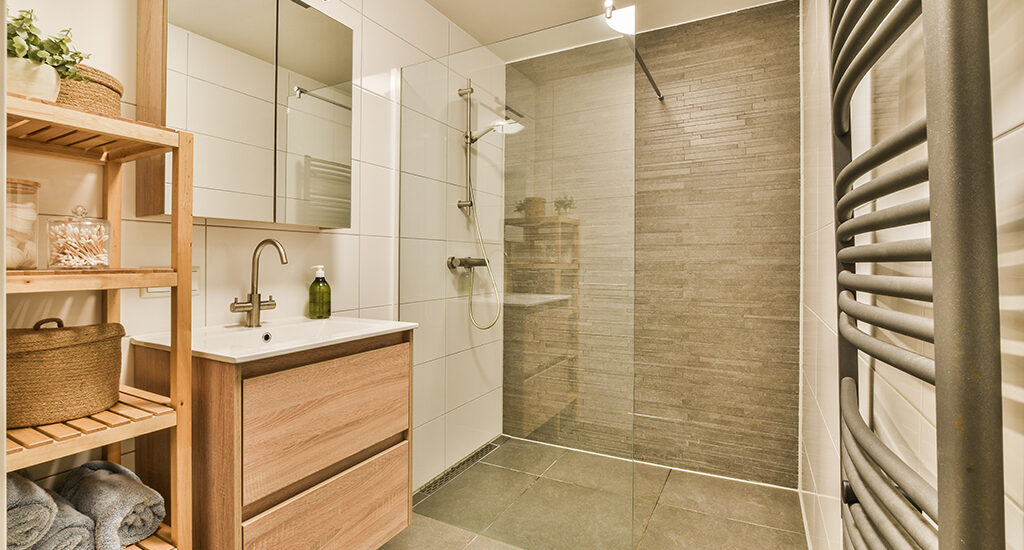
• JP Precision Glass is the leading glass shower doors company in Chicago
36 glass shower panel

Why a 36 Glass Shower Panel Is the Perfect Fit for Compact Walk-In Showers

Why a 36 Glass Shower Panel Works So Well in Compact Bathrooms

A 36 glass shower panel is a smart choice for a compact walk-in shower because it blocks much of the spray without taking up the floor space a hinged door needs to open. Choose 3/8-inch tempered safety glass, confirm the finished wall and shower base are level and secure, and place the showerhead so its spray points away from the open entry.

Unlike a full door enclosure, a fixed frameless panel keeps the room feeling open. It lets light move through the shower, makes a small bath look less boxed in, and has no hinges or rollers to maintain. It can mount on tile, a properly supported acrylic or fiberglass pan, or a tiled threshold. Clear, mold-resistant silicone is still essential to seal the base and add stability.

The key tradeoff is water control: a 36-inch panel works best when the shower has enough depth and the showerhead is not aimed at the opening. Custom sizing, finish-matched hardware, and thoughtful placement make the difference between a sleek walk-in shower and one with persistent overspray.
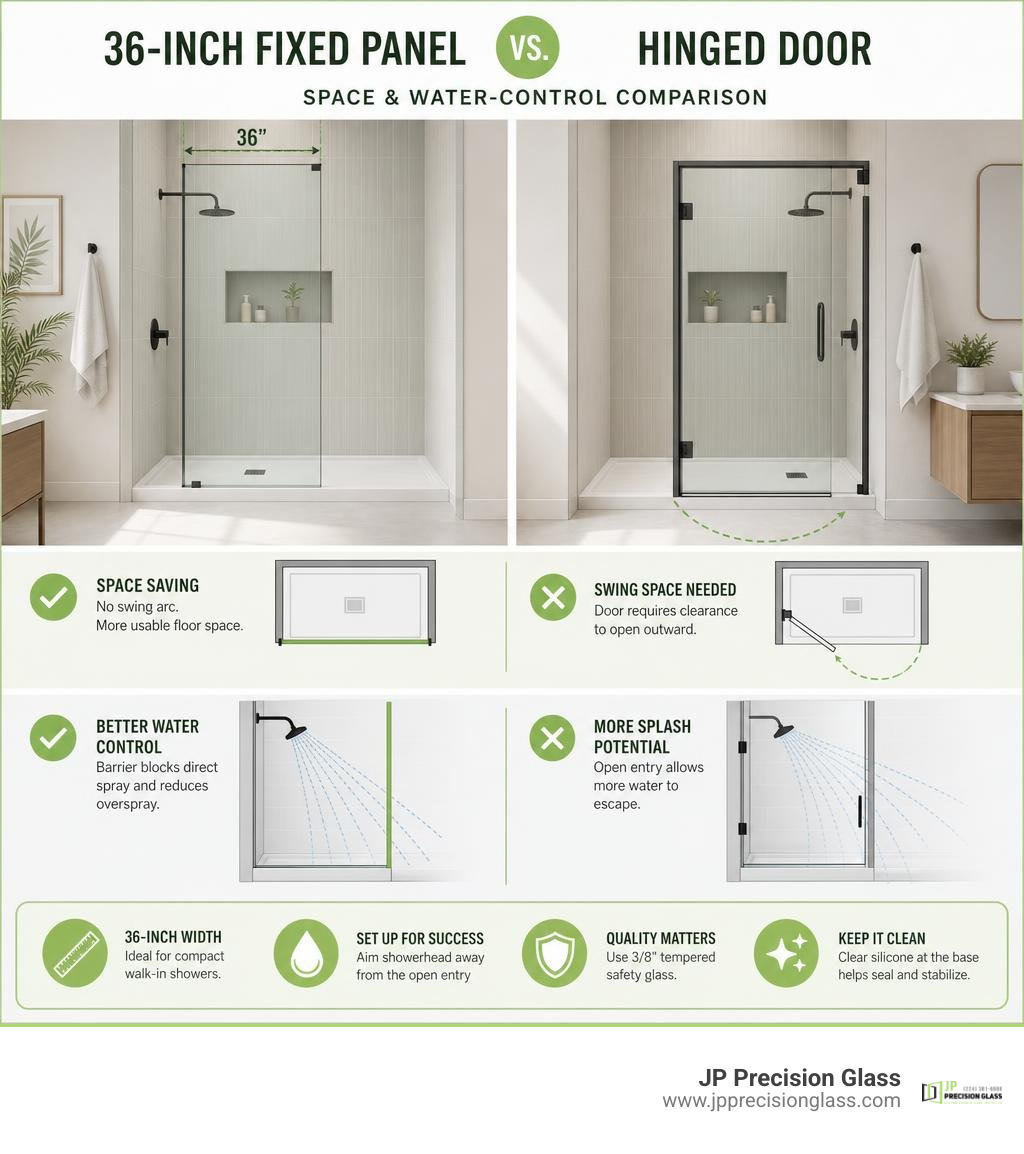
36-inch fixed panel versus hinged door space and water-control comparison infographic

Basic 36 glass shower panel vocab:

Benefits of a 36 Glass Shower Panel in Walk-In Bathrooms

Fixed Stationary Screens vs Hinged Shower Doors

When redesigning a smaller bathroom or converting a cramped alcove tub into a walk-in shower, door swing clearance becomes an immediate headache. A traditional hinged door demands a clear arc of swinging space outside the enclosure, which often collides with vanity drawers, toilets, or linen towers.

By utilizing a stationary screen, you unlock all the core benefits of frameless glass shower doors without the mechanical limitations. A fixed glass screen has zero moving components. That means no hinges that squeak, no door sweeps that wear down or trap mildew, and no roller tracks that gather grime over time.

Feature 36-Inch Fixed Glass Panel Hinged Shower Door
Floor Footprint Zero clearance required outside entry Requires 24–36 in. clear outward swing
Moving Parts 0 (fully stationary) Hinges, handles, sweeps, magnetic seals
Cleaning Effort Simple flat surface sweep down Requires cleaning around pivots and gaskets
Visual Openness Maximum open walk-in feel Segmented by framing or door seams
Hardware Wear Virtually zero mechanical wear Periodic hinge alignment and sweep replacement

Water Containment and Walk-In Entry Clearance

A 36-inch wide panel provides a solid barrier against water deflection while leaving an accessible opening for standard walk-in shower layouts. For a typical 60-inch tub-to-shower conversion, installing a 36-inch fixed screen leaves a comfortable 24-inch walk-in opening, which satisfies standard residential building accessibility needs.

To ensure excellent overspray management, we always look closely at your showerhead placement. When the showerhead directs water straight down or parallel to the glass rather than aiming toward the opening, a 36-inch partition deflects direct spray effectively. Homeowners exploring options often compare fixed panels to swinging solutions when clearly superior finding your perfect 36 inch frameless or pivot shower door helps evaluate which layout matches their lifestyle.
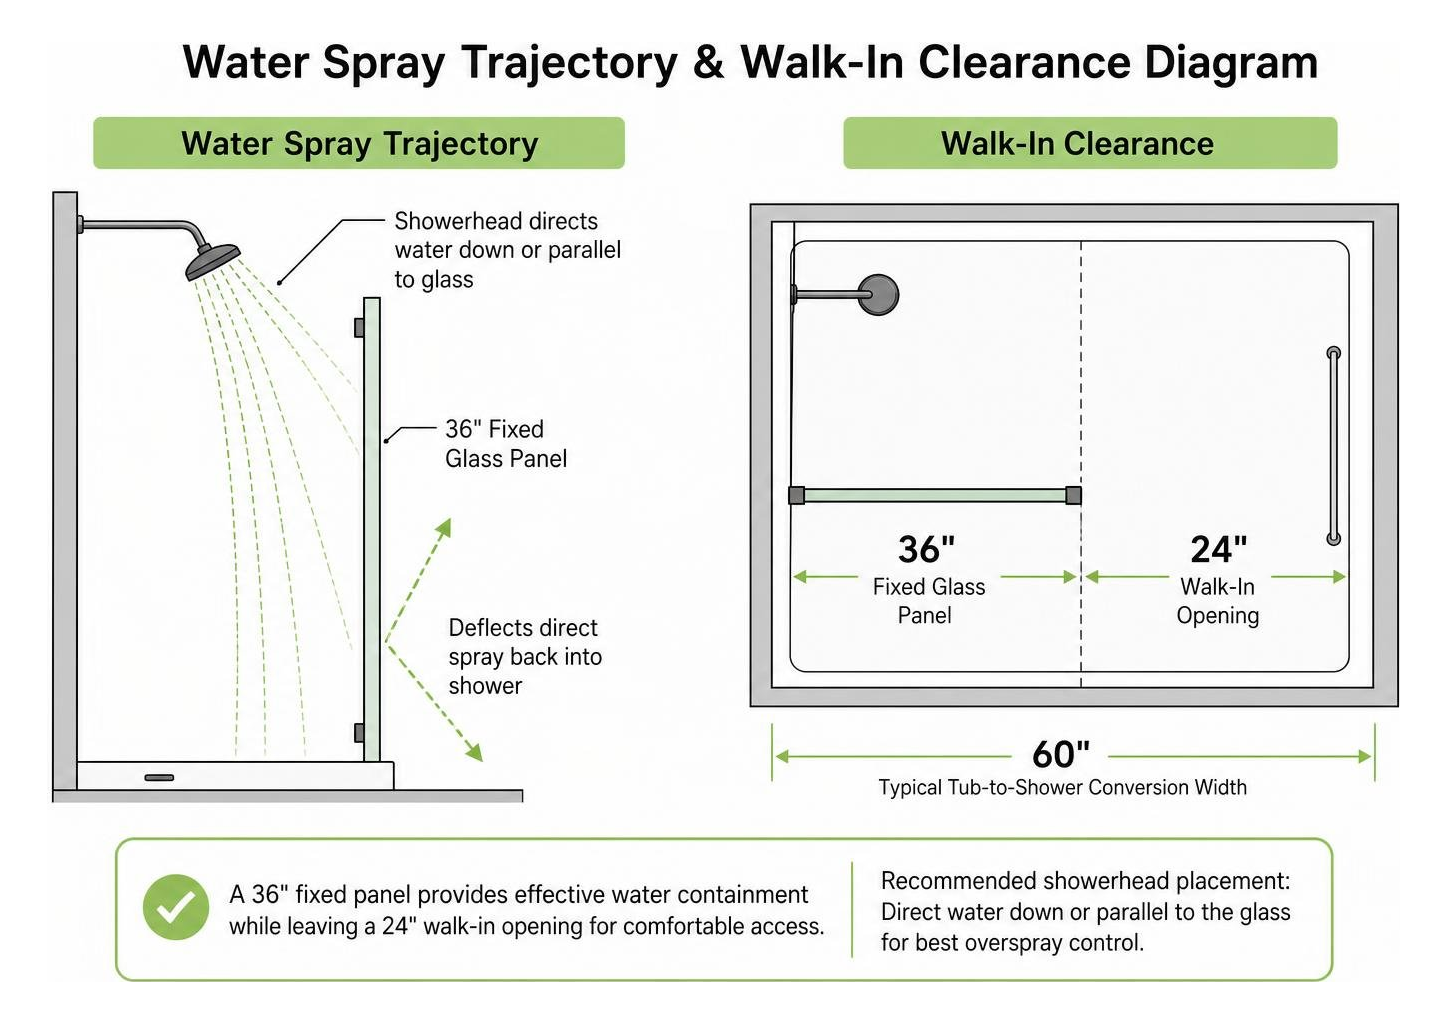
Water spray trajectory and walk-in clearance diagram

Glass Thickness, Sizing, and Protective Treatments

Standard Dimensions for a 36 Glass Shower Panel
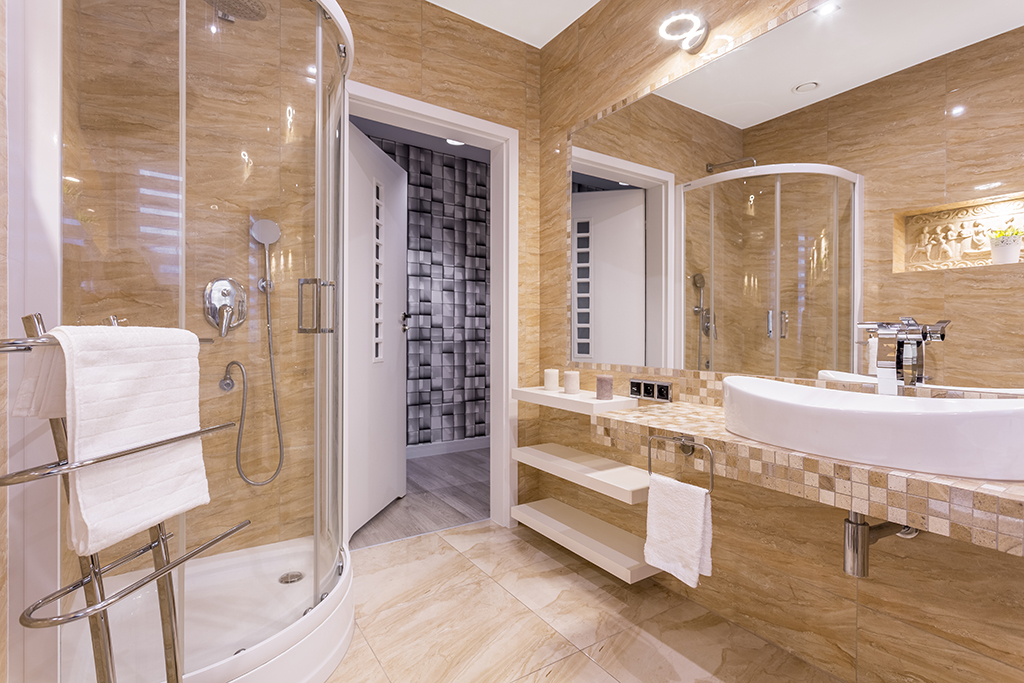
3/8-inch architectural tempered safety glass panel

Architectural stationary glass needs substantial heft to remain rigid and safe without a metal perimeter frame. We recommend 3/8-inch (10mm) ANSI-certified tempered safety glass.

Standard fixed panels generally come in heights of 76 inches or an extended 78 inches. A 36-inch wide by 78-inch tall piece of 3/8-inch thick tempered glass weighs roughly 100 pounds. This weight gives the partition high structural stability, preventing vibrations or flex when bumped.

Selecting the Best 36 Glass Shower Panel Style and Edge Design

While traditional rectangular panels deliver clean, sharp lines, a radius fixed frameless panel offers curved upper corners. A top radius corner softens the visual edges of the bathroom, introducing flowing geometry that coordinates nicely with round mirrors, freestanding tubs, and curved plumbing fixtures.

Whether you choose a crisp rectangular profile or a smooth radius corner, fixed panels provide a refined visual baseline. For broader enclosures, seeing how fixed screens work in setups like spacious and sleek why 36 x 48 shower glass is the perfect mid-size fit gives great context on balancing open walk-in space with perimeter coverage.

Hydrophobic Protective Coatings and Maintenance

Keeping heavy glass clean shouldn’t feel like a workout. Many modern panels feature dual-sided factory hydrophobic surface protection, such as EnduroShield coating.

This treatment bonds chemically to the glass surface, repelling water, soap scum, and mineral deposits. It reduces cleaning time by up to 90% because water simply beads up and runs off rather than evaporating and leaving hard water spots. When applied to both sides, it also ensures the glass is fully reversible for left- or right-hand installation without losing protective performance.

Hardware Finishes and Mounting Methods

Wall Clamps vs Continuous Channel Systems
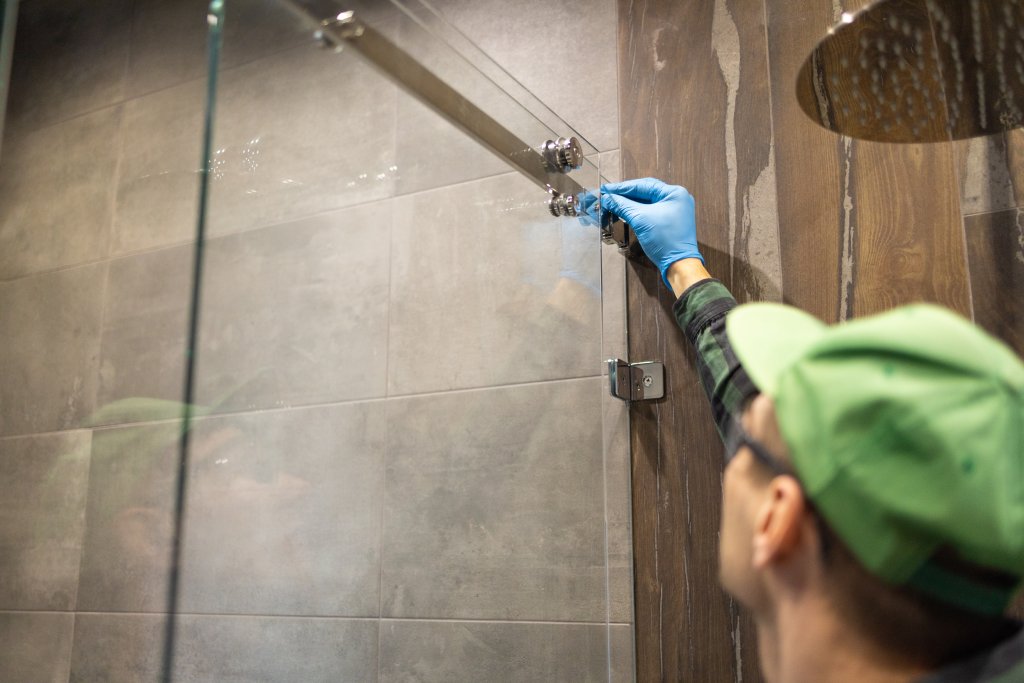
Solid brass mounting clamps and matte black channel profiles

Securing a 100-pound panel requires reliable mounting hardware. You generally have two primary mounting options:

  1. Solid Brass Wall Clamps: Small, heavy-duty brackets anchor the glass at two points along the wall and one or two points along the threshold. They maximize transparency by keeping hardware minimal.
  2. Aluminum U-Channels / Recessed Channels: A continuous metal channel holds the glass edge. Surface-mounted channels help accommodate out-of-square walls, while recessed systems (such as Schluter Deco-SG profiles) allow the glass to integrate directly into the tile work for a clean, channel-free reveal.

Matching Modern Hardware Finishes

Mounting hardware should harmonize with the rest of your bathroom fixtures. High-quality solid brass clamps resist corrosion and rust in high-moisture environments.

Popular hardware finishes include:

  • Matte Black: Creates bold, contemporary contrast against light marble or white subway tile.
  • Brushed Nickel: A timeless, low-maintenance finish that blends easily with transitional styling.
  • Brushed Bronze / Satin Brass: Pairs beautifully with warm metallic fixtures and champagne gold accents.
  • Polished Chrome: Delivers a bright, mirror-like finish that reflects bathroom lighting.

Understanding these hardware options is simple when exploring glass shower doors a comprehensive guide to types comparison to see how different mounting systems impact the finished aesthetic.

Installation Requirements and Base Compatibility

Shower Base and Threshold Compatibility

A fixed glass screen works across multiple floor types:

  • Tiled Curbs: Standard masonry curbs provide a firm, solid foundation for clamp or channel anchoring.
  • Curbless Wet Rooms: Ideal for universal design and modern walk-in wet rooms where the glass mounts directly to a sloped tile floor.
  • Acrylic or Fiberglass Shower Pans: Prefabricated pans must feature proper subfloor framing and threshold support to carry the stationary weight without flexing.

Before ordering, verifying that walls are plumb and square is critical. For complex layouts or custom bathroom configurations, homeowners in our service area rely on our custom frameless showers chicago solutions to achieve a tailored fit that prevents gaps.

Two-Person Handling and Structural Silicone Sealing

Handling a single 100-pound tempered panel safely requires a two-person lift using commercial glass suction cups. A minimum vertical ceiling clearance of 78.5 inches is required to maneuver a 78-inch panel upright into position.

Beyond mechanical brackets, applying a continuous bead of clear, mold-resistant silicone along the base and wall joint is essential. The silicone serves two vital purposes:

  • It creates a watertight seal against threshold leaks.
  • It provides essential structural adhesion that stabilizes the lower edge of the heavy glass panel.

Always allow the silicone to cure for a full 48 hours before exposing the shower to running water.

Frequently Asked Questions About Walk-In Glass Panels

Can a fixed glass panel be installed for left or right entry?

Yes. When glass panels feature dual-sided hydrophobic treatments and non-directional hardware cutouts, they are completely reversible. You can install the panel on either the left or right wall depending on your bathroom’s layout and plumbing orientation.

Does a 36-inch stationary panel prevent water overspray?

A 36-inch panel provides reliable splash containment for standard shower pans when paired with a properly positioned showerhead. To minimize overspray, aim the showerhead downward or against the back wall, and avoid placing high-pressure body jets directly facing the open walk-in entry.

Is silicone caulking required when using mounting brackets?

Yes. Even when heavy-duty wall clamps are used, a clear mold-resistant silicone caulk must be applied along the bottom edge where the glass meets the threshold or floor. This caulk provides critical structural rigidity and ensures water doesn’t seep underneath the panel onto your bathroom floor. Allow 48 hours of curing time before your first shower.

Conclusion

A fixed glass partition offers the perfect balance of visual space, modern design, and low-maintenance durability for compact walk-in bathrooms. By eliminating the footprint of swinging doors and simplifying your cleaning routine, it delivers an open, spa-like experience even in modest square footage.

Whether you are updating an existing alcove or planning a complete remodel, our team at JP Precision Glass is ready to bring precision measurements and custom fabrication to your space. Explore our collection of premium glass shower panels to find the ideal fit for your bathroom today.
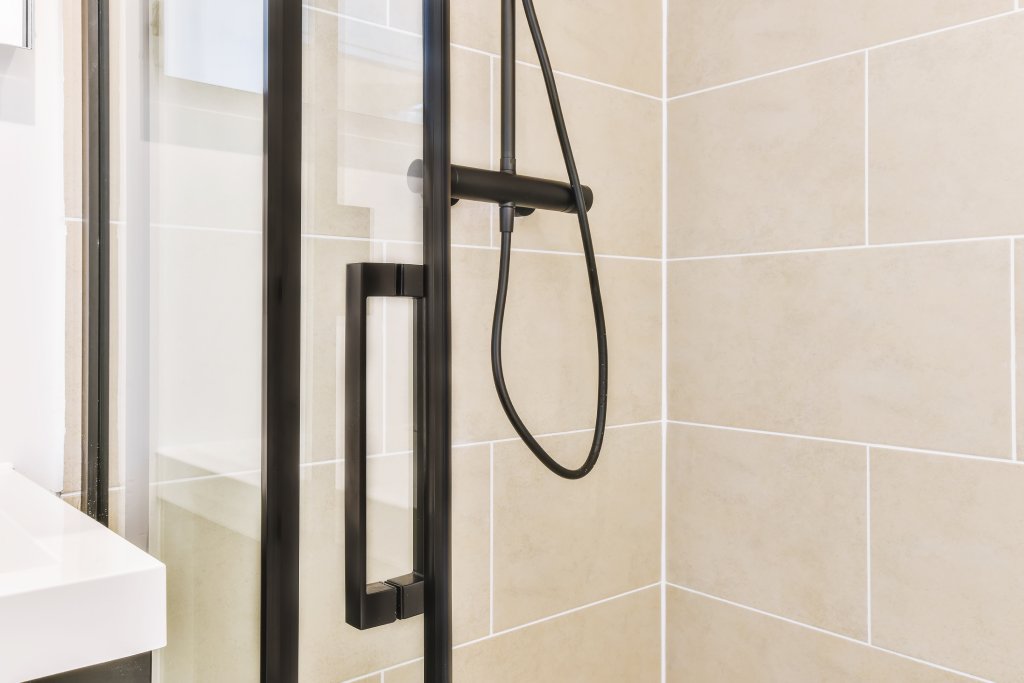
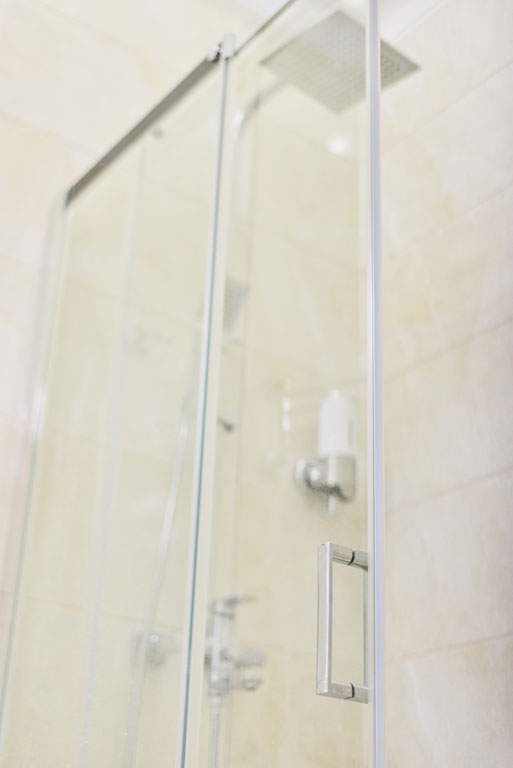
modern luxury bathroom with a sleek frameless glass shower enclosure

7 Sleek Bathroom Shower Door Ideas: From Frameless Glass to Crittall Style

Inspiring Bathroom Shower Door Ideas to Transform Your Space

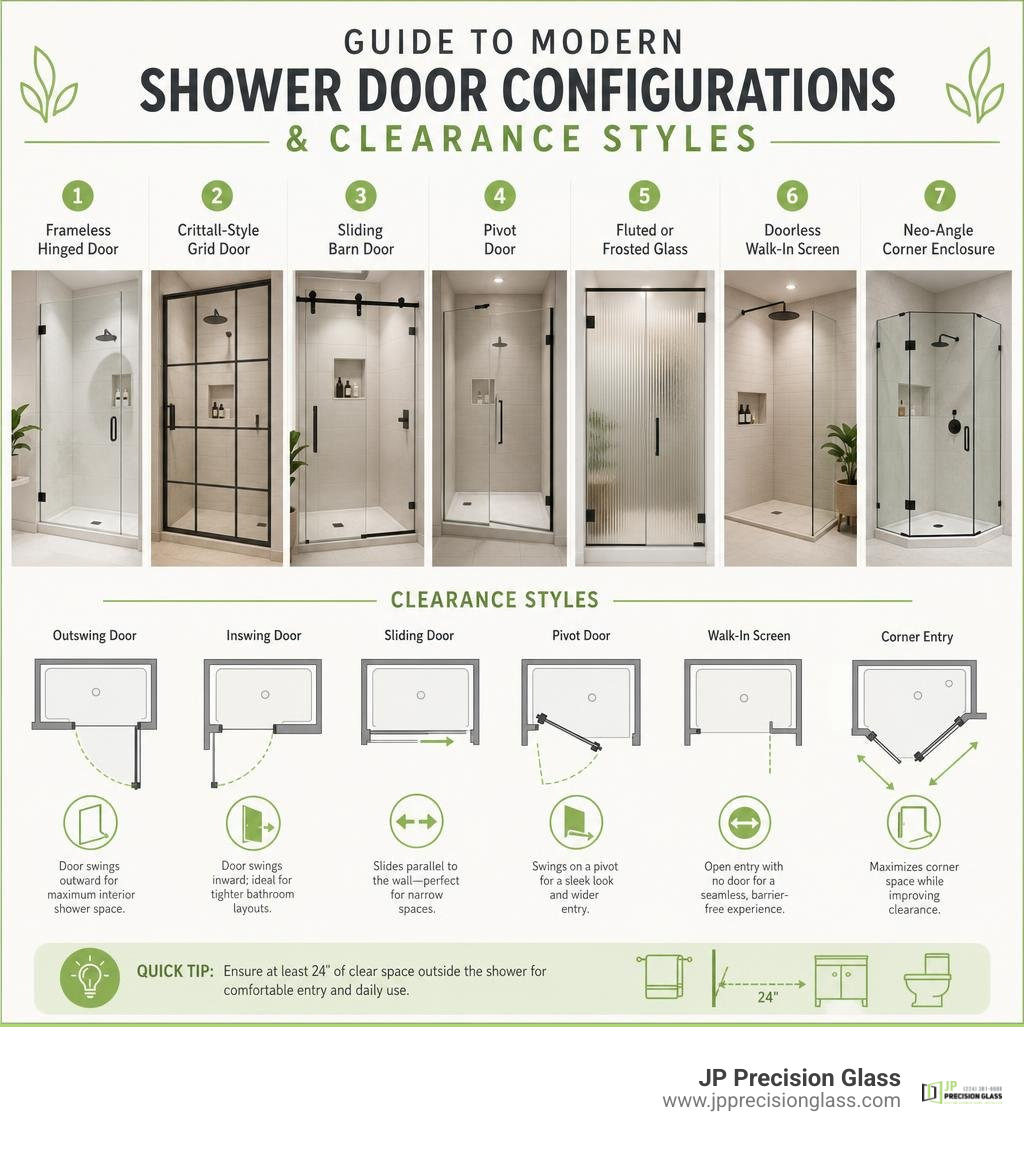
The best bathroom shower door ideas balance your room layout, lighting, and daily routine. Choosing the right design instantly opens up your space and eliminates visual clutter:

  • Ultra-Clear Frameless Doors: Use low-iron glass to eliminate green tints and maximize visual space.
  • Crittall-Style Black Grid Doors: Add bold, architectural lines for an industrial or modern farmhouse look.
  • Sliding Barn-Door Rollers: Save valuable floor clearance in tight bathrooms using smooth, top-hung rollers.
  • Minimalist Pivot Doors: Deliver a clean, seamless look for classic alcove openings.
  • Fluted or Frosted Glass: Diffuse sightlines for privacy while keeping natural daylight flowing.
  • Doorless Walk-In Screens: Create an accessible, barrier-free wet room with a single stationary panel.
  • Neo-Angle Corner Enclosures: Maximize awkward corner footprints to prevent collisions with vanities or toilets.

Whether you are updating a compact guest bath or designing a custom primary suite, matching the right door mechanism to your room dimensions makes all the difference.

guide to modern shower door configurations and clearance styles infographic

Glossary for bathroom shower door ideas:

7 Sleek Bathroom Shower Door Ideas for Modern Homes

curated collection of modern glass shower door styles

Upgrading your shower enclosure is one of the single most impactful changes you can make during a remodel. Replacing an old, cloudy framed slider or a clingy vinyl curtain with custom glass instantly reshapes your bathroom into an open, spa-like sanctuary. To help you determine the best layout for your home, our glass shower doors: a comprehensive guide to types comparison breaks down how various glass profiles interact with natural light, tiled walls, and room footprints.

Below, we explore seven leading design concepts shaping modern residential interiors this year.

1. Ultra-Clear Frameless Glass Shower Doors

Frameless clear glass remains the gold standard of contemporary bathroom design. By eliminating bulky metal framing along the perimeter, frameless enclosures provide uninterrupted sightlines that extend across the entire room. This transparency allows your interior tilework—whether luxurious Calacatta marble, handcrafted zellige, or rich slate—to take center stage.

To achieve maximum visual clarity, we often recommend low-iron glass (such as Starphire). Standard architectural clear glass naturally contains trace amounts of iron oxide, which imparts a subtle greenish tint visible along cut edges or against pure white backdrops. Low-iron glass drastically reduces this iron content, delivering true color rendition and crystal-clear transparency.

Exploring the architectural benefits of frameless glass shower doors reveals that their minimal hardware leaves fewer places for moisture, mineral scale, and soap scum to collect, making daily cleaning significantly simpler.

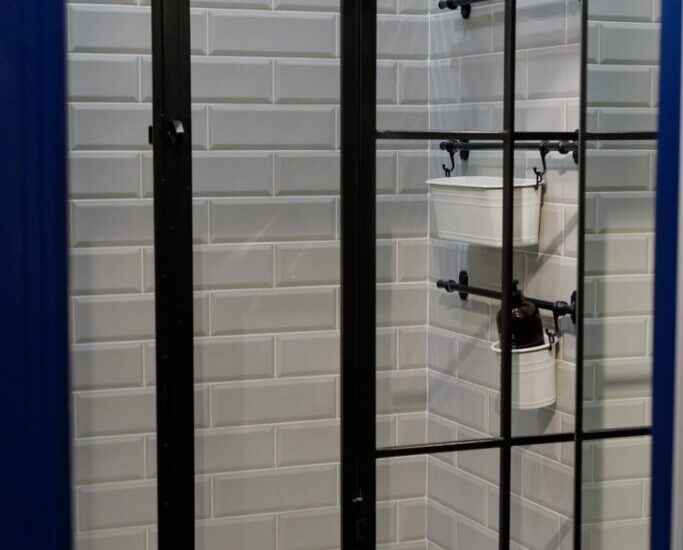
2. Crittall-Style Industrial Black-Framed Grid Doors

For homeowners seeking striking visual contrast and structure, Crittall-style black-framed grid doors provide an unmistakable architectural statement. Originating from historic steel-framed glazing, modern interpretations utilize lightweight, rust-resistant matte black aluminum framing or durable ceramic silk-screened grids applied directly to tempered safety glass.

These black geometric mullions pair effortlessly with concrete vanities, white subway tiles, brushed gold plumbing fixtures, and exposed pipe accents. If you love industrial chic or modern transitional decor, an external grid enclosure introduces bold verticality and drama while retaining light distribution throughout the shower interior.

3. Space-Saving Sliding Roller Barn Door Systems

Traditional sliding enclosures frequently relied on heavy, rattling floor tracks that trapped dirt and required constant scrubbing. Modern sliding barn-door shower systems reimagine this mechanism with precision-engineered, top-hung roller hardware.

Heavy tempered glass panels hang securely from an overhead stainless steel bar, utilizing exposed wheels that glide effortlessly. A low-profile, trackless floor guide at the base keeps the panels aligned without creating an awkward step-over metal channel. Modern sliding shower doors are ideal for tighter bathrooms where swinging doors might collide with vanities, toilets, or linen towers.

4. Minimalist Pivot Bathroom Shower Door Ideas for Alcoves

When working with classic alcove showers, pivot doors offer clean functionality with minimal visible hardware. Unlike continuous side-mounted piano hinges, pivot systems utilize top and bottom hinges anchored directly into the wall stud, curb, or ceiling header.

This hardware placement creates a clean, floating appearance and distributes weight evenly. If you have an alcove opening, a 36 inch frameless or pivot shower door delivers a substantial opening clearance while maintaining a minimalist profile. For compact standard alcoves, tailored pivot mechanisms maximize entry width even in tight spaces.

5. Fluted and Frosted Privacy Bathroom Shower Door Ideas

If your bathroom is shared across a busy household, complete transparency might not fit your daily routine. Fortunately, modern privacy glass provides modesty without sacrificing light flow:

  • Fluted / Reeded Glass: Features vertical rounded convex ribs that distort direct sightlines while reflecting light across tactile textures.
  • Acid-Etched / Sandblasted Frosted Glass: Creates a smooth, matte translucent surface across the entire glass panel.
  • Partial Modesty Bands: Positions a frosted horizontal band across the torso zone while leaving the top and bottom panels crystal clear.
  • Slumped / Cast Glass: Formed in specialized ceramic molds to produce organic textures resembling ocean waves, falling rain, or stratified stone.

These textured panels soften ambient light, prevent heavy glare, and introduce tactile richness to minimalist interiors.

6. Doorless Walk-In Showers with Fixed Glass Screens

curbless walk-in shower with a single stationary glass screen

Doorless walk-in showers—often integrated into European-style wet rooms—eliminate movable doors entirely. Instead, a single, structural stationary glass panel shields adjacent vanity areas from splashing while leaving an open entryway.

Creating a successful doorless design requires careful spatial planning. Floor tiles must slope gradually toward a linear or center drain, and rainfall showerheads should be positioned far enough from the opening to prevent splashing. Incorporating sturdy glass shower panels provides barrier-free, zero-threshold accessibility, creating a seamless transition across the room’s continuous tile flooring.

7. Curved and Neo-Angle Glass Shower Enclosures

Corner showers often present tricky spatial challenges, especially in square guest bathrooms where adjacent fixtures leave little room to spare. Neo-angle and curved glass shower enclosures solve this by clipping off the sharp 90-degree corner:

  • Neo-Angle Enclosures: Feature a three-panel configuration (two fixed side panels set at 45-degree angles flanking a central swinging door). This angled layout keeps foot-traffic lanes clear around toilets and sinks.
  • Curved Glass Corner Units: Utilize smooth, bent tempered glass that glides on curved tracks, eliminating angular corners altogether.

These configurations maximize interior showering elbow room while keeping the exterior footprint compact and efficient.

Glass Thickness, Safety Standards, and Layout Planning

Building codes require all residential shower enclosures to be constructed from tempered safety glass. Annealed flat glass undergoes an intense thermal heating cycle followed by rapid high-pressure air cooling. This process creates high surface compression, making tempered glass roughly four times stronger than standard glass.

In the rare event that tempered glass breaks, it shatters into thousands of small, blunt, pebble-like granules rather than sharp, dangerous shards.

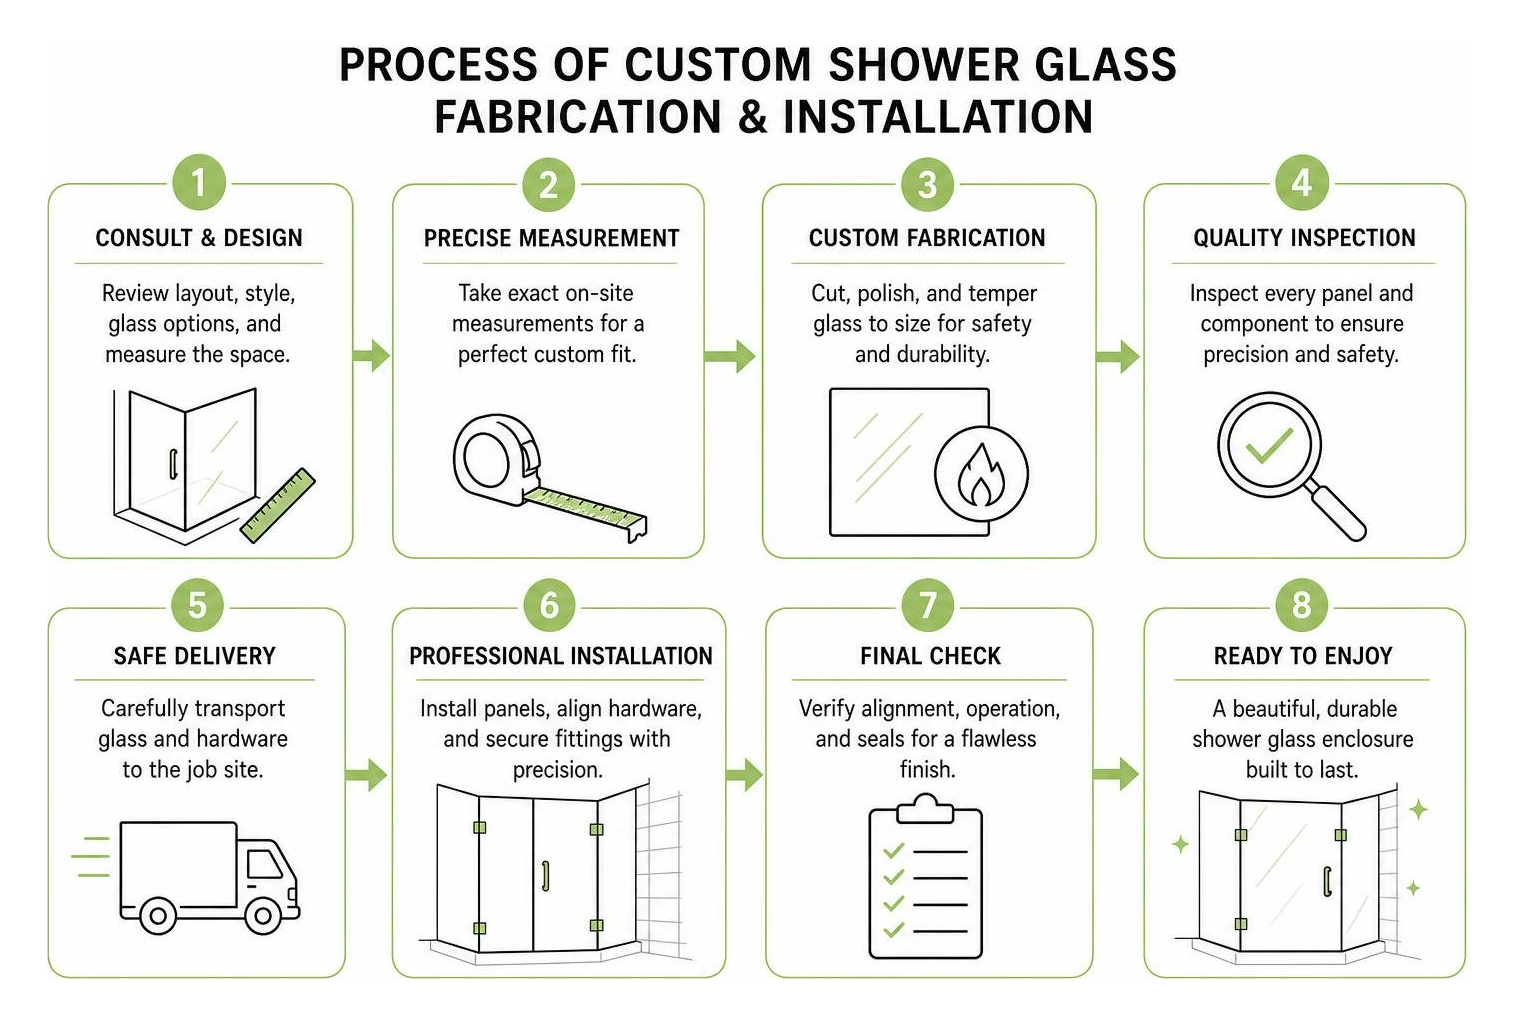
process of custom shower glass fabrication and installation

Comparing 3/8-Inch vs. 1/2-Inch Tempered Safety Glass

When planning a custom frameless enclosure, selecting the correct glass thickness is a vital engineering choice.

Feature / Metric 3/8-Inch (10mm) Tempered Glass 1/2-Inch (12mm) Tempered Glass
Primary Application Standard frameless doors, inline panels, sliding setups Oversized custom panels, tall steam showers, luxury suites
Structural Rigidity Excellent structural integrity for standard door sizes Superior rigidity; eliminates panel flex on tall spans
Weight Profile ~5.0 lbs per square foot ~6.6 lbs per square foot
Hardware Demands Standard heavy-duty solid brass hinges & wall clamps Heavy-duty commercial hinges; requires structural stud blocking
Aesthetic Feel Sleek, clean, and unobtrusive Substantial, vault-like luxury feel

While 3/8-inch glass remains the industry standard for most residential frameless doors, 1/2-inch glass delivers a rock-solid, luxurious feel for tall glass enclosures and sprawling open walk-ins.

Space-Saving Configurations for Small Bathrooms and Tub Combos

You don’t need a sprawling primary suite to enjoy custom glass. If your layout features a bathtub/shower combination, replacing a curtain with a fixed glass splash shield or hinged bath screen modernizes the entire room.

Reviewing how to choose the perfect glass tub enclosure for your bathroom helps you explore configurations such as bi-fold tub screens and pony-wall (half-wall) mounted glass. Anchoring stationary glass securely to a tiled half-wall keeps plumbing or custom benches neatly integrated while maintaining an open, airy feeling above.

Hardware Finishes and Low-Maintenance Glass Care

The hardware holding your glass panels together acts as the jewelry of your bathroom. To prevent corrosion in humid environments, always choose components forged from solid brass or marine-grade stainless steel.

Coordinating your glass hardware with your plumbing fixtures, vanity pulls, and vanity mirrors ensures a cohesive design:

  • Matte Black: Provides sharp architectural contrast against light tile and anchors industrial or modern farmhouse aesthetics.
  • Brushed Brass & Warm Gold: Adds inviting warmth, pairing beautifully with natural wood vanities, zellige tile, and transitional spaces.
  • Polished Chrome & Brushed Nickel: Timeless, versatile, and highly reflective, chrome complements cool marble, gray porcelain, and classic subway tile.

Hydrophobic Protective Coatings and Daily Maintenance Tips

Untreated glass is naturally porous at a microscopic level. Over time, hard water minerals, soap residues, and body oils settle into these microscopic peaks and valleys, causing cloudy mineral hazing that ordinary cleaners cannot remove.

A factory-applied hydrophobic protective coating chemically bonds to the glass surface, sealing microscopic pores and creating an ultra-smooth, water-repellent barrier. Water and soap bead up and roll off the surface rather than clinging to the glass. Discovering recent shower glass innovations shows how treated glass cuts down cleaning time significantly.

Daily Care Best Practices:

  1. Squeegee After Every Shower: A quick 30-second wipe down with a rubber squeegee eliminates lingering water droplets before they evaporate and leave mineral spots.
  2. Use pH-Neutral Cleaners: Clean weekly using a soft microfiber cloth and a mild solution of water and pH-neutral dish soap.
  3. Avoid Abrasives: Never use steel wool, abrasive scouring powders, or harsh ammonia-based glass sprays on treated protective coatings.

Frequently Asked Questions About Shower Doors

What type of shower door makes a small bathroom look bigger?

A clear frameless glass shower door makes a small bathroom appear larger by eliminating visual barriers. Because clear glass lets light move freely across the entire space and keeps your back wall tile in view, the eye perceives the room as one continuous, open area.

Should a shower door open inward or outward for safety?

Building codes generally require swinging shower doors to open outward into the bathroom. This ensures an occupant can safely exit or receive assistance in an emergency without being blocked by an inward-swinging panel. Many custom pivot hinges also feature dual-swing operation, allowing the door to swing both inward to contain drips and outward for easy egress.

How do hydrophobic glass coatings prevent hard water stains?

Hydrophobic coatings create a permanent molecular bond that fills the microscopic pores on the surface of raw glass. By creating a slick, water-repellent surface, the coating forces water to bead up and sheet off cleanly. This prevents calcium, magnesium, and soap scum from bonding to or chemically etching into the glass panel.

Conclusion

Choosing the right shower door transforms your daily routine and elevates your entire bathroom. Whether your aesthetic calls for the crisp transparency of ultra-clear frameless glass, the striking structure of Crittall-style black grids, or the smooth functionality of modern sliding barn rollers, tailored glass design makes all the difference.

At JP Precision Glass, we specialize in designing, customizing, and installing made-to-measure glass enclosures built to your exact specifications. Every bathroom features unique angles, tile variations, and spatial considerations. Explore our wide range of custom shower doors and let our team help you create a beautiful, durable glass enclosure tailored perfectly to your home.

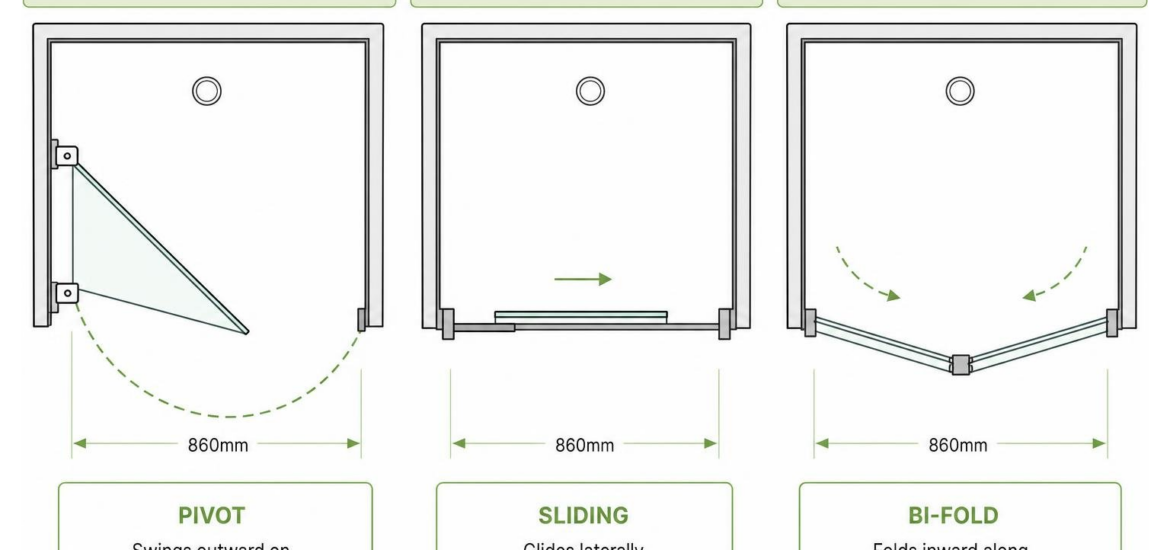
Comparison of shower enclosure opening mechanisms diagram

Find the Perfect 860 Pivot Shower Door for Your Space

Key Features and Benefits of an 860 Pivot Shower Door

An 860 pivot shower door is designed to maximize entry space while maintaining a sleek, modern architectural aesthetic. The defining feature of a pivot door is its hinge mechanism. Unlike continuous piano hinges that run the full height of the frame, pivot hinges mount at the top and bottom corners of the door panel. This design transfers the door’s weight directly into the top and bottom wall profiles or floor structure, creating an exceptionally smooth, quiet swing.

The 860mm width offers remarkable flexibility. It is an ideal middle ground for standard bathroom layouts—significantly more spacious than narrow 700mm doors, yet compact enough to fit comfortably into tight floor plans where a massive 900mm or 1000mm door would create spatial conflicts.

Key advantages of choosing an 860mm pivot enclosure include:

  • Generous Door Opening Width: Because pivot hinges can be offset slightly inward from the side frame, they open wide to provide a comfortable, clear entryway (often over 500mm of usable clearance).
  • Flexible Layout Configuration: Pivot doors work exceptionally well in three-wall alcove setups. When paired with a matching glass side panel, they easily transform into a stunning corner shower enclosure.
  • Superior Water Containment: Precision-engineered magnetic closing strips and durable bottom drip seal strips create a tight barrier against escaping water, keeping your bathroom floor dry even when paired with high-flow showerheads.
  • Reversible Design: Most quality 860mm pivot frames feature symmetrical wall profiles, allowing us to install the door to swing open from left-to-right or right-to-left depending on your room layout and fixture placement.

To help you decide whether a pivot door is the right mechanism for your layout, here is how an 860mm pivot shower door compares to other common enclosure styles:

Feature / Benefit 860mm Pivot Shower Door Sliding Shower Door Bi-Fold Shower Door
Opening Mechanism Swings outward on top/bottom pivot pins Glides laterally on tracks Folds inward along a center hinge
Entryway Width Very Wide (maximizes opening relative to frame) Moderate (limited by overlapping glass panels) Wide (folds neatly away)
Mechanical Durability High (few moving parts to wear out) Moderate (rollers and tracks require cleaning) Moderate (multiple hinge pivots and guides)
Cleaning Ease Extremely Easy (flat glass surface, no bottom tracks) Moderate (dirt can accumulate in bottom guide tracks) Moderate (multiple hinge seal joints to clean)
Outward Clearance Needed Yes (requires space in front of shower) None (operates entirely within frame envelope) None (folds inside the enclosure footprint)

Standard Dimensions and Glass Thickness for an 860 Pivot Shower Door

When specifying an 860 pivot shower door, height and glass thickness are two essential factors that dictate both safety and performance.

Standard heights for pivot enclosures typically range between 1850mm and 1900mm. Selecting a taller 1900mm profile provides enhanced splash protection, keeping elevated water spray contained within the cubicle—a particularly useful feature if you prefer ceiling-mounted rain showerheads.

For the glass itself, 6mm thermally toughened safety glass represents the optimal structural balance for an 860mm door. Thermally toughened glass undergoes a specialized heating and rapid cooling process that makes it up to five times stronger than standard annealed glass.

Using 6mm glass ensures:

  1. Structural Balance: It provides structural integrity and a solid, premium weight feel without overloading the pivot pin hinges.
  2. Effortless Operation: Heavier 8mm or 10mm glass panels require heavy-duty architectural hardware; 6mm glass keeps the swing lightweight and smooth for family members of all ages.
  3. Safety First: In the rare event of damage, toughened safety glass fractures into tiny, blunt granular pieces rather than dangerous sharp shards.

Frame Finishes and Glass Coatings for an 860 Pivot Shower Door

The overall look and long-term maintenance of your shower enclosure depend heavily on the frame finish and surface treatments applied to the glass.

Modern pivot shower doors come in several high-durability hardware finishes to complement your bathroom taps and fixtures:

  • Polished Chrome: A classic, timeless mirror-like finish that reflects light and matches traditional or contemporary brassware.
  • Matt Black: A bold, modern finish crafted via powder coating or electroplating. It creates sharp architectural contrast against white tiling or marble walls.
  • Brushed Brass: A warm, luxurious finish that introduces subtle texture and pairs beautifully with earthy stone tiles and neutral color palettes.

Beyond visual appeal, pay attention to practical surface protection. High-quality 860mm pivot glass panels come treated with an anti-limescale glass coating (often referred to as an easy-clean protective shield). This hydrophobic coating seals the microscopic pores of the glass surface, repelling water droplets, soap scum, and limescale buildup. Instead of clinging to the door, water glides off effortlessly, drastically reducing cleaning frequency and eliminating stubborn water spots.

Comparing 860mm Pivot Doors to Alternative Enclosure Styles

Understanding how spatial dynamics differ across door types helps ensure you select the best fit for your room.

The primary operational detail of a pivot door is its outward swing radius. When the door opens, it swings into the bathroom space. You must ensure that nearby fixtures—such as a vanity, towel radiator, or toilet—do not block the swing path.

When compared directly to Sliding Shower Doors, pivot doors offer a much wider physical opening for the exact same width. Sliding doors require one fixed glass panel for the door panel to glide behind, effectively halving your usable entry space. On an 860mm frame width, a sliding door might only yield 350mm to 400mm of entry clearance, whereas an 860mm pivot door provides a roomy entry opening exceeding 500mm.

Compared to bi-fold mechanisms, pivot doors feature fewer moving mechanical joints. Bi-fold doors fold inward on themselves, which is excellent for spaces with zero outward floor clearance, but the additional hinges, plastic seal joints, and top/bottom runner channels require more frequent cleaning.

If you are looking to maximize visual openness and eliminate bulky metal framing altogether, exploring the Benefits of Frameless Glass Shower Doors is a fantastic option. Frameless or semi-frameless pivot designs allow natural light to flow uninterrupted across the bathroom, making smaller ensuites feel significantly larger.

Choosing the Right Shower Tray and Key Safety Features

Pairing your 860 pivot shower door with the right shower tray ensures long-lasting watertight performance and reliable underfoot safety.

Textured low-profile shower base with rapid drain system

When selecting a shower tray, consider these technical factors:

  • Built-in Anti-Slip Surface: Wet tile surfaces and smooth tray bases can become slick. Premium shower bases feature textured non-slip surface technology. Look for trays tested under official safety standards, such as the BS 7976:2 Pendulum Slip Test. While standard building regulations require a minimum slip-resistance score of 35, high-performance anti-slip trays can achieve pendulum scores over 70, offering extraordinary traction underfoot.
  • Composite Tray Materials: Modern shower trays utilize advanced mineral resins or aerospace-grade composite materials. These composite trays are up to 60% lighter than traditional stone resin bases while maintaining immense structural rigidity and impact resistance.
  • Low-Profile vs. Raised Mounting: A low-profile tray (typically 25mm to 40mm high) offers a modern, step-free threshold that integrates seamlessly into timber floors. However, if you are installing on a solid concrete floor where plumbing pipes cannot be recessed beneath the floorboards, choose a raised tray kit with leg sets and removable plinths to comfortably accommodate under-tray waste pipework.
  • High-Flow Waste Systems: Pivot shower doors allow full water flow across the enclosure footprint. To prevent water pooling inside the tray, pair the tray with a rapid high-flow waste system capable of clearing at least 32 liters per minute.

Installation Considerations and Maintenance Best Practices

Proper installation guarantees a watertight enclosure and smooth, quiet door operation for years to come. Whether you are installing a standard kit or choosing custom solutions like our Shower Door Replacement Chicago services, paying close attention to site preparation is key.

Essential Installation Adjustments

  1. Alcove Alignment and Adjustment Ranges: Bathrooms are rarely perfectly square. High-quality shower door wall profiles offer built-in lateral adjustment (typically 15mm to 20mm per side) within the vertical channels. This allows us to compensate for out-of-plumb walls without leaving unsightly gaps.
  2. Tiling Allowance: Always measure your opening after tiling is completely finished. Tile thickness and adhesive layers can easily reduce an 860mm rough opening by 15mm to 25mm.
  3. Reversible Hanging: Verify the swing orientation before securing the wall profiles. Depending on towel bar locations and light switches, reversing the pivot block placement lets you choose whether the door swings left or right.

Hinge adjustment on glass shower door

Maintenance Best Practices

To keep your pivot door operating smoothly and looking crystal-clear, adopt a quick maintenance routine:

  • Daily Squeegee Routine: Wipe down the inner glass face with a soft rubber squeegee after every shower to prevent mineral deposits from drying on the glass.
  • Microfibre Care Routine: Clean the aluminum wall profiles and hardware with warm water and a soft microfibre cloth. Avoid harsh abrasive chemicals, bleach, or scouring pads, which can degrade protective anodized or electroplated hardware finishes.
  • Inspect Magnetic Seals: Clean the bottom drip vinyl fins and magnetic door closures monthly to prevent soap residue buildup. If seals eventually harden or discolor after years of heavy use, you can easily Replace Glass Shower Door vinyl seals to restore a factory-fresh watertight fit.
  • Check Pivot Pins: Periodically check the top and bottom pivot hinge screws to ensure they remain tightened to spec, guaranteeing perfect alignment over time.

Frequently Asked Questions About 860mm Pivot Shower Doors

How much opening clearance is needed for an 860mm pivot shower door?

Because an 860mm pivot door swings outward into the room, you should allow at least 500mm to 600mm of clear, unobstructed floor space directly in front of the shower door. Always check that the door will not strike vanities, toilets, heated towel rails, or bathroom entry doors when fully opened.

Can an 860mm pivot shower door be installed in an alcove?

Yes! Alcove installation (a three-solid-wall setup) is the most popular installation method for an 860mm pivot door. The door frame mounts securely between two opposite tiled walls, utilizing adjustable wall channels and vertical continuous magnetic seals to create a completely watertight shower room.

What factors influence the cost and quality of an 860mm pivot door?

Key quality factors include:

  • Glass Specification: Thermally toughened safety glass with pre-applied anti-limescale coatings.
  • Hardware Materials: Heavy-duty brass or aluminum pivot blocks versus plastic core hinges.
  • Frame Engineering: Thickness and adjustability of wall profiles, as well as high-grade magnetic vinyl seals.
  • Customization: Standard off-the-shelf sizes versus precision custom-cut glass designed to fit custom openings perfectly.

Conclusion

An 860 pivot shower door combines spatial efficiency, smooth mechanical operation, and sleek modern design. Whether you are building an alcove shower setup or replacing an old enclosure, choosing quality 6mm toughened safety glass, durable metal finishes, and a high-performance anti-slip base ensures your bathroom remains safe, comfortable, and stylish for years to come.

At JP Precision Glass, we pride ourselves on precision craftsmanship, made-to-size custom glass solutions, and flawless professional installation. If you are planning a bathroom renovation or need expert advice on sizing and glass specifications, explore our full range of custom solutions for Shower Doors Chicago today!

glass door scratch repair

Clear View Ahead: A Practical Guide to Glass Door Scratch Repair

Glass Door Scratch Repair Starts With the Right Diagnosis

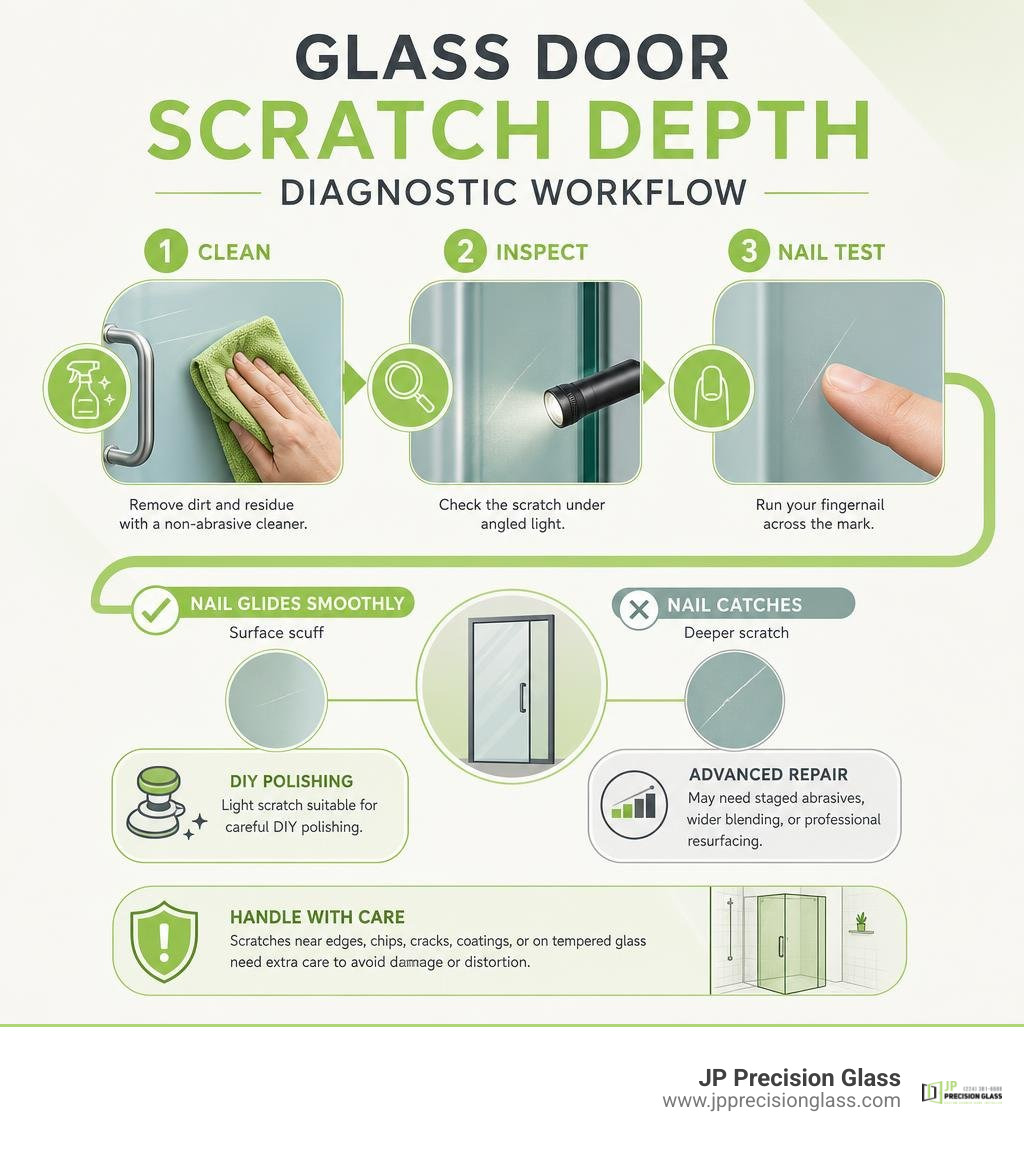
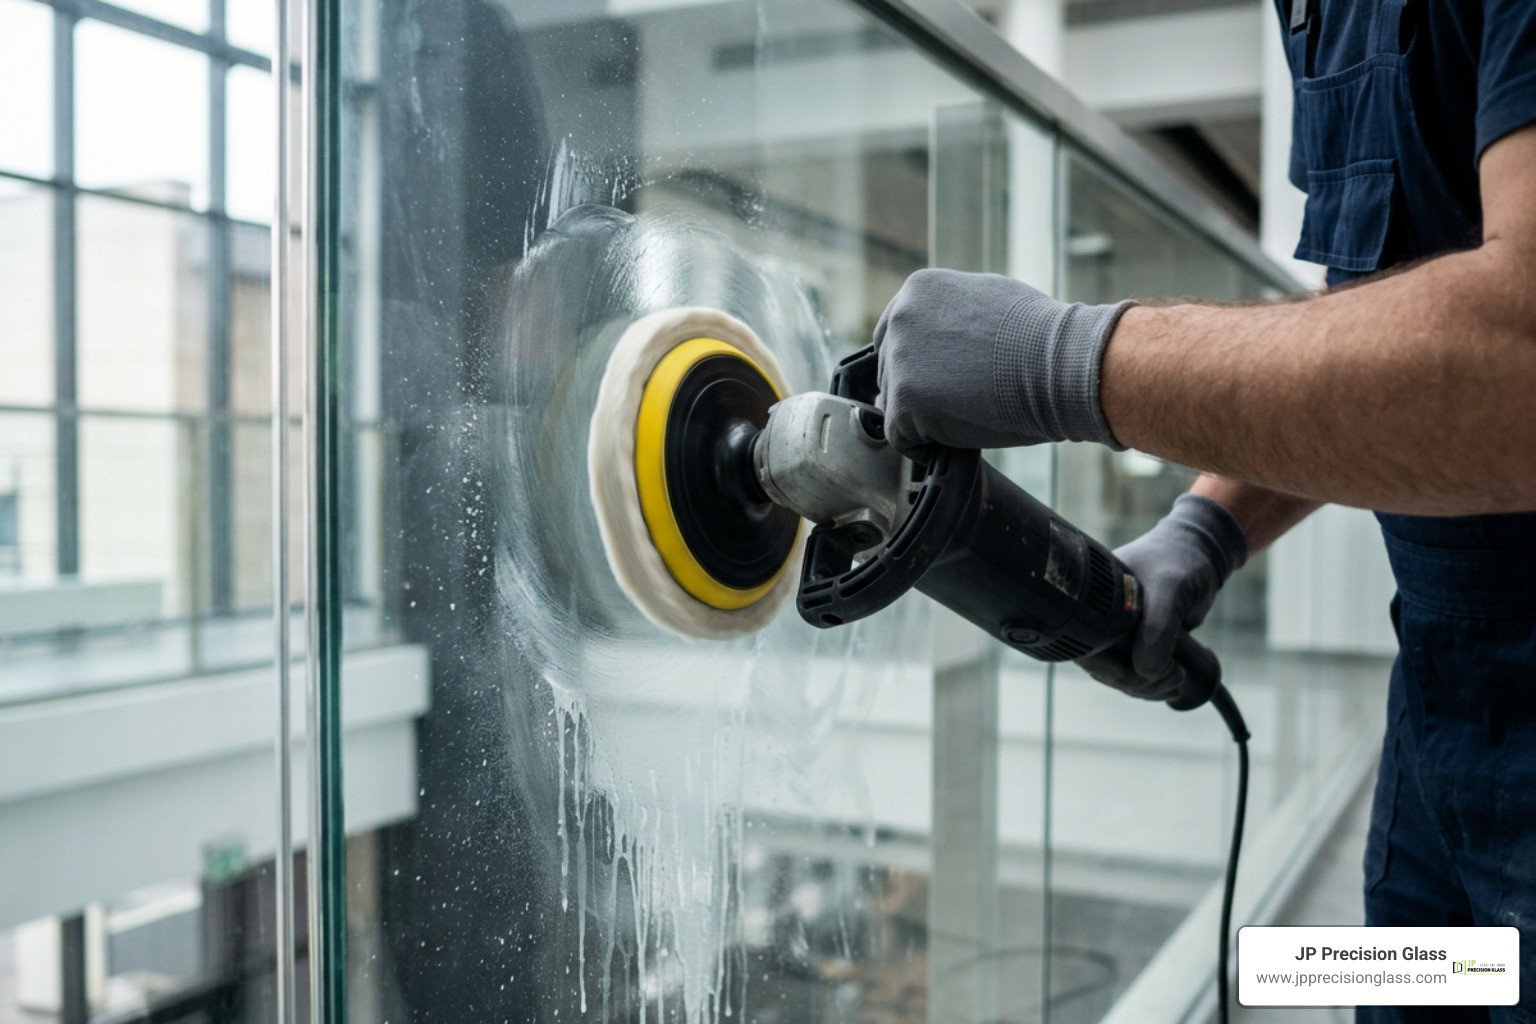
Most light scratches on a glass door can be reduced or removed by cleaning the glass, checking the scratch with a fingernail, then polishing with a glass-specific cerium oxide compound and a felt pad. If your nail glides over the mark, it is usually a surface scuff suitable for careful DIY polishing. If it catches, the damage is deeper and may need staged abrasives, wider blending, or professional resurfacing to avoid haze and optical distortion.

Glass door scratch repair works by removing a very thin layer of glass around the scratch, then polishing the area back to clarity. Do not treat every mark the same: scratches near an edge, cracks, chips, coated glass, and deep damage on tempered shower doors need extra care because too much heat or pressure can damage the panel.

For shower doors, start with the least aggressive method. Clean with a non-abrasive glass cleaner and microfiber cloth, inspect under angled light, and test a small hidden area before using a drill-mounted polishing kit.

Glass door scratch depth diagnostic workflow infographic

Glass door scratch repair definitions:

Assessing Damage: How to Evaluate Scratches on Glass Doors

Before reaching for power tools or polishing compounds, it is essential to accurately diagnose what kind of damage you are facing. Glass panels on patio sliders, interior dividers, and shower enclosures regularly face abrasive threats—from pet claws and gritty sponges to jewelry impacts and construction debris.

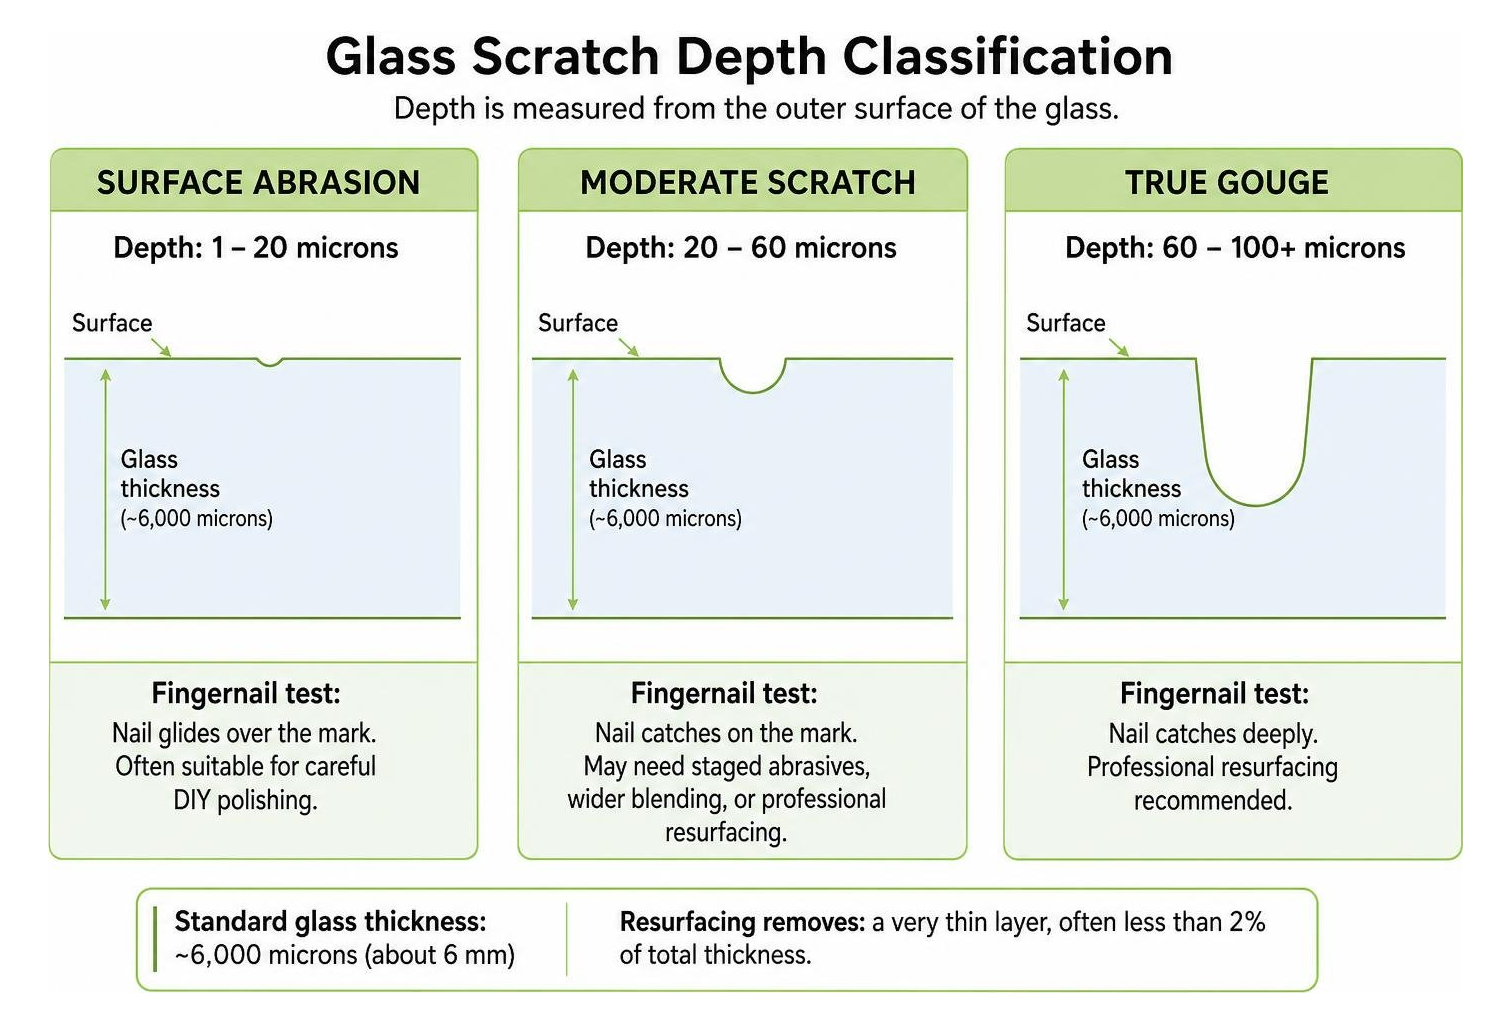
Evaluating the damage requires a careful optical inspection under direct, multi-angle lighting. Standard architectural glass found in residential doors is typically around 6 millimeters thick (roughly 6,000 microns). Most common scratches exist solely on the outer boundary of this layer. Surface abrasions often sit anywhere between 1 and 20 microns deep, whereas moderate scratches settle around 20 to 60 microns. True gouges reach 60 to 100+ microns into the surface.

glass scratch depth classification

Because resurfacing only shaves away a fraction of a percent of the total glass thickness (often less than 2%), restoring visual clarity without weakening the panel is entirely feasible. To learn more about scratch depths and classifications across different glass profiles, you can consult this comprehensive glass restoration guide for in-depth technical breakdowns.

The Fingernail Test for Depth Assessment

The quickest diagnostic test available is the simple fingernail test. Clean the glass thoroughly and drag your fingernail perpendicular across the scratch line.

  • Level 1: Surface Scuffs (Glides Smoothly): If your fingernail glides over the mark without catching, the damage is superficial (under 20 microns). These scuffs only require light buffing with a high-purity polishing paste.
  • Level 2: Moderate Scratches (Slight Catch): If your fingernail catches slightly—similar to catching on a seam of paper—the scratch has penetrated deeper into the silicate layer. This level generally requires fine mechanical sanding before final polishing.
  • Level 3: Deep Gouges (Hard Stop): If your fingernail drops into a distinct groove or comes to an abrupt halt, you are dealing with a severe gouge. These require multi-stage abrasive discs with wide feathered blending to avoid creating an optical lens effect.

Tempered vs. Annealed Door Glass Considerations

Understanding whether your door features annealed or tempered glass changes how you handle friction and heat during repair.

Standard float (annealed) glass breaks into large, sharp shards when fractured. It handles progressive grinding well but can develop thermal stress cracks if friction is concentrated in one spot.

Tempered glass, standard in modern patio doors and shower enclosures, undergoes extreme thermal heating and rapid cooling during manufacturing. This creates balanced internal compression and tension, causing it to crumble into dull, pebble-like granules if structurally compromised. While a common myth suggests tempered glass cannot be resurfaced, it can safely be repaired provided you manage heat dissipation carefully and avoid working directly on chipped edges where internal tension is most fragile.

Step-by-Step Guide to DIY Glass Door Scratch Repair

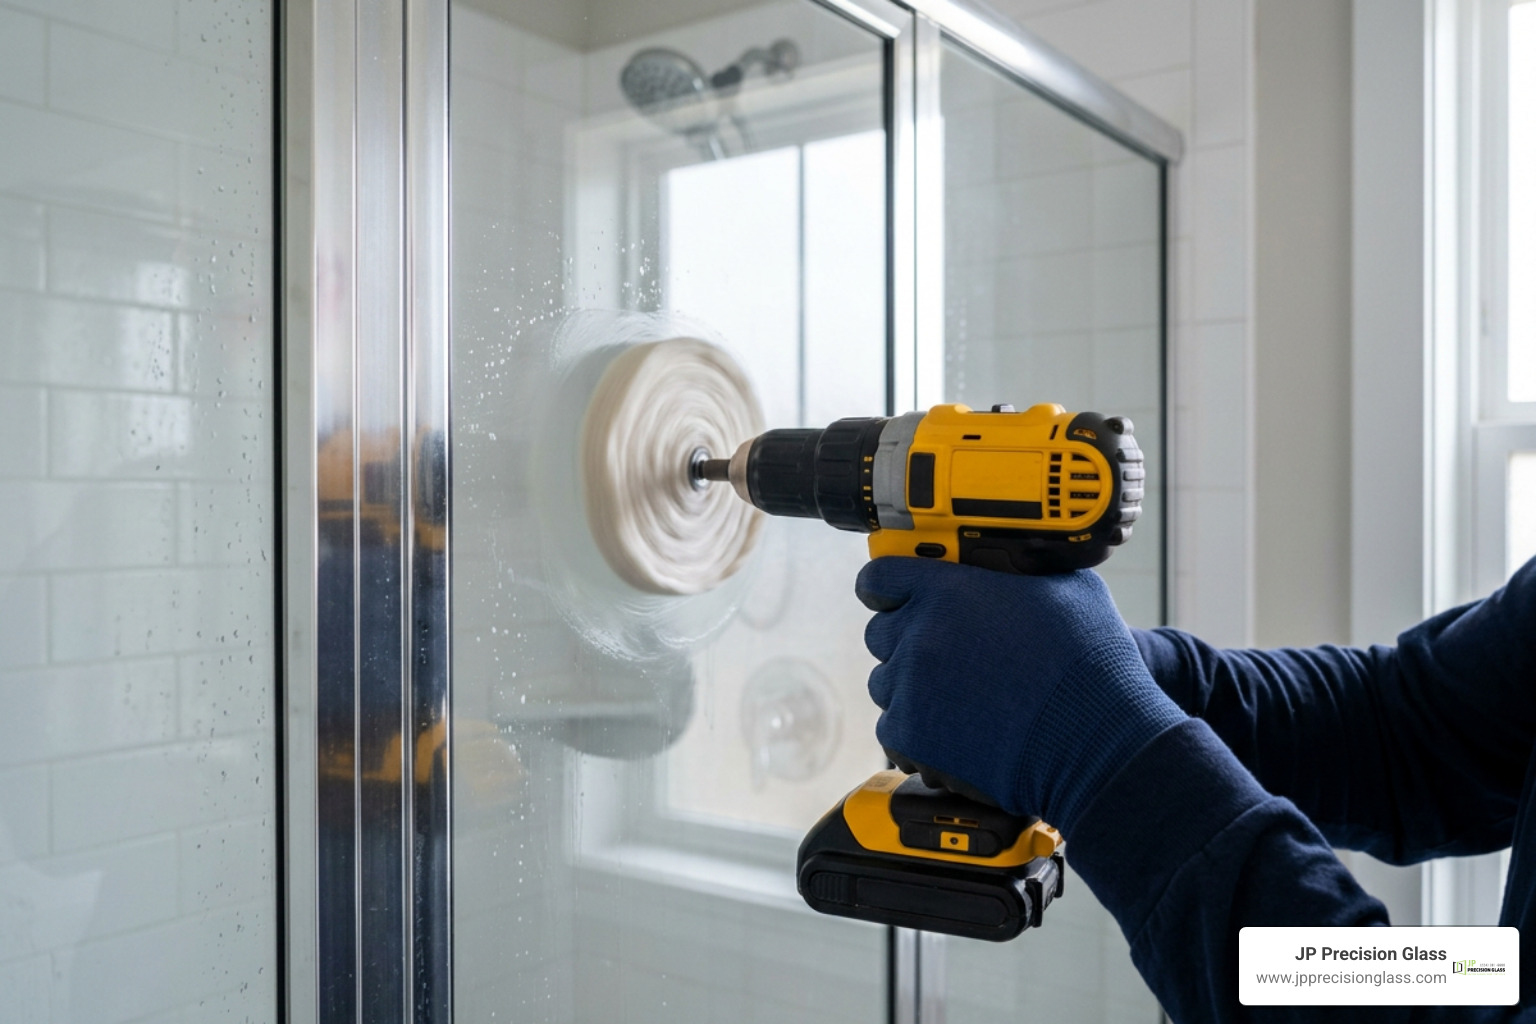
drill-mounted felt pad polishing a glass door panel

Taking on minor to moderate glass blemishes yourself can save significant time and keep your panels looking pristine. If you are also working on framing hardware or sliding assemblies, tackling sliding into savings with diy aluminum glass door repair alongside your glass work is a great way to completely refresh your door.

Preparing Tools and Materials for Glass Door Scratch Repair

Gather the proper equipment before starting so you never have to leave a wet slurry sitting on the glass mid-process:

  • Variable-Speed Drill: A standard 18V or 24V cordless drill (or corded electric drill) capable of holding 1500 to 2000 RPM under load. Avoid weak 12V tools that bog down when applying pressure.
  • Polishing Backing Pad & Spindle: A 2-inch (50mm) or 3-inch (75mm) backing plate fitted with hook-and-loop fasteners.
  • High-Density Rayon Felt Polishing Discs: Designed specifically for compounding glass without disintegrating.
  • Glass Polishing Compound: High-purity (99%+) cerium oxide powder or pre-mixed glass polish slurry. You can find ready-to-use solutions such as a dedicated drill-mounted glass polishing kit designed for domestic resurfacing.
  • Abrasive Discs (Optional): P500 and P800 grit micro-abrasive discs if addressing Level 2 scratches.
  • Spray Bottle: Filled with clean, room-temperature water.
  • Safety Equipment: Protective eye goggles, dust mask, and painter’s tape to shield surrounding metal frames or trim.

Executing Rotary Polishing and Feathering Techniques

Follow this structured workflow to safely remove scratches without creating haze or warping:

Glass door scratch repair steps

  1. Mask the Surrounding Frame: Apply painter’s tape around adjacent aluminum or wood frames to prevent accidental scuffing from the spinning disc.
  2. Mount the Backing Pad: Secure your backing pad into the drill chuck. Attach a clean felt pad to the plate.
  3. Apply Cerium Oxide Compound: Shake the compound well and apply a small dollop (about the size of a quarter) directly to the face of the felt pad. Lightly press the pad against the glass before turning on the tool to prevent splatter.
  4. Set Your RPM and Motion: Set the drill speed to roughly 1500–2000 RPM. Begin moving the pad across the scratch using smooth, overlapping circular patterns.
  5. Master the Feathering Technique: Never keep the polishing pad stationary. Holding the pad in one spot for longer than 15 to 20 seconds creates dangerous thermal hotspots. Expand your polishing area to three to four times the original length of the scratch. This gradual blend (feathering) prevents a localized dip in the glass that could otherwise cause noticeable visual distortion.
  6. Maintain Moisture: Glass polishing requires steady lubrication. As the cerium oxide begins to dry and become sticky, mist the panel lightly with clean water from your spray bottle to reactivate the abrasive properties.

Post-Repair Cleanup and Optical Clarity Check

Once the scratch appears visually resolved, wipe away all compound using clean water and a plush microfiber cloth.

To completely clear any remaining compound film or mineral haze, prepare a mild cleaning solution by mixing two ounces of household ammonia with two quarts of clean water. Spray the glass and wipe it clean with a fresh, lint-free towel while wearing protective gloves.

Step back and inspect the glass from multiple angles and under direct directional light (such as a bright work light or flashlight). Look for remaining scratch lines, swirl marks, or milky haze. If faint traces remain, reapply your felt pad with light pressure for an additional two-minute cycle.

Professional Equipment and Advanced Resurfacing Techniques

variable-speed rotary polisher resurfacing architectural glass

When scratches are exceptionally deep, cover large surface areas, or affect high-end architectural fixtures, professional-grade equipment offers controlled material removal that basic drill kits cannot match. For homeowners balancing project scope with cost, reading our guide on how to find glass door repair services on a budget provides great insight on prioritizing what needs restoration.

Choosing the Best Approach for Glass Door Scratch Repair

Professional glass resurfacing relies on specialized variable-speed rotary polishers fitted with multi-stage abrasive discs rather than basic handheld drills.

  • Dry Pad Multi-Stage Systems: Advanced dry abrasive systems use precisely graded silicon carbide or diamond abrasive pads (ranging from 180 grit down to fine 1000+ grit) to physically step down and level the glass plateau around a scratch.
  • Wet Cerium Slurry Polishing: Liquid polishing systems continuously flush the surface with a recirculated or misted cerium oxide slurry. This manages heat dispersion across extensive commercial panels.
  • Surface Reunification: Independent tests show that controlled mechanical resurfacing can unify the outer microscopic structure of the glass, eliminating micro-fissures and restoring surface integrity.

Common Mistakes to Avoid During Resurfacing

Achieving crystal-clear results requires avoiding several common DIY pitfalls:

  • Localized Overheating: Applying heavy downward pressure in one tight area builds extreme thermal friction. On tempered doors, excessive localized heat can trigger catastrophic panel breakage.
  • Focal Warping (The Lens Effect): Polishing only directly on top of the scratch groove creates a subtle valley in the glass. When looking through the door, objects on the other side will appear bent or wavy. Always blend your polishing motion outward.
  • Working Too Close to Frame Edges: Standard rotary pads struggle to maintain a flat profile within two inches of door frames. Forcing a spinning backing pad against metal or silicone gaskets will chew up the pad and risk chipping the vulnerable glass edge.
  • Skipping Abrasive Grits: If sanding deep scratches, jumping directly from an aggressive coarse grit to a fine finishing polish leaves behind micro-swirls that permanently dull the glass clarity.

Preventing Future Scratches and Knowing When to Replace

Once your glass door looks brand new again, taking proactive steps will keep it clear for years to come. In bathrooms and high-traffic entryways, routine care keeps grit from turning into fresh scratches. If an existing door has reached the end of its lifespan, exploring our breakdown on glass shower doors replacement made easy helps outline straightforward modern upgrades.

Damage Characteristic DIY Polishing Viable? Professional Resurfacing? Full Panel Replacement Needed?
Light Surface Scuff (<20 microns) Yes (Cerium oxide & felt pad) Optional No
Moderate Scratch (20–60 microns) Possible (Multi-stage kit) Yes (Recommended) No
Deep Gouge (>60 microns) No (High risk of distortion) Yes Only if structural integrity is compromised
Edge Chip or Corner Crack No No Yes (Immediate safety risk)
Failed Double-Pane Seal No No Yes (Internal fogging cannot be polished)

Applying Protective Nano-Coatings on Glass Enclosures

One of the most effective ways to preserve shower doors and exterior glass is applying a hydrophobic nanotechnology coating.

These sealers bond microscopically with the silica surface, filling in microscopic pores to form an ultra-smooth, water-repellent barrier. Water beads up and rolls off, carrying away dirt, limescale, and soap scum before they can etch into the glass.

For ongoing maintenance:

  • Use a soft silicone squeegee after daily shower use.
  • Clean exclusively with non-abrasive, pH-neutral cleaners and clean microfiber cloths.
  • Never use green heavy-duty scouring pads, steel wool, or harsh scouring powders on treated glass.

When Scratches Require Panel Replacement

While resurfacing works wonders for surface damage, certain structural issues make restoration impossible:

  • Cracks Originating at the Frame Edge: Any crack running inward from the edge of a tempered panel poses an immediate safety hazard.
  • Deep Clustered Pitting or Slag: Deep burn pits from welding slag or heavy grinding sparks that penetrate through more than 10% of the pane thickness weaken the overall glass tension.
  • Extensive Surface Coverage: If severe scratches cover more than 30% of a large glass panel, the labor and time required to blend the surface often makes replacement more practical.

When damage exceeds the threshold of safe polishing, choosing to replace glass shower door assemblies ensures your bathroom remains safe, functional, and visually stunning.

Frequently Asked Questions About Glass Door Scratch Repair

Can scratches on tempered glass doors be safely repaired?

Yes. Tempered glass can be resurfaced and polished safely. Because standard residential door panels are around 6mm thick, removing 20 to 80 microns of surface glass to eliminate a scratch removes less than 2% of the total glass thickness.

The key requirement is careful temperature control: keep the tool moving in a wide feathering pattern, maintain steady water lubrication, and keep drill speeds between 1500 and 2000 RPM to prevent localized thermal shock.

How long does a glass door scratch repair take and how durable is it?

A typical repair for minor surface scuffs takes roughly 20 to 45 minutes of active polishing. Moderate scratches requiring staged sanding and polishing generally take 1 to 2 hours per damaged area.

Because glass scratch repair physically smooths and levels the natural silica surface rather than simply filling it with temporary resins, the results are permanent. Once polished and cleaned, the repaired area will never fade, peel, or cloud over time.

What causes optical distortion during scratch removal?

Optical distortion (often called the “funhouse mirror” or lens effect) happens when glass is removed too aggressively in an isolated spot without proper blending.

When you grind down a deep scratch without spreading the work across a broader radius, you create a shallow depression in the glass pane. Light passing through this uneven curve refracts at varying angles, making straight lines behind the glass appear bent. Feathering the work area outward to 3 to 4 times the scratch diameter prevents this distortion.

Conclusion

Scratches on your sliding glass doors or shower panels do not automatically mean you need a brand-new pane. By using the fingernail test to evaluate depth, equipping yourself with a quality variable-speed rotary setup, and using careful feathering techniques with cerium oxide, you can restore brilliant clarity to your glass surfaces safely and effectively.

For deeper gouges, widespread surface etching, or custom tempered enclosures that demand exacting precision, professional guidance guarantees a flawless, distortion-free finish. At JP Precision Glass, we specialize in delivering custom, made-to-size solutions and premium glass installations tailored to your home. If you are dealing with challenging door damage or considering a full bathroom upgrade, reach out to our expert team for dedicated shower door repair chicago homeowners trust for lasting quality.

glass enclosure tub

How to Choose the Perfect Glass Tub Enclosure for Your Bathroom

Choosing the Right Glass Enclosure Tub for Your Bathroom

A glass enclosure tub replaces a shower curtain or dated framed doors with tempered glass panels that make a bathroom feel cleaner, brighter, and more custom.

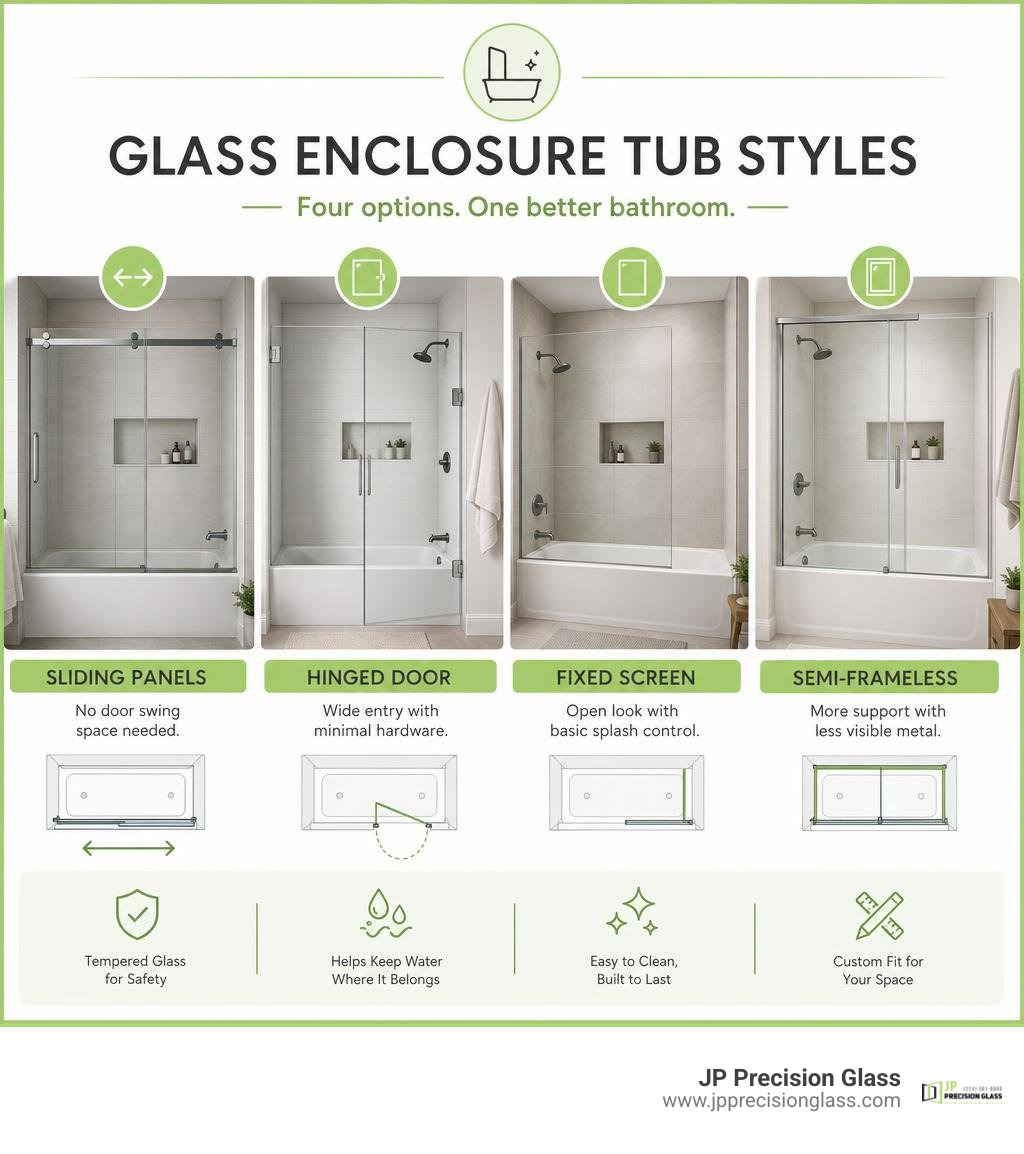
Option Best for Main advantage
Frameless sliding panels Small bathrooms and alcove tubs No door swing space needed
Frameless hinged door Bathrooms with open floor space Wide entry and minimal hardware
Fixed screen Simple tub-shower setups Open look with basic splash control
Semi-frameless enclosure A practical middle ground More support with less visible metal

The best choice depends on your tub layout, wall support, entry side, and how much water protection you need. Glass thickness, safety features, and hardware finishes also shape both daily use and the final look.

For Chicago homeowners planning a remodel, a custom glass enclosure can upgrade the tub area without changing the entire bathroom. The sections ahead compare the key options so you can choose a design that fits your space and routine.

Glass enclosure tub styles: sliding panels, hinged door, fixed screen, semi-frameless infographic

Must-know glass enclosure tub terms:

Key Benefits of Upgrading to a Glass Enclosure Tub

Upgrading from a traditional fabric shower curtain or an old aluminum-framed door to a custom glass enclosure tub completely changes how your bathroom looks and functions. A standard vinyl or fabric shower curtain easily traps humidity, clings to your body mid-shower, and absorbs soap residue that quickly turns into stubborn mold and mildew. Older framed sliding doors, on the other hand, feature deep aluminum tracks along the tub deck that trap water, grime, and soap scum, making them notoriously difficult to keep clean.

When you install a sleek glass enclosure, you immediately raise the hygiene standards of your bath space. High-end glass surfaces resist moisture retention, making them far less prone to mildew or unpleasant odors. A quick swipe with a squeegee after a bath or shower keeps the glass sparkling clear. To explore the broader structural advantages of clear heavy glass, see our breakdown on the Benefits of Frameless Glass Shower Doors.

Beyond cleanliness, replacing a heavy, opaque shower curtain with clear tempered glass creates an immediate visual expansion. By eliminating the visual barrier created by fabric curtains or bulky metal frames, light flows unimpeded across the room. Small or narrow bathrooms instantly feel larger, airier, and far more modern.

Furthermore, a glass tub upgrade acts as a permanent architectural feature rather than a temporary accessory. Real estate experts and prospective buyers consistently view custom heavy glass tub systems as a clear indicator of a modern home update. It gives your existing tub setup the high-end appeal of a luxury walk-in shower without requiring expensive tile tear-outs or plumbing relocation.

Comparing Tub Glass Enclosure Styles and Configurations

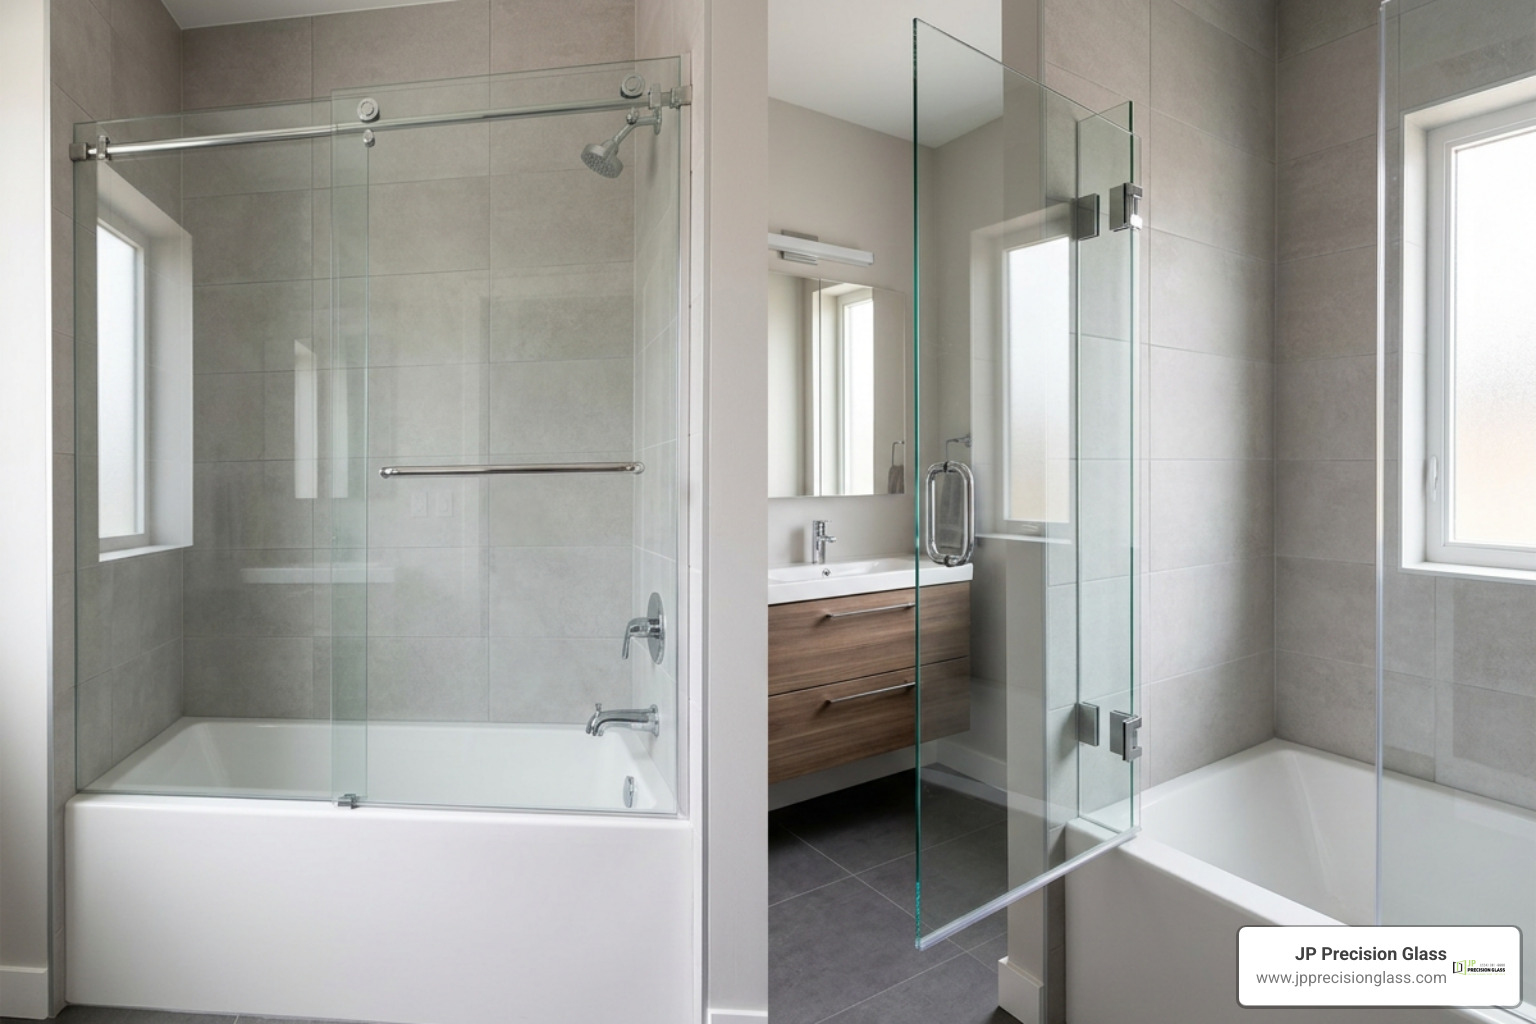
sliding vs hinged glass tub enclosure styles

Every bathroom layout presents unique spatial opportunities and constraints. Whether your tub sits inside a tight three-wall alcove or forms a two-sided corner configuration, choosing the correct enclosure style ensures smooth daily operation and effective water containment.

Frameless Sliding Glass Enclosure Tub Options

Sliding panels—often called bypass glass doors—are the most popular choice for standard alcove bathtubs. Because the glass panels slide laterally along a top header rail or roller track, they require zero outward clearance into your bathroom floor space. This makes sliding glass panels ideal for tight bathrooms where a vanity, toilet, or towel bar sits close to the edge of the bathtub.

Modern frameless sliding systems are engineered for silent, effortless operation. They feature exposed industrial top rollers equipped with anti-jump technology. These specialized anti-jump rollers keep the heavy glass panels securely locked into the overhead track, preventing any accidental derailment during fast or heavy sliding.

Additionally, many frameless sliding tub doors feature double bypass action, allowing both panels to slide left or right. This dual access makes it exceptionally easy to turn on the bath faucets from outside the tub or reach inside to wash children and pets. You can also integrate horizontal handle hardware that doubles as a sturdy towel bar directly mounted through the glass. To learn more about modern trackless mechanisms, check out our selection of Sliding Shower Doors.

Frameless Hinged Doors and Fixed Glass Screens

If your bathroom layout offers ample floor clearance in front of the bathtub, a frameless hinged swinging door or a fixed glass screen offers a remarkably clean, minimal look.

  • Frameless Hinged Doors: These doors pivot outward (and sometimes inward) on heavy-duty brass wall hinges. They provide a wider walk-in opening than sliding doors, giving your tub area an expansive feel. However, you must ensure that swinging doors clear toilets, vanities, and towel hooks without obstruction.
  • Single Fixed Screens and Half Doors: Also known as fixed bathtub shields or splash guards, these stationary glass panels cover approximately half the length of the tub—typically near the showerhead end. They block water spray where it matters most while leaving the rear of the tub open for entry.

Fixed screens eliminate moving mechanical hardware entirely, resulting in an uncluttered appearance. If you are weighing whether a partial barrier suits your bathing routine, read our guide on Splish Splash No Bath Pros and Cons of a Bathtub Glass Half Door.

Frameless vs. Semi-Frameless Design Options

Understanding the structural distinction between frameless and semi-frameless tub enclosures helps narrow down your choices:

Feature Frameless Enclosures Semi-Frameless Enclosures
Glass Thickness Heavy 3/8″ (10 mm) or 1/2″ (12 mm) Medium 5/16″ (8 mm) or 1/4″ (6 mm)
Metal Framing None around glass perimeter; secured with heavy clamps/hinges Partial perimeter framing, usually top header and wall channels
Cleaning Effort Minimal; no metal channels to catch dirt Moderate; minor metal seams require cleaning
Aesthetic Impact Sleek, modern, floating glass look Classic, refined appearance with defined borders
Structural Rigidity Relies entirely on heavy tempered safety glass Relies on metal frame support for lighter glass

Frameless designs highlight polished glass edges and subtle wall clamps, creating a seamless transition across the room. Semi-frameless options utilize metal framing along selective edges (such as wall channels or top support rails) to guide lighter glass panels while maintaining an open visual feel.

Selecting Glass Thickness, Safety Features, and Hardware Finishes

glass hardware finishes and heavy tempered glass panel

The performance, weight, feel, and visual character of your glass enclosure tub depend directly on the glass specifications and solid hardware components you select.

Glass Thickness and Safety Features for Your Glass Enclosure Tub

Safety is paramount when installing large panels of overhead or sliding architectural glass over a ceramic or acrylic bath deck. All residential tub glass panels must consist of toughened, heat-treated tempered safety glass. Tempered glass is engineered to be roughly four times stronger than standard annealed window glass. In the rare event of severe impact failure, tempered glass disintegrates into small, dull granular pieces rather than sharp, dangerous shards.

When choosing panel thickness, two standard options dominate modern installations:

  1. 5/16-Inch (8 mm) Glass: Commonly utilized in high-quality semi-frameless and lighter frameless sliding systems, such as standard alcove tub door combos. This thickness strikes an excellent balance between structural rigidity and operational weight, making doors easier to glide without placing extreme stress on wall studs.
  2. 3/8-Inch (10 mm) Glass: The gold standard for heavy, architectural frameless tub enclosures. Thick 3/8-inch panels feel solid to the touch, eliminate noticeable flex when pushed, and deliver premium sound dampening.

To maximize safety, premium glass tub enclosures often feature advanced shatter retention coatings—such as specialized clear protective film layers applied directly to the glass surface during fabrication. Shatter retention technology ensures that if the glass suffers an impact, the fractured safety granules remain glued to the inner protective film, preventing glass fragments from falling onto the tub deck. Pair this with anti-jump roller clips on sliding systems, and you achieve maximum structural security.

Hardware Finishes and Custom Aesthetics

Your mounting brackets, handles, hinges, top header rails, and door rollers are functional elements that double as decorative jewelry for your bathroom. Matching hardware finishes across your shower enclosure, sink faucets, towel bars, and cabinet handles unifies the entire room’s design motif.

Step-by-step selection process for glass tub enclosure selection

Popular hardware finish options include:

  • Polished Chrome: Bright, highly reflective, and classic. Chrome complements virtually any tile color and offers great water resistance, though it requires routine wiping to prevent water spots.
  • Brushed Nickel: Warm, soft metallic tones with subtle brushed graining. Excellent at hiding fingerprints and dried water drops, making it low-maintenance for busy households.
  • Matte Black: Bold, industrial, and deeply modern. Black hardware creates a striking visual frame around clear glass edges, especially when paired with white subway tile or natural marble.
  • Brushed Gold / Brass: Sophisticated, luxurious, and warm. Adds a refined pop of color that stands out against modern neutral tile palettes.

Explore our comprehensive catalog of durable brackets, handles, and seals under Shower Glass Accessories.

Sizing, Alcove Layout Requirements, and Handedness

Selecting or custom-fabricating a glass enclosure tub requires absolute precision. Unlike flexible fabric curtains, heavy tempered glass cannot be trimmed, cut, or adjusted once it undergoes the factory heat-tempering process.

Before ordering, verify these crucial structural requirements:

  1. Plumbing and Handedness Alignment: “Handedness” refers to the direction of entry relative to your bathtub’s plumbing fixtures. For example, a left-hand door placement means your primary entry opening sits on the left side as you face the tub. Aligning handedness ensures you don’t hit the showerhead spray when opening the door, while also allowing easy access to water control valves from outside the tub deck.
  2. Level Tub Deck and Plumb Walls: A glass panel must rest flat along the tub rim to seal out water effectively. If your bathtub deck slants slightly or your surrounding walls bow outward or inward (out-of-plumb), custom glass panels must be measured with laser levels and precision-cut with tapers to match your walls exactly.
  3. Internal Wall Support: Heavy 3/8-inch glass panels and overhead track rails require solid mounting points. Wall clamps and hinge brackets must anchor securely into solid wooden wall studs or reinforced backing behind tile or acrylic surrounds. Standard drywall anchors cannot support the weight of heavy architectural glass.
  4. Standard Alcove Dimensions: Standard bathtub openings measure 60 inches long, with tub deck depths typically ranging between 30 to 32 inches. Height dimensions for glass tub doors range between 58 and 66 inches above the tub rim. Measuring both top width, bottom width, and vertical height ensures an airtight fit.

For detailed measuring instructions and layout advice, read How to Choose the Perfect Bathroom Tub Glass Enclosures for Your Home.

Installation Process, Timeline, and Maintenance Tips

A seamless glass enclosure upgrade follows a systematic process from initial digital field measurements to the final silicone sealant cure:

  1. Precision In-Home Measurement: Our glass specialists measure your bathtub deck, wall plumbness, and tile layout using digital levelling tools to create exact production templates.
  2. Custom Fabrication Period: Custom glass panels are cut, notched for hinges/brackets, edge-polished, and treated with heat tempering. This fabrication stage generally takes 2 to 3 weeks.
  3. Physical On-Site Installation: On installation day, our installation team removes existing framed doors or curtain rods, cleans the tub rim, anchors mounting hardware into wall studs, hangs glass panels, adjusts anti-jump rollers, and applies high-grade mold-resistant silicone sealant along structural junctions. The physical installation process is swift—typically completed within 2 to 4 hours in a single visit.
  4. Silicone Cure Time: After installation is complete, the silicone sealant requires a strict 24-hour cure period before exposure to running water. Avoid touching sealant lines or running the shower during this window.

To maintain crystal-clear transparency over time and prevent hard water stains or mineral etching, follow these simple care practices:

  • Daily Squeegee Routine: Use a flexible rubber squeegee for 30 seconds after every bath or shower to sweep standing water drops into the tub drain.
  • Factory Hydrophobic Coatings: Choose factory-applied protective glass coatings (such as Microtek surface treatments). These invisible polymer treatments seal microscopic pores on the glass surface, causing water to bead up and slide off effortlessly without leaving mineral residue behind.
  • Gentle Cleaning Solutions: Clean your glass weekly using non-abrasive microfiber cloths and mild dish soap or diluted white vinegar. Never use harsh abrasive pads, steel wool, or heavy chemical solvents that could scratch metal hardware finishes or strip protective glass coatings.

For more maintenance tips and glass protection strategies, explore our guide on Shower Glass Upgrade.

Frequently Asked Questions About Glass Tub Enclosures

Can a glass enclosure be installed on any type of bathtub?

In almost all residential scenarios, yes! Custom glass enclosures can be engineered for standard three-wall alcove tubs, two-sided corner tubs, and built-in drop-in bathtubs. The core requirements are a flat, level tub rim (deck) for bottom seals and solid, plumb vertical walls with adequate internal stud backing to securely anchor mounting clamps or header tracks.

Freestanding clawfoot tubs or deep oval soaking tubs without surrounding walls generally require specialized ceiling-hung rod systems rather than wall-mounted glass enclosures, though surrounding glass half-walls can occasionally be custom-built around fixed soaking platforms.

How long does the professional installation process take?

The physical installation phase on the day of your appointment takes only 2 to 4 hours, which includes removing your old shower curtain or metal-framed door system. However, the complete project timeline includes the initial digital measurement visit and a 2 to 3-week custom fabrication window where your glass panels are tailored, polished, notched, and heat-tempered. Once installed, allow 24 hours for the clear mold-resistant silicone sealant to cure completely before turning on the shower.

What warranties are typically provided with glass tub enclosures?

High-quality glass tub enclosures are backed by comprehensive coverage. Most reputable manufacturers provide a 10-year limited product warranty covering glass clarity, structural hardware defects, and mechanical component integrity, along with dedicated 5-year coverage on specialized shatter retention protective films and anti-corrosion hardware finishes. Working with a dedicated professional installer ensures both product hardware and labor installation quality are fully protected.

Conclusion

Choosing the right glass enclosure tub turns an ordinary bathtub setup into a clean, bright, and modern feature. By assessing your bathroom layout, choosing between frameless sliding panels or swinging hinged screens, selecting heavy 3/8-inch safety glass, and specifying hardware finishes that complement your fixtures, you create a space that meets your daily needs.

At JP Precision Glass, we specialize in custom-engineered, made-to-measure glass tub enclosures across the Greater Chicago area. Whether you need a space-saving frameless bypass slider or a fixed splash shield for a modern alcove tub, our team handles every step with precision—from digital measurement to clean installation. Explore our full suite of custom solutions at Shower Doors Chicago to start planning your bathtub transformation today.