• JP Precision Glass is the leading glass shower doors company in Chicago

Category Archives: Shower Glass Door

Modern bathroom with a frameless glass tub door

Modernizing Your Bath: Practical Tips for Frameless Tub Doors

Choosing a Frameless Glass Door for Your Tub

Choose the door style that fits your room first. A sliding tub door needs no floor space to open, while a hinged door needs clear swing space. For either style, measure the opening after the tile is finished. Then check the glass thickness, safety markings, hardware, and how much adjustment the door allows for uneven walls.

A well-fitted frameless glass door for tub enclosures can make a small bathroom feel more open without changing the tub. The right choice depends less on looks alone and more on how the door will fit, open, and hold up to daily use. Removing the visual weight of a metal frame also helps light travel across the room, making the bathing area feel larger than its actual footprint.
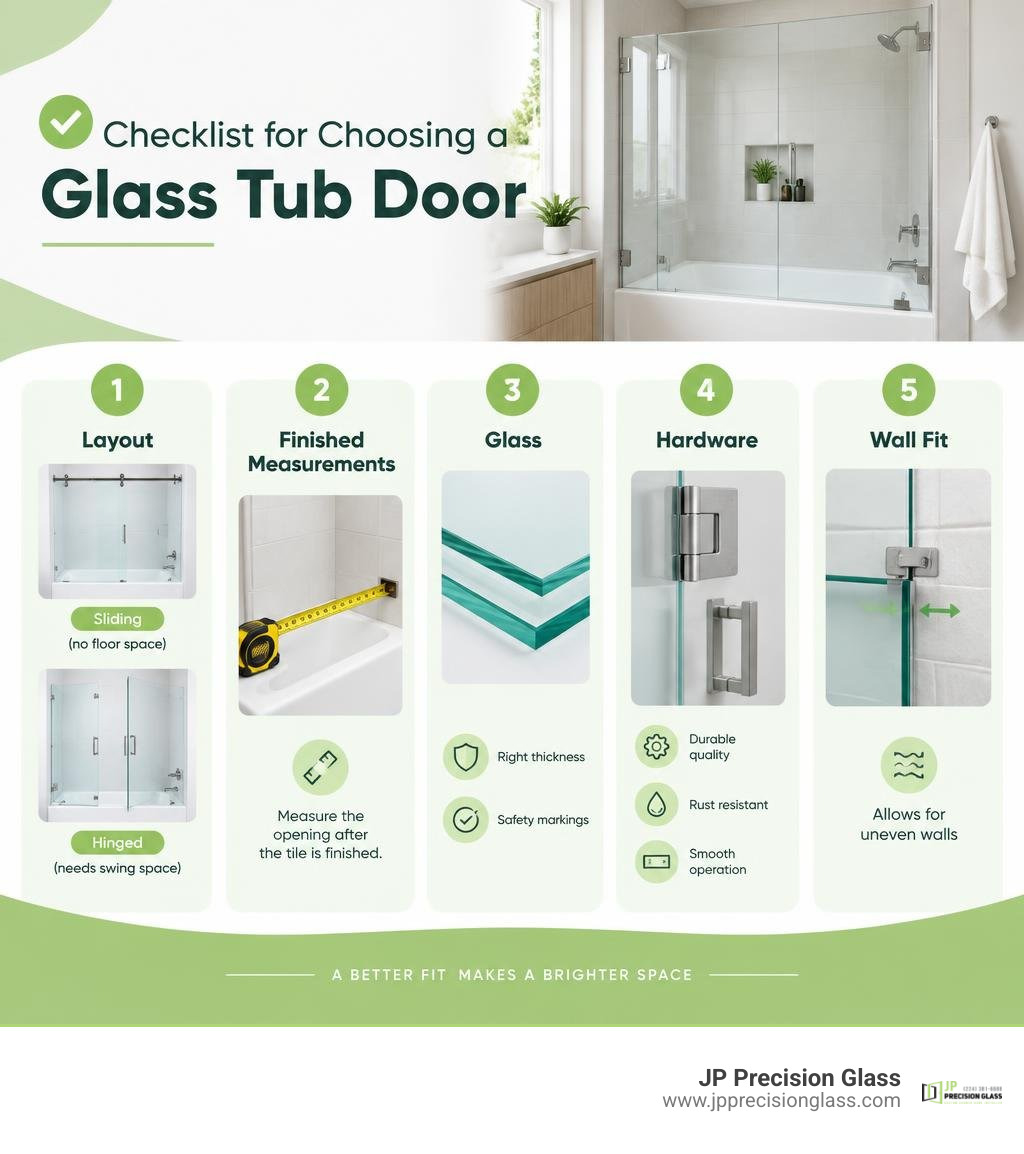
Checklist for choosing a glass tub door: layout, finished measurements, glass, hardware, and wall fit infographic

Frameless glass door for tub word roundup:

Choosing the Right Frameless Glass Door for Tub Configuration

Upgrading from a flimsy vinyl curtain to a solid glass enclosure instantly transforms an ordinary bath into a clean, modern focal point. By removing bulky metal frames, frameless systems maximize visual space and let light flow uninterrupted throughout the bathroom. When evaluating your layout, selecting the proper configuration represents the first major decision.

Homeowners typically choose between double sliding bypass systems, single swinging panels, or stationary splash guards. Exploring why sliding glass tub enclosures are making a major comeback highlights how versatile these configurations can be in standard alcove spaces.

Configuration Type Best Suited For Clearance Needs Entry Access
Double Sliding (Bypass) Tight spaces, compact layouts Zero outward floor clearance Dual-sided (left or right)
Hinged / Pivot Door Spacious, open layouts 24–36 inches outward swing Single-sided pivot entry
Fixed Splash Shield Minimalist, modern spaces Zero clearance required Walk-in open access

Sliding vs. Hinged Options

Double sliding bypass doors feature two independent panels gliding effortlessly along a top header guide. This design provides maximum flexibility because you can enter from either the left or right side of the tub—ideal for reaching in to turn on the water before stepping inside. Because the glass moves parallel to the tub deck, bypass doors require zero bathroom floor clearance, making them ideal for spaces where a vanity or toilet sits near the tub. Furthermore, bypass doors utilize slim bottom guide channels and structural anti-jump pins on the top track to keep panels safely aligned during everyday sliding.

In contrast, hinged doors swing outward into the main bathroom space on heavy-duty wall hinges. While they offer a truly seamless, minimalist appearance, you must ensure adequate clearance so the swinging panel does not hit cabinets, towel warmers, or toilets. If your bathroom layout allows for that outward arc, a hinged door provides a striking, open design statement that highlights intricate custom tilework inside the enclosure.

Functional Hardware and Double Towel Bars

The hardware on a sliding tub enclosure should serve both aesthetic and everyday practical needs. Premium sliding designs incorporate back-to-back towel bars mounted directly through pre-drilled holes on both sliding panels.
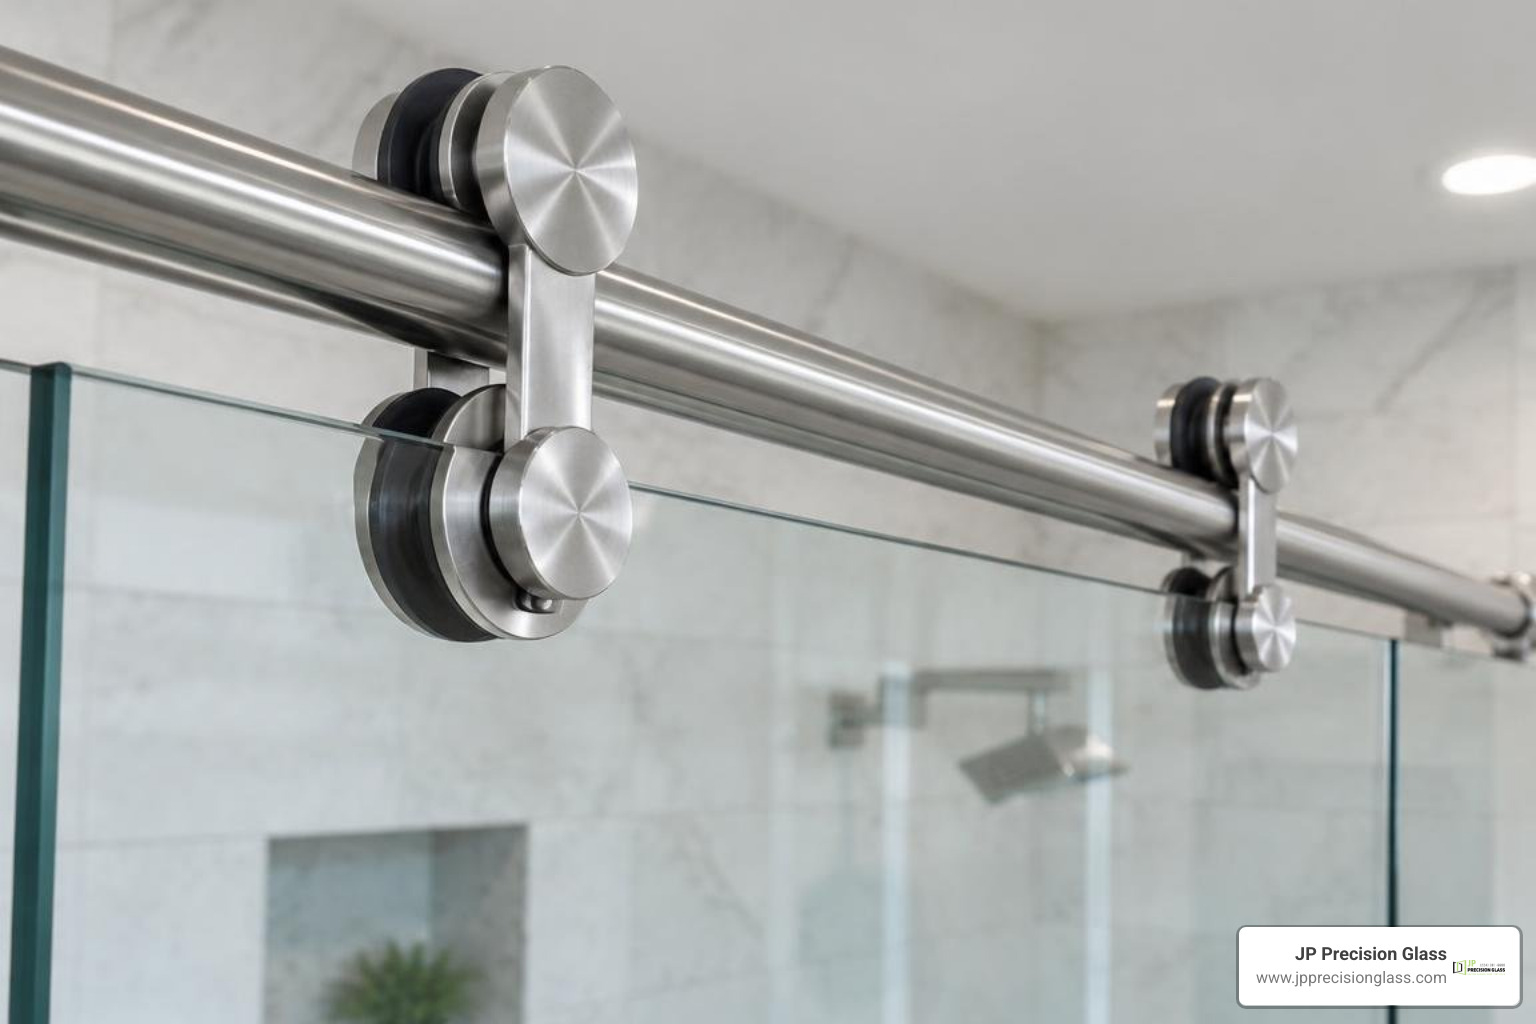
Stainless steel sliding tub door rollers mounted on top track

This dual-bar configuration solves a common bathroom challenge: providing a sturdy handle to slide the heavy glass from inside the shower while serving as a full-sized exterior towel bar. Look for high-grade solid rollers engineered to roll smoothly and silently along top guide tracks, paired with precision-machined stops that absorb impact without stressing the glass.

Glass Quality, Coatings, and Safety Standards

The safety, durability, and daily feel of your enclosure depend entirely on the quality of the tempered glass and hardware engineering. Understanding the core benefits of frameless glass shower doors helps clarify why solid structural glass outperforms lightweight alternatives in longevity and performance.

Why Glass Thickness Matters for a Frameless Glass Door for Tub

Standard retail tub doors often feature 6mm (1/4-inch) glass, which keeps shipping weight low but can feel flexible or rattle during operation. In contrast, 10mm (3/8-inch) tempered glass provides the substantial weight, structural rigidity, and stability required for a true luxury feel. The additional mass of 10mm glass eliminates flexing and delivers superior sound insulation against running water, creating a quiet and substantial showering experience.

Specification Feature 6mm (1/4-inch) Tempered Glass 10mm (3/8-inch) Tempered Glass
Structural Stability Moderate; noticeable panel flex High; solid, rigid structural feel
Sound Dampening Basic water deflection Enhanced acoustic insulation
Weight per Sq. Ft. ~3.1 lbs ~5.2 lbs
Track & Roller Demand Standard-duty hardware Heavy-duty solid stainless hardware

Surface Protection and Easy Maintenance

Unprotected glass is naturally porous. Over time, hard water minerals, soap scum, and lime scale etch into microscopic surface valleys, causing cloudy permanent staining.

To eliminate tedious scrub sessions, quality panels feature factory-applied hydrophobic nano-coatings like EnduroShield. This treatment chemically bonds to the glass surface, repelling water droplets and grime. A protective nano-coating reduces cleaning time by up to 90%, allowing routine wipe-downs with a simple microfiber cloth or squeegee. (While it keeps glass remarkably clean, we still recommend eating your meals at the dining table instead!)

Safety Certifications and Hardware Durability

Because tub enclosures must safely handle everyday family use, ensure your glass carries verified certifications from the Safety Glazing Certification Council and meets ANSI Z97.1 standards. Certified panels feature a permanent, subtle laser-etched logo in the corner verifying impact compliance and thermal tempering quality.

Hardware construction is equally crucial. Always insist on solid 304 or 316 marine-grade stainless steel for structural brackets, handles, and rollers. Lesser aluminum or plastic components can degrade, pit, and discolor in humid environments, while stainless steel resists rust and structural fatigue over decades of exposure.

Critical Measurement and Installation Steps

Achieving a clean, watertight enclosure requires meticulous planning. Reviewing our how to choose the perfect glass tub enclosure guide will help you align aesthetic goals with your home’s exact layout requirements.
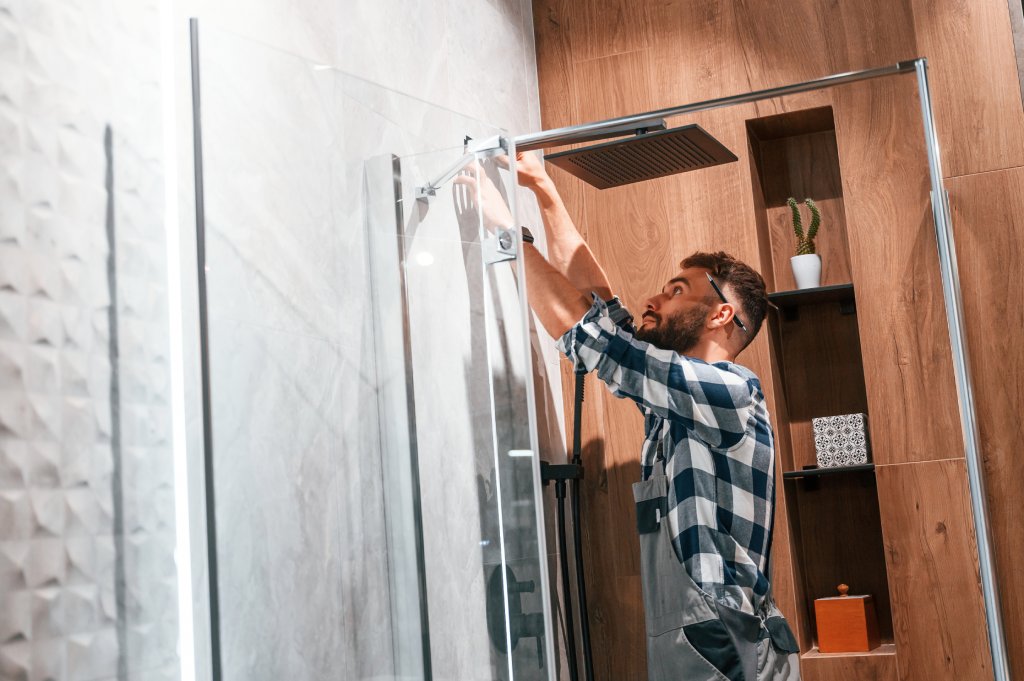
Plumb wall measurement check with spirit level on bathroom tile

Managing Out-of-Plumb Walls and Tub Decks

Rarely is a bathroom wall or tub ledge perfectly square. Settling foundations, framing shifts, and uneven mortar beds create out-of-plumb walls and out-of-level tub decks.
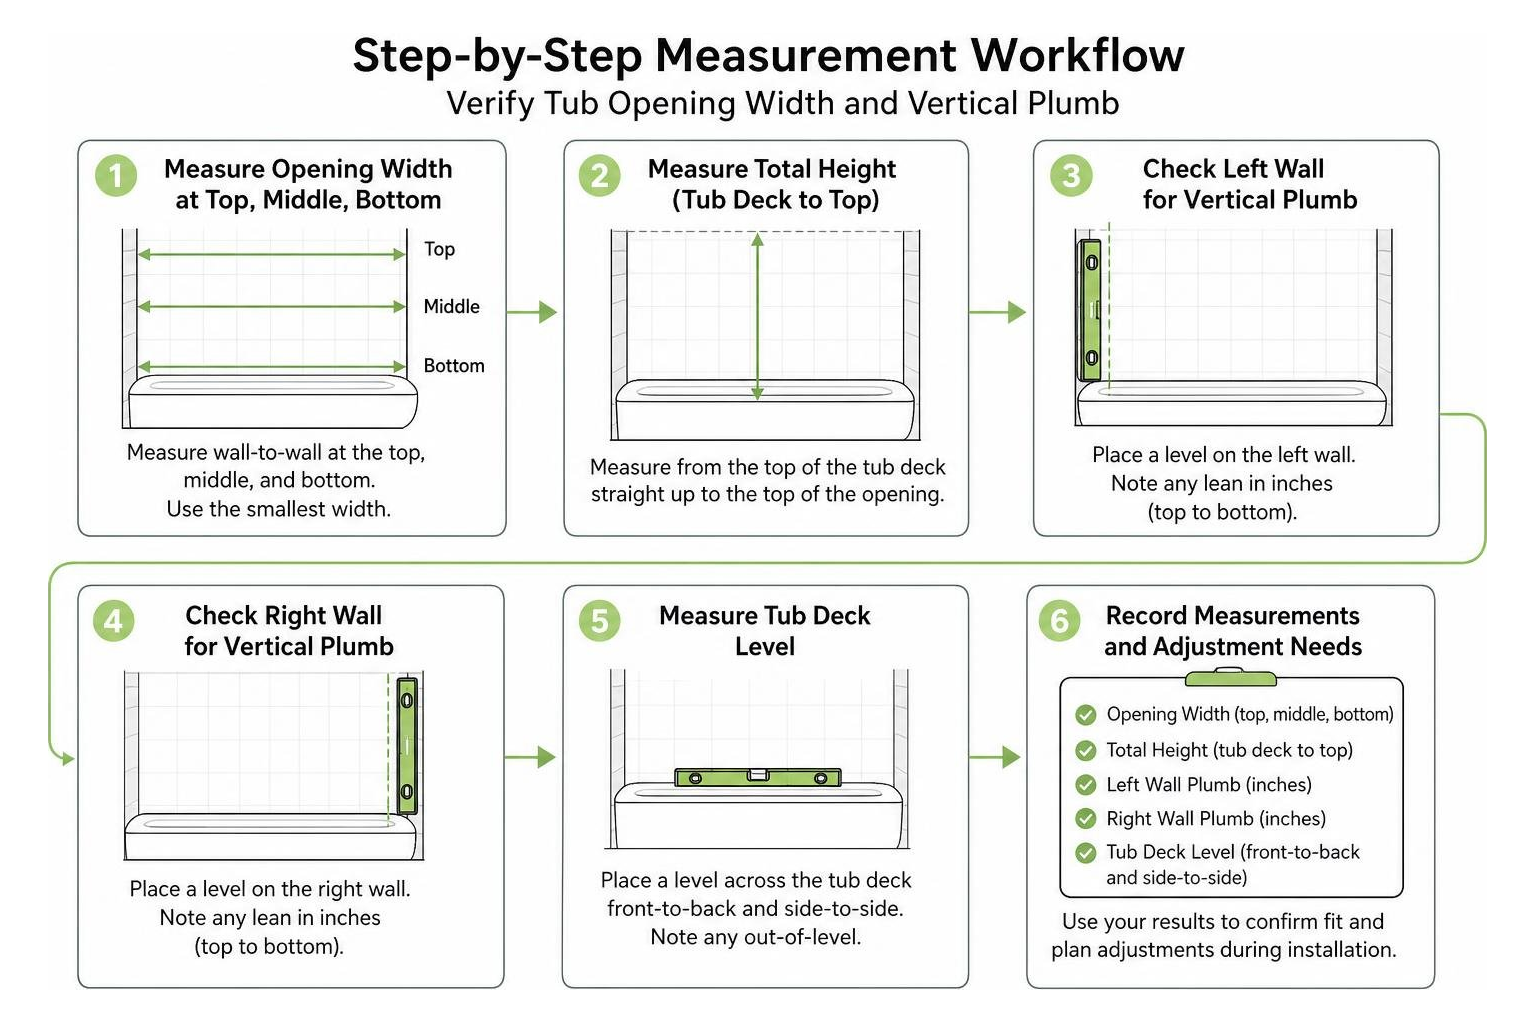
Step-by-step measurement workflow for verifying tub opening width and vertical plumb

Quality frameless and semi-frameless systems provide between 1/4-inch and 3/8-inch of built-in out-of-plumb adjustment within the wall jambs or hinge channels. This built-in tolerance allows installers to square the glass panels, ensuring tight magnetic or vinyl seal contact to prevent water leaks. If the opening leans beyond these standard tolerances, custom-tempered glass fabricated to exact angled dimensions is essential to ensure consistent edge reveal.

Preparing for Professional Installation

A standard 10mm glass tub panel can easily weigh between 70 and 100 pounds. Safely handling these panels requires specialized vacuum suction cups, precise drilling through delicate porcelain or stone tile, and structural anchoring into solid wood wall studs or reinforced blocking behind the wall surface.

A single dropped corner on a tile floor will shatter tempered glass instantly. To protect your investment and ensure an airtight, perfectly balanced fit, hiring a specialist for frameless shower door installation in Chicago, IL ensures the panels glide quietly and seal properly. Professional installers also verify that the tub deck is level before setting the glass, because even a small slope can shift the panel alignment and create uneven gaps along the bottom seal.

Frequently Asked Questions

What should I do if my tub glass arrives damaged or cracked?

If you order delivered glass products, inspect the freight packaging thoroughly before signing the delivery receipt. If you discover damage, take clear photos of the packaging and broken glass immediately. Contact the supplier or your installation provider within 48 hours to file a claim for a complimentary replacement panel.

Can I measure for my tub door before the tile is installed?

No. Never take final enclosure measurements before the tile or wall surround installation is 100% complete. Even minor variances in tile thickness, mortar beds, or backer boards can alter the finished width by 1/8 to 1/2 inch, which can make a factory-cut glass door unusable.

How much out-of-plumb wall variance can a tub door accommodate?

Most quality sliding and hinged tub door systems offer between 1/4-inch and 3/8-inch of lateral adjustment. If your walls lean beyond 3/8-inch, custom-cut tapered glass panels are required to maintain proper alignment and watertight seals.

Conclusion

Upgrading your bathroom with a frameless glass door enclosure delivers clean sightlines, easy maintenance, and long-term durability. By choosing heavy 10mm certified safety glass, corrosion-proof stainless steel hardware, and protective nano-coatings, you create an open, spa-like environment built for daily performance.

At JP Precision Glass, we specialize in precision-crafted glass solutions tailored to your space. Ready to elevate your tub enclosure? Explore our custom shower doors in Chicago to schedule your custom design consultation today.
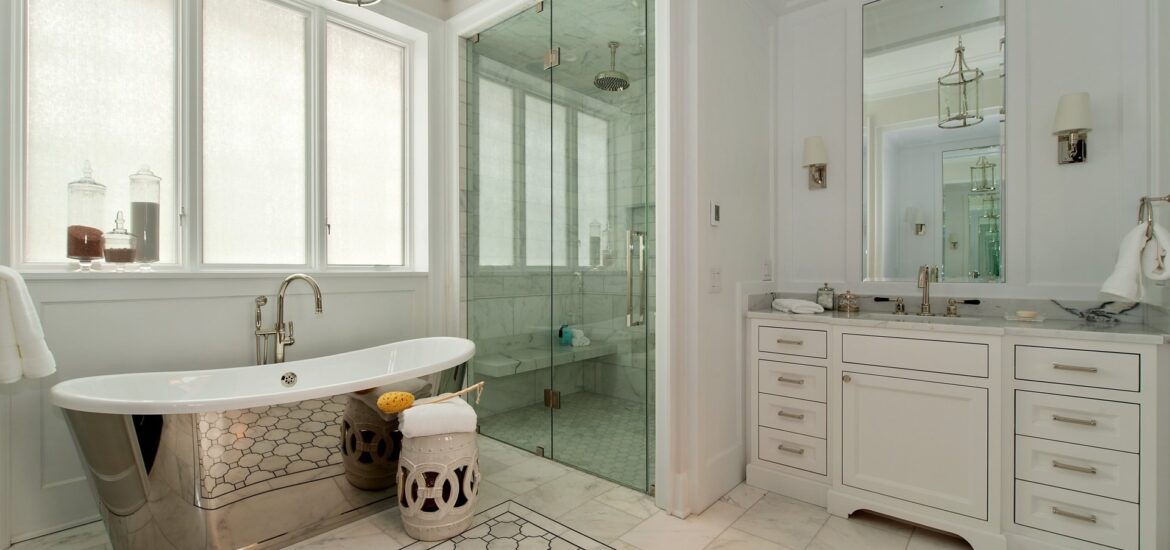
freestanding tub with glass enclosure

Stunning Freestanding Tub and Glass Enclosure Design Ideas

Plan a Freestanding Tub With Glass Enclosure That Feels Open

A freestanding tub with glass enclosure can work beautifully, even in a smaller bathroom, when the layout protects clear walking paths and keeps sightlines open. Start by choosing a compact tub, allow room to clean around it, and use clear frameless glass to separate the shower without creating a visual wall.

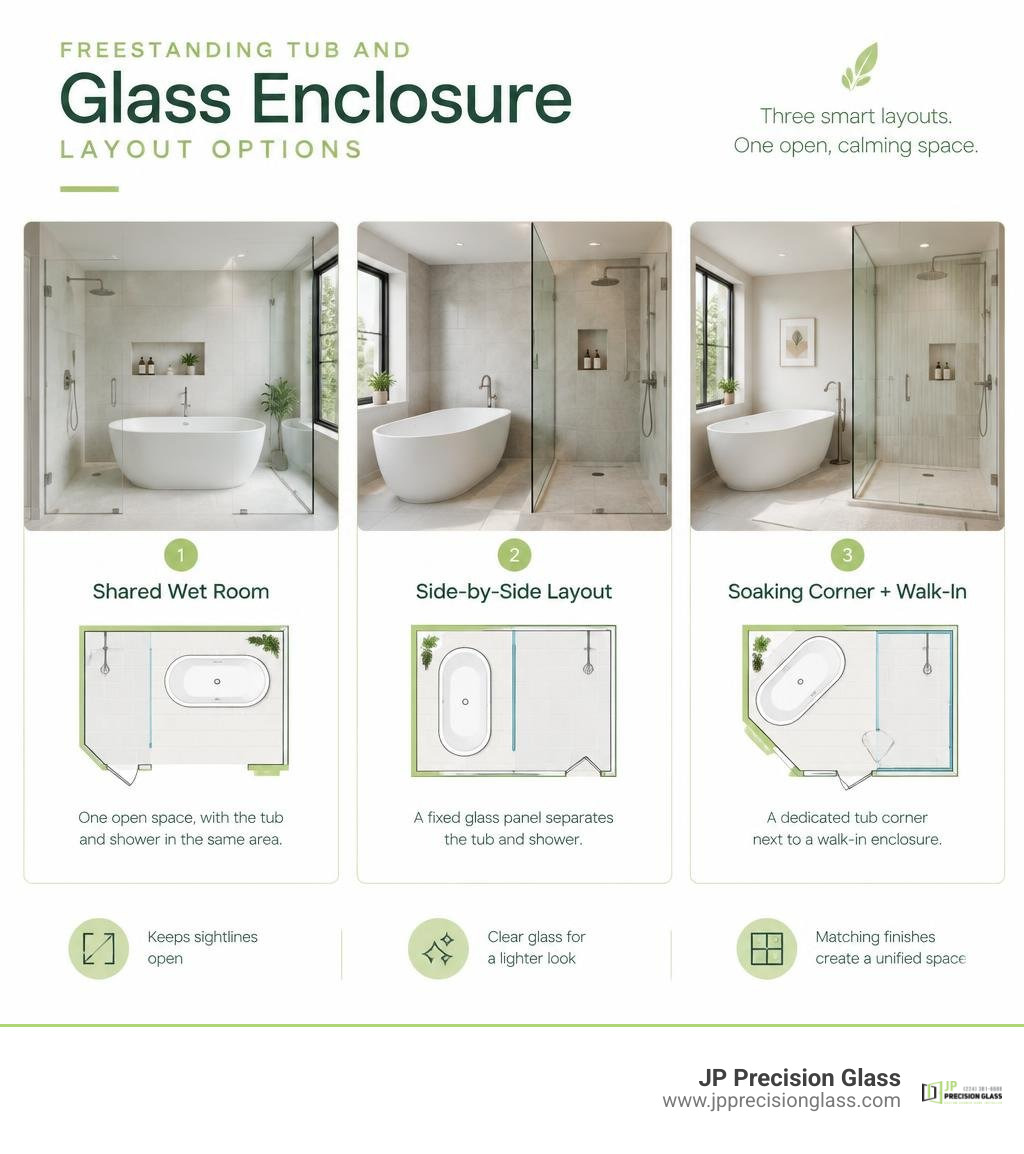
The most successful designs usually use one of three approaches: a shared wet room, a side-by-side tub and shower divided by a fixed glass panel, or a dedicated soaking corner next to a walk-in enclosure. Matching tile, metal finishes, and fixture scale helps the two zones feel like one calm, intentional space rather than a crowded collection of features.

Freestanding tub and glass enclosure layout options infographic

Freestanding tub with glass enclosure basics:

Top Layout Configurations for a Freestanding Tub with Glass Enclosure

When planning a bathroom remodel, pairing a freestanding soaking tub with a modern glass shower requires thoughtful floor plan zoning. The goal is to strike an architectural balance where neither fixture overwhelms the other. Depending on your room’s square footage, window placement, and plumbing footprint, three primary configurations stand out.

open-concept wet room with a standalone tub behind glass

The Shared Wet Room Freestanding Tub with Glass Enclosure

The wet room format places both the freestanding tub and the showerhead inside a single, fully waterproofed glass enclosure. Rather than walling off the shower in one corner and placing the tub in another, the two fixtures share a unified zone.

This approach offers major functional and visual advantages:

  • Continuous Floor Tile: By running unbroken floor tile across the entire wet zone, the bathroom appears significantly larger than it actually is.
  • Curbless Entry: Eliminating traditional shower curbs creates a barrier-free transition that enhances modern, minimalist aesthetics.
  • Open Containment: Oversized tempered glass panels keep splashing water contained while preserving direct sightlines to a contemporary oval freestanding bath.

Because the entire enclosure is engineered to get wet, you don’t have to worry about water dripping onto delicate dry-zone flooring when stepping out of the tub.

Side-by-Side Installation with a Frameless Glass Partition

In a side-by-side configuration, the freestanding tub sits directly adjacent to a walk-in shower, separated only by a sleek, stationary glass panel. This layout is a favorite in linear bathrooms where plumbing runs along a single structural wall.

Step-by-step layout planning framework for side-by-side tub and glass installations

The primary secret to making this layout work is leveraging the benefits of frameless glass shower doors. Heavy framed enclosures introduce bulky metal tracks that chop up the room. In contrast, ultra-clear, low-iron frameless glass delivers seamless splash protection without interrupting the flow of natural light. The tub remains on full display as a sculptural centerpiece while the shower functions independently right next to it.

Dedicated Corner Soaking Zone Alongside a Walk-In Enclosure

If your bathroom features an L-shaped layout or awkward alcoves, tucking the tub into its own corner zone while keeping the glass shower enclosure opposite or adjacent offers exceptional footprint efficiency.

Understanding how to style a corner tub glass enclosure allows you to turn an underutilized corner into an intentional spa retreat. Positioning a compact soaking tub beneath a window or along an accent wall adds depth to the room. Meanwhile, an independent glass shower enclosure anchors the opposite wall, maintaining clear walking corridors throughout the center of the bathroom.

Key Clearance and Space Requirements for Dual Tub and Shower Layouts

Nothing ruins the luxury of a primary bathroom faster than a cramped, claustrophobic layout. Before purchasing fixtures, understanding minimum dimensions, door swings, and ergonomic clearances ensures the room remains comfortable and functional.

well-spaced bathroom showing clearances between tub and glass

Wet Room Dimensions vs. Separate Zone Footprints

A shared wet room is inherently more efficient with floor space than designing two completely separate dry-and-wet zones. The comparison below illustrates typical spatial requirements:

Layout Configuration Minimum Recommended Space Optimal Space Best Suited For Key Spatial Benefit
Shared Wet Room 60 – 75 sq. ft. 80 – 90 sq. ft. Compact & medium primary baths Tub and shower share splash clearance
Side-by-Side (Glass Partition) 75 – 90 sq. ft. 100 – 120 sq. ft. Long, rectangular bathrooms Consolidates plumbing along one wall
Separate Defined Zones 90 – 100 sq. ft. 120 – 150+ sq. ft. Large, open master suites Independent traffic flow around each fixture

Achieving Adequate Clearance Around a Freestanding Tub with Glass Enclosure

To look its best, a freestanding bathtub needs “breathing room.” Shoving a tub flush against a glass panel or drywall eliminates its sculptural appeal and creates a cleaning nightmare where dust and moisture get trapped.

  • Perimeter Buffer: Maintain at least 6 to 12 inches of open clearance between the rim of an acrylic double-ended soaking tub and any adjacent glass partition or wall.
  • Door Swing Clearances: Ensure hinged glass shower doors have at least 24 to 30 inches of unobstructed outward swing path, preventing them from striking the tub rim or external fixtures.
  • Cleaning Access: Leaving adequate space allows a mop, squeegee, or hand to slide easily between the tub exterior and the shower glass.

Design and Aesthetic Strategies to Keep the Space Cohesive

Combining a freestanding tub and a custom glass enclosure requires unified styling so the components complement rather than compete with one another.

Material Continuity and Coordinated Hardware Finishes

Visual harmony starts with hardware coordination. If your freestanding tub filler features a sleek matte black or warm brushed brass profile, carry that exact metal finish across your shower door hinges, handles, channel clamps, and showerheads.

When exploring glass shower door styles, selecting low-profile hardware in matching finishes ties the enclosure to the tub tapware seamlessly. Repeating tile textures—such as running vertical subway tile behind the tub and continuing it inside the shower stall—further enhances aesthetic continuity.

Preventing Visual Clutter with Frameless Glass and Sightlines

Visual clutter makes even spacious bathrooms feel tight. To maintain an open, airy ambiance:

  1. Choose Heavy Tempered Glass: Opt for 3/8-inch or 1/2-inch architectural tempered glass to minimize bulky perimeter framing.
  2. Prioritize Uninhibited Views: Clear glass ensures that anyone entering the room looks right through the enclosure to the back tile work and the tub, making the entire footprint feel expansive.
  3. Elevate Other Elements: Pair the enclosure with floating vanities and minimalist wall-mounted fixtures.

You can get a sense of how frameless glass expands smaller spaces by viewing completed glass installations in our project portfolio.

Plumbing, Weight, and Waterproofing Essentials Before You Build

A flawless bathroom requires robust engineering behind the walls and underneath the subfloor.

Subfloor Load Bearing and Floor-Mounted Fillers

A standard 60-inch acrylic tub holds roughly 60 to 70 gallons of water. Since water weighs 8.34 pounds per gallon, a full tub easily exceeds 500 to 600 pounds before factoring in the bather’s weight.

  • Joist Inspection: Always have a contractor verify that floor joists can handle the concentrated static load without sagging.
  • Supply Lines: Floor-mounted freestanding tub fillers require rigid subfloor mounting brackets and integrated shut-off valves beneath the finished floor to prevent wobbling and leaks.

Waterproofing Membranes and Dual Drainage Strategy

Managing water flow and humidity is critical:

  • Membrane Systems: In wet room setups, continuous sheet membranes (like Schluter-Kerdi) must extend across the entire floor and travel up walls well past splash zones.
  • Dual Drainage: Wet rooms require carefully pitched floors sloped toward a high-capacity linear or center drain, completely separate from the tub’s dedicated pop-up waste line.
  • Proper Ventilation: Ensure your exhaust fan is rated for the combined cubic footage of the tub and shower zone (at least 1 CFM per square foot) to prevent moisture buildup on glass panels.

Frequently Asked Questions About Freestanding Tubs and Glass Enclosures

Will a glass shower enclosure look awkward placed directly next to a freestanding tub?

Not when designed with proper proportion and alignment. Aligning the edge of the glass partition with the centerline or end radius of the tub creates clean, architectural sightlines. Using clear frameless glass makes the partition practically disappear, highlighting the tub as a deliberate design feature rather than an afterthought.

Can a freestanding tub and glass enclosure fit in a small bathroom?

Yes. By choosing a compact freestanding tub (between 53 and 59 inches in length) and integrating it into a shared wet room or placing it alongside a custom stationary glass screen, homeowners can fit both fixtures into bathrooms as compact as 60 to 70 square feet without sacrificing openness.

How much clearance should you leave between a freestanding tub and a glass shower panel?

Ideally, you should leave between 6 and 12 inches of clearance between the tub rim and the glass partition. This spacing provides enough room for hands and cleaning tools while preserving the distinct silhouettes of both the tub and the glass enclosure.

Conclusion

Pairing a freestanding soaking tub with a custom glass enclosure is one of the most transformative upgrades you can make to your home. By choosing an efficient layout, maintaining proper clearances, and selecting high-performance materials, you can create a luxurious, spa-like sanctuary that maximizes both space and light.

At JP Precision Glass, we specialize in made-to-size, precision-cut glass enclosures that bring high-end bathroom concepts to life. Whether you are building an open-concept wet room or need a sleek partition next to your standalone tub, our team provides the craftsmanship and quality you need. Reach out today for expert custom shower door installation in Chicago to start planning your dream bathroom.

bath shower screen with return

Is a Bath Shower Screen with Return Worth the Splurge?

Is a Bath Shower Screen with Return Worth It?

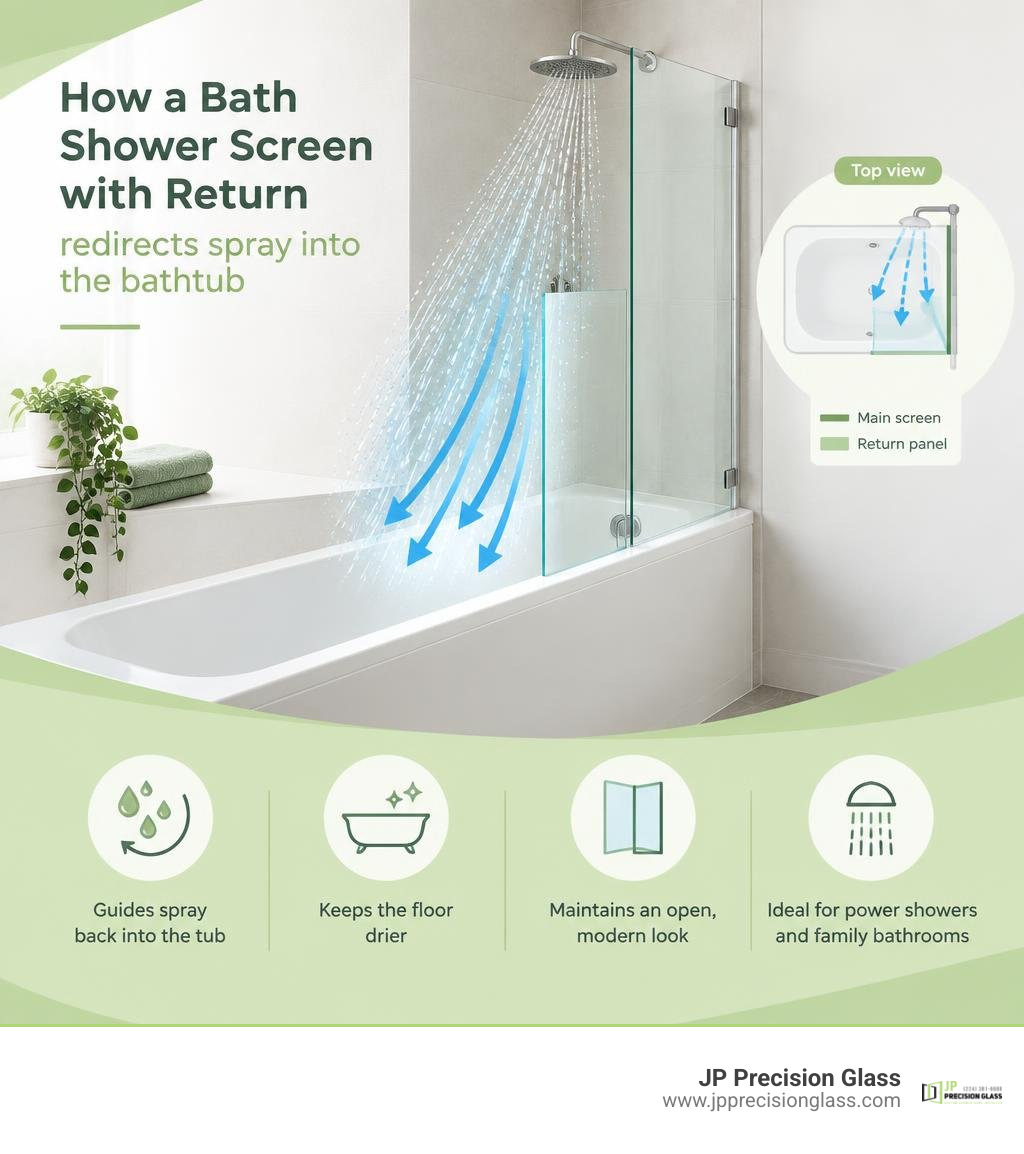
Yes, a bath shower screen with return is usually worth choosing if you want better splash control without closing off the bathroom. It adds a short glass panel at the open edge of the main bath screen, creating an L-shaped barrier that guides spray back into the tub.

It is especially useful for power showers, busy family bathrooms, and tubs with a wider showering end. Compared with a standard single flat screen, a return panel helps keep the floor drier while preserving the clean, open look of glass.

Before choosing one, confirm that:

  • Your bath has a flat, suitable rim for the screen and return panel.
  • The screen matches the bath shape, whether straight, L-shaped, P-shaped, or curved.
  • There is enough clearance for a fixed or hinged panel to sit safely near the bath edge.
  • The glass, seals, and wall fixings are sized for your bathroom’s layout.

A well-fitted return is not a guarantee against every drop of water, but it greatly reduces the main splash path that escapes around the end of an over-bath screen. For a remodel where sleek design, easy cleaning, and practical water control matter, it can be a smart upgrade. For broader context on how these enclosures compare with other glass options, see the shower enclosure overview.

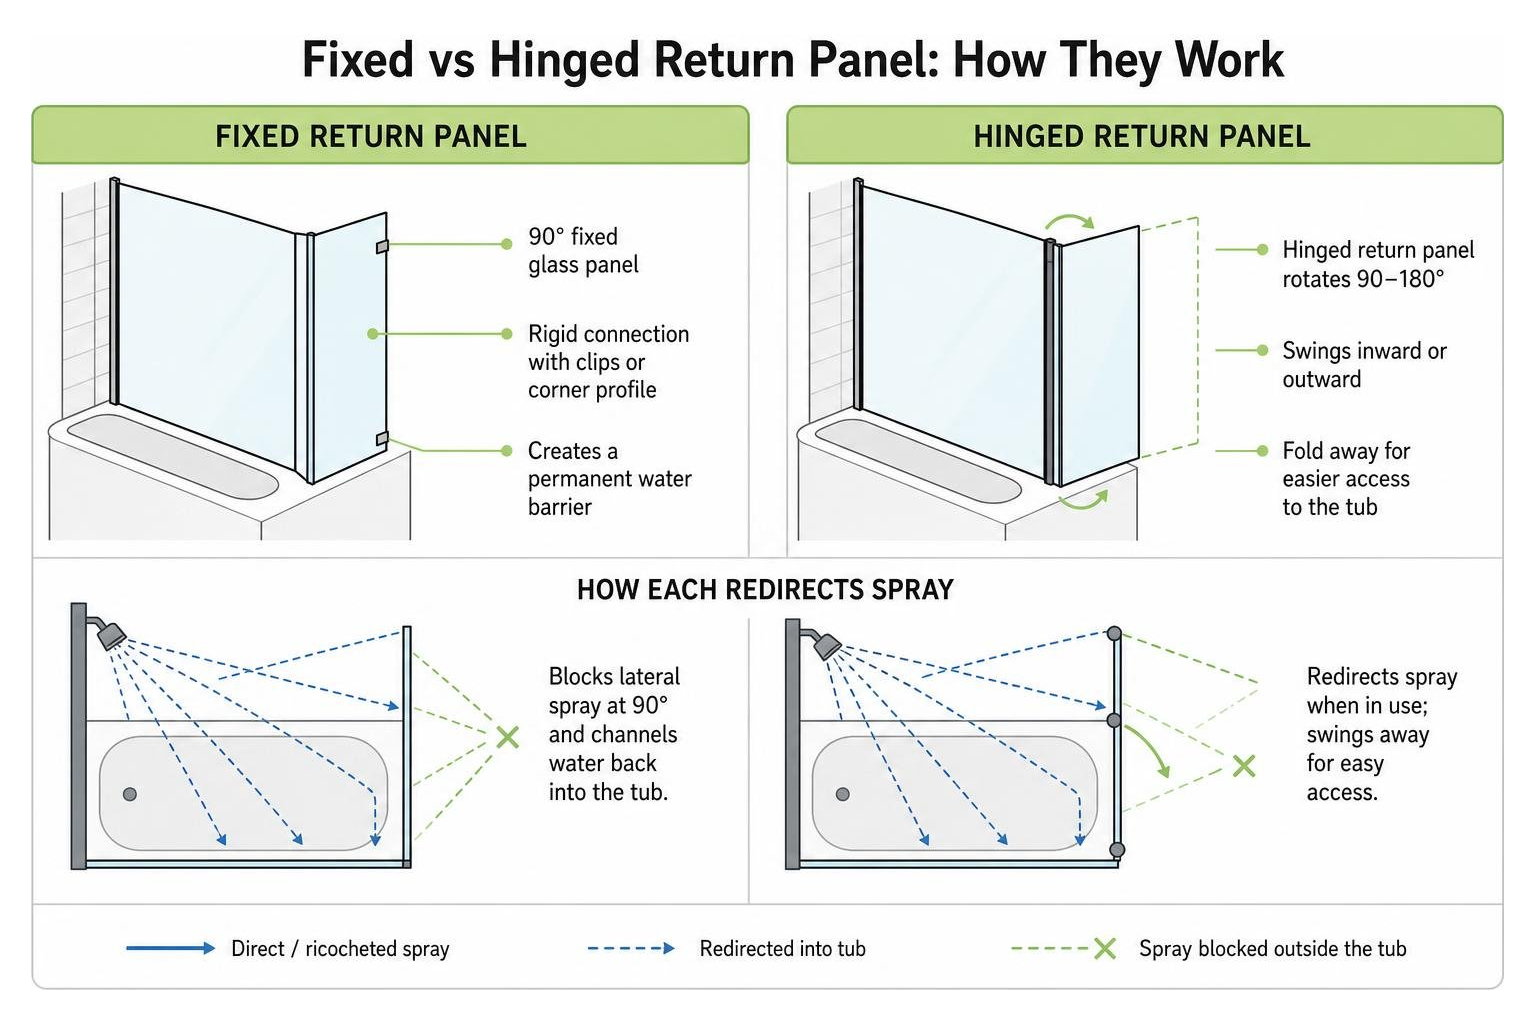
How a bath shower screen with return redirects spray into the bathtub infographic

Quick look at bath shower screen with return:

What Is a Bath Shower Screen with Return and How Does It Work?

An over-bath showering setup brings together the relaxation of a soaking tub with the daily convenience of a standing shower. However, standard single-panel glass screens often leave a significant gap where ricocheting water escapes onto the bathroom floor. This is where a return panel comes into play.

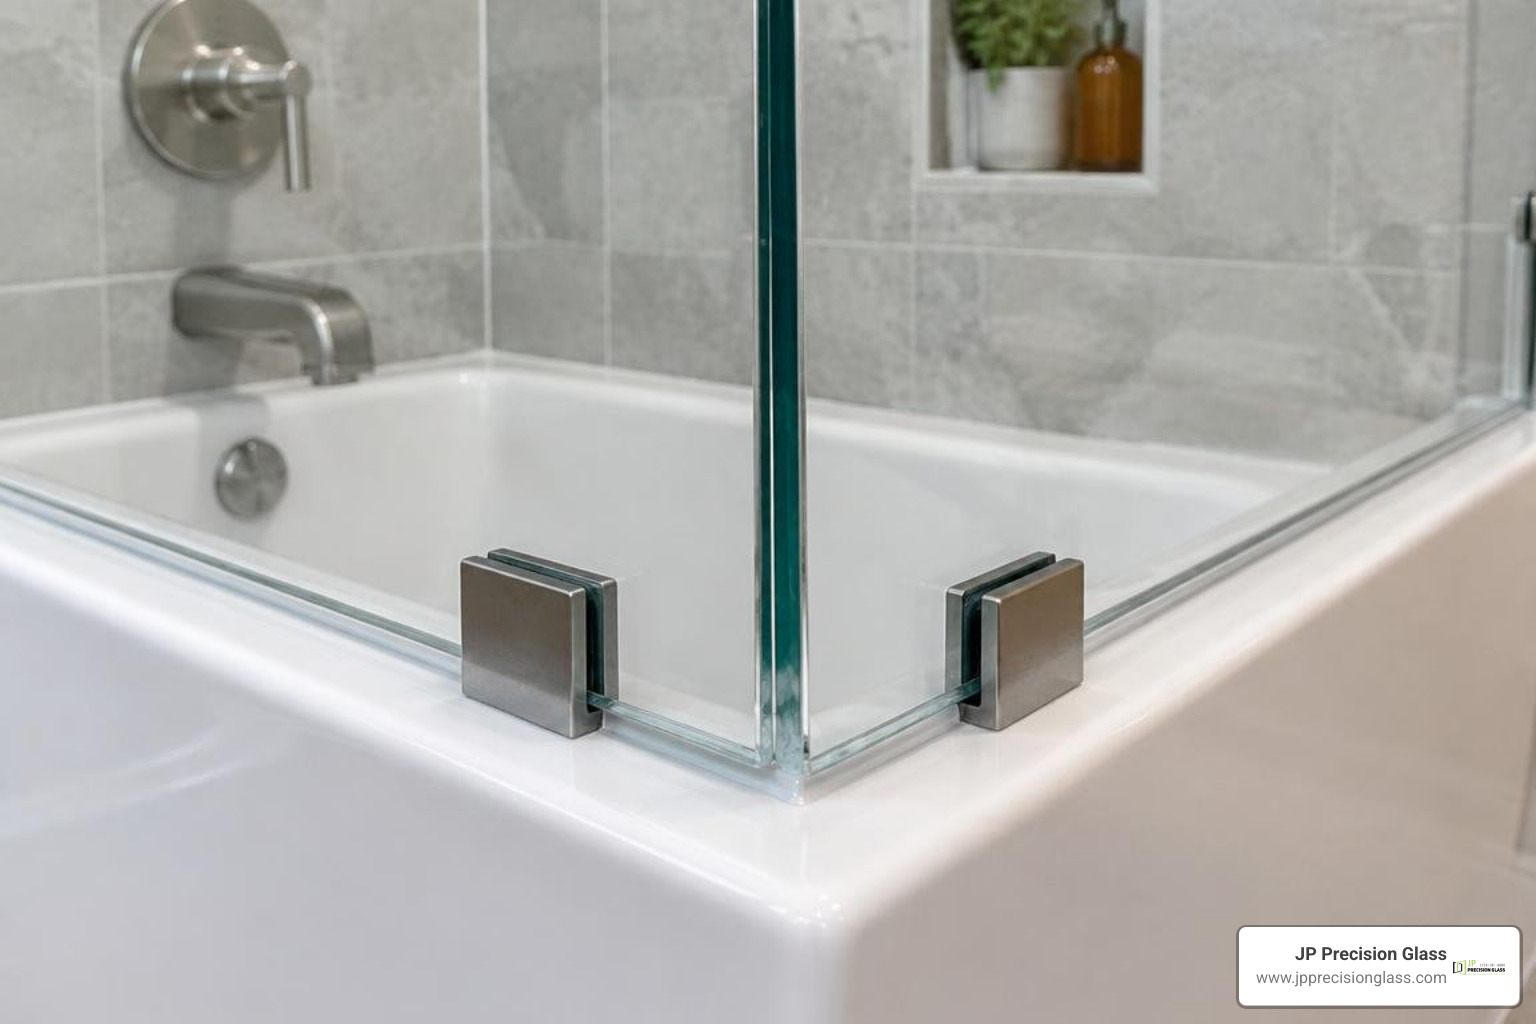
close-up of a fixed 90-degree return screen joint

A return panel is an additional, shorter pane of glass positioned at an angle—most commonly a 90-degree right angle—at the outer edge of the primary bath screen. By forming an L-shaped footprint along the rim of the bathtub, the return creates an inward-facing barrier.

When you shower, droplets do not just spray straight ahead; they bounce off your body, deflect off the side walls, and travel outward diagonally. The return panel blocks this lateral spray trajectory and channels the water back down into the tub basin, dramatically enhancing splash protection without turning your bath into a fully boxed-in cubicle.

Anatomy of Fixed vs Hinged Return Panels

Return screens generally fall into two functional categories:

  1. Fixed Return Panels: These panels attach rigidly to the main screen using stationary glass clips or a corner profile. Because they do not move, they offer high structural stability and create a permanent water barrier. They are particularly popular on dedicated L-shaped shower baths.
  2. Hinged Return Panels (Flipper Screens): Equipped with a continuous hinge or concealed pivot hardware, a flipper screen can rotate 90 to 180 degrees inward or outward. This allows you to swing the deflector panel inward to reach tub controls without getting soaked, or fold it back out of the way when stepping into the bath.

comparison of fixed versus hinged return panel mechanics

Single Over-Bath Panels vs. a Bath Shower Screen with Return

A standard single straight screen only shields the length of the tub directly adjacent to the wall. Water spraying toward the open end of the tub easily rolls off the rim. Adding a return panel encloses the splash zone on two planes, protecting sensitive vanity units and floorboards from chronic moisture damage.

Feature Single Straight Screen Screen with Fixed Return Screen with Hinged Return
Water Containment Moderate; allows side spray escape Excellent; full 2-sided barrier High; flexible splash deflection
Access Convenience Open entry Fixed entry point Hinged panel swings clear
Tub Compatibility Straight, standard tubs L-shaped and wide straight tubs Straight and curved baths
Visual Footprint Minimalist line Defined shower corner Sleek, adjustable profile

When deciding on the right layout for your space, learning how to choose the perfect glass tub enclosure can help you match your bathing habits with the right glass style.

Key Benefits: Water Containment and Enhanced Usability

Upgrading to a bath shower screen with return transforms a routine shower-bath hybrid into a dedicated showering zone.

minimalist bath screen with return preventing water escape

Superior Splash Protection for Power Showers

High-pressure showerheads and aerated power showers produce a high volume of turbulent spray. A single flat pane often struggles to contain this increased water velocity. The angled return acts as a deflector wall, stopping escaping mist and droplets right at the critical escape corner.

Quality designs feature continuous bottom gaskets and precision-fitted wall profiles to prevent pooling along the tub ledge. For bathrooms with specialized layouts, adding dedicated bath shower screen extension panels provides an extra layer of splash defense tailored to high-output shower systems.

Space Optimization and Open Bathroom Feel

Clear glass enclosures allow sightlines to pass uninterrupted across the room, making compact bathrooms feel significantly larger and brighter.

Even in tight quarters where every millimeter counts, choosing a compact 500mm glass shower screen or an over-bath return setup delivers the functionality of a walk-in shower enclosure without sacrificing the tub. Many return screens also feature integrated horizontal towel rails on the exterior glass, keeping your bath sheets dry, warm, and within arm’s reach.

Bathtub Shape Compatibility and Sizing Factors

Bath screens with return panels are engineered to complement a wide range of modern tub profiles.

Straight, L-Shaped, and P-Shaped Bathtub Configurations

  • Straight Baths: Standard rectangular tubs benefit from a square-edged screen with a fixed or hinged 300mm return to catch lateral spray along the straight rim.
  • L-Shaped Shower Baths: Designed specifically with an expanded, squared showering end, L-shaped baths pair naturally with a 90-degree fixed return panel that follows the exact contour of the tub’s outer ledge.
  • P-Shaped and Curved Baths: These tubs feature a rounded, ergonomic bulge at the showering end. They require curved bath screens paired with articulated or curved return sections that contour to the bath’s unique radius.

Reversible Handing and Layout Versatility

Most return screens feature universal handing, meaning the hardware and glass panels are completely reversible. During installation, the screen can be configured for either a left-hand or right-hand wall mount. This versatility ensures you can easily position the glass to clear vanity basins, toilet suites, and wall-mounted towel radiators without obstructing entry.

Glass Specifications, Hardware Finishes, and Aesthetic Styles

The durability and appearance of your screen depend directly on the materials you select. Consulting comprehensive glass shower enclosure comparisons can help clarify how different specifications perform over decades of daily use.

Choosing the Right Glass Thickness for a Bath Shower Screen with Return

Bath screens typically use toughened safety glass (tempered glass) to comply with rigorous safety standards:

  • 6mm Safety Glass: The most common standard for hinged over-bath screens. It balances strength, lightweight operation, and smooth hinge movement.
  • 8mm Premium Glass: Provides greater structural rigidity, reducing screen flex and giving the installation a solid, luxurious feel.
  • 10mm Frameless Glass: Ideal for high-end bespoke enclosures. If you are exploring 10mm frameless shower screen options, keep in mind that the increased weight requires heavy-duty wall anchors and sturdy structural backing.

High-grade screens often include an easy-clean factory nano-coating that repels water and prevents limescale, soap scum, and hard mineral buildup.

Hardware and glass treatments allow you to personalize your enclosure:

  • Polished Chrome: A timeless, reflective finish that complements traditional and contemporary chrome brassware.
  • Matte Black: Crisp, architectural framing that grounds industrial, monochrome, and modern designs.
  • Brushed Brass: Warm metallic hardware that pairs well with organic textures and earthy tiles.
  • Decorative Glass: Fluted (reeded) glass offers tactile elegance and visual privacy, while silk-screened grid patterns or subtle smoked glass create striking focal points.

Measuring and Installation Best Practices

Precision is essential when fitting an over-bath screen. Even minor discrepancies in bath level or wall plumb can lead to water pooling or seal failure.

Accurate Measurement Steps for Bathtub Screens

Before ordering your screen, verify these critical checkpoints:

  1. Check Wall Plumb: Use a long spirit level to check if your tiled wall leans inward or outward. Choose a wall profile that offers built-in out-of-true adjustment (typically 15mm to 20mm).
  2. Confirm Bath Rim Levelness: Verify that the bathtub deck sits level along both its length and width.
  3. Measure Rim Width: Ensure the flat landing area of the tub rim is wide enough to seat the glass channel and bottom drip seal without hanging over the edge.
  4. Account for Obstructions: Check the full swing radius of hinged panels to confirm they clear faucets, shower valves, and nearby sanitaryware.

Maintenance, Seal Replacement, and Glass Care

Keeping your glass screen pristine requires simple, consistent habits:

  • Use a soft silicone squeegee after each shower to wipe away standing droplets.
  • Clean glass surfaces using non-abrasive, pH-neutral cleaners and a microfiber cloth to protect the water-repellent coating.
  • Inspect the bottom vinyl sweep and vertical magnetic seals periodically. Replacing worn seals every few years maintains an impenetrable water barrier.

Frequently Asked Questions About Over-Bath Screens

Does a bath screen with a return panel prevent all leaks?

While an L-shaped return panel dramatically reduces escaping spray compared to standard straight screens, it is designed to redirect indirect spray and splashing. It is not an airtight seal against high-pressure water streams sprayed directly at the glass joints. Directing your showerhead toward the tiled wall rather than directly at the screen joint ensures reliable water containment.

Can a return panel screen be fitted to any standard bath?

Most screens can be fitted to standard rectangular baths, provided the bath rim has a flat, level surface at least 40mm to 50mm wide. Tubs with steep internal slopes, pronounced roll tops, or uneven decorative rims may not allow bottom seals to seat properly.

Is a fixed return panel better than a hinged flipper screen?

It depends on your bathroom layout. A fixed return panel provides exceptional structural stability and a permanent barrier, making it ideal for dedicated shower baths. A hinged flipper panel offers greater accessibility, allowing you to fold the deflector inward to turn on the taps or bathe small children without leaning over rigid glass.

Conclusion

Upgrading to an over-bath shower screen with a return panel delivers the splash-stopping security of a dedicated enclosure while maintaining an open, airy bathroom environment. By blocking lateral spray, protecting your flooring, and providing a clean architectural look, it offers substantial long-term value for modern homes. When you are ready to elevate your space with custom, precision-crafted installations, explore our premium collection of made-to-measure glass shower panels to find the perfect fit for your bathroom.

corner tub glass enclosure

How to Style a Corner Tub Glass Enclosure Like a Pro

Style a Corner Tub Glass Enclosure for Space, Light, and Privacy

A well-styled corner tub glass enclosure should fit the room before it follows a trend. Start by choosing a layout that preserves clear floor space, match the door operation to available clearance, and select glass that gives you the right balance of light and privacy.

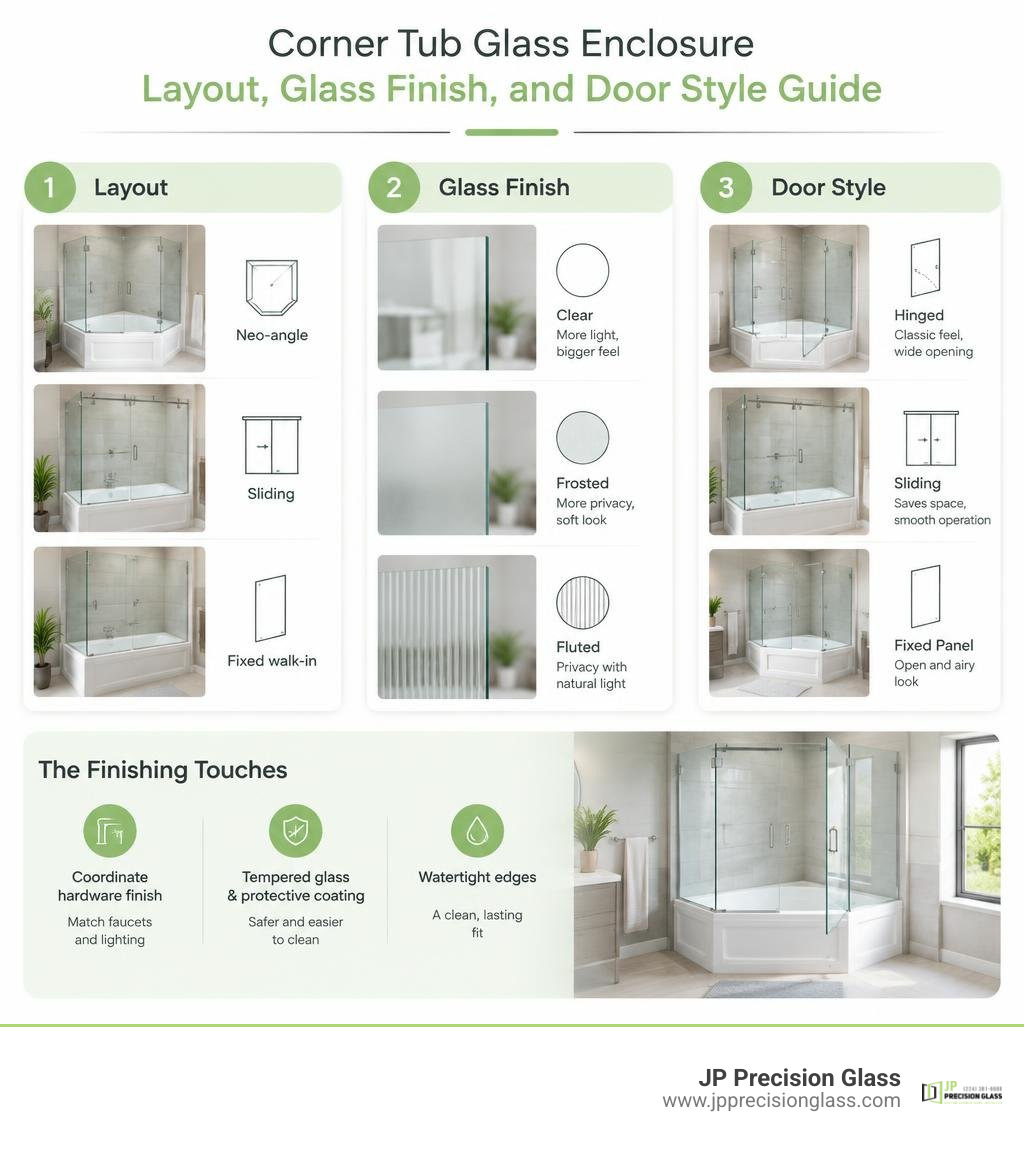
  1. Choose a neo-angle layout to soften a tight corner, a sliding system when there is no room for a door swing, or a fixed walk-in panel for an open look.
  2. Use clear glass to make a small bathroom feel larger; choose frosted or fluted glass when privacy matters more.
  3. Coordinate the hardware finish with faucets and lighting, then plan for easy cleaning with tempered glass and a protective water-repellent coating.

The best result is not necessarily the most elaborate one. It is a clean, well-measured design with safe glass, watertight edges, and a door or panel arrangement that works with how you move through the bathroom. The sections ahead break down the layout, glass, hardware, and installation choices that make a corner enclosure look custom without wasting valuable space.

Corner tub enclosure layout, glass finish, and door style guide infographic

Corner tub glass enclosure terms at a glance:

For broader context on how glass enclosures are used in residential bathrooms, see shower.

1. Select the Right Layout for Your Corner Tub Glass Enclosure

Designing a functional corner bathing space begins with understanding the footprint of your room. Corner installations are naturally suited for saving space, but selecting the proper configuration determines whether your bathroom feels open and airy or cramped and awkward. When exploring how to choose the perfect bathroom tub glass enclosures for your home, the primary goal is balancing structural containment with accessible movement.

Neo-angle and walk-in corner glass tub configurations

A standard corner installation involves two perpendicular structural walls meeting at a 90-degree angle, with custom glass panels completing the boundary along the outer edges of the tub or low-profile acrylic base. Installing a corner base typically requires direct-to-stud framing, after which finished backwalls—such as waterproof backwall kits or custom-set tile—are integrated. Once the walls and base are fully set, we measure the precise walk-in openings and sightlines to ensure the surrounding fixtures remain unobstructed.

Neo-Angle Corner Configurations

Neo-angle configurations are among the most efficient geometric layouts for tight corner areas. Instead of following a conventional square or rectangular boundary, a neo-angle enclosure features a diamond-inspired footprint that cuts across the outer corner at two 135-degree angles. This clipped corner design removes the sharp point extending into the room, freeing up valuable floor area in front of vanities or toilets.

In a neo-angle design, the center panel serves as the door, flanked by two stationary glass return panels anchored to the tiled walls. This setup provides excellent sightlines and structural stability while keeping the walk-in opening central. Proper drain planning is essential; neo-angle setups typically use a dedicated corner or offset center drain to ensure rapid water evacuation away from the door threshold.

Walk-In and Corner Bathtub Shields

If you prefer an open-concept bathroom aesthetic without swinging doors, fixed splash panels and walk-in designs offer barrier-free convenience. Understanding why you need a glass bathtub shield comes down to simplicity: a stationary panel shields high-spray zones near the showerhead while leaving the rest of the corner open for effortless entry.

Weighing the pros and cons of partial glass tub enclosures helps determine if this minimalist approach suits your household. Partial enclosures eliminate mechanical tracks and hinges entirely, creating clean visual lines and reducing cleaning tasks. However, walk-in openings require thoughtful showerhead placement to prevent stray water droplets from reaching the bathroom floor.

2. Match Glass Textures and Door Mechanics to Your Space

Every bathroom layout presents unique spatial challenges. The way your glass door opens and the texture of the glass itself significantly impact both functionality and daily comfort.

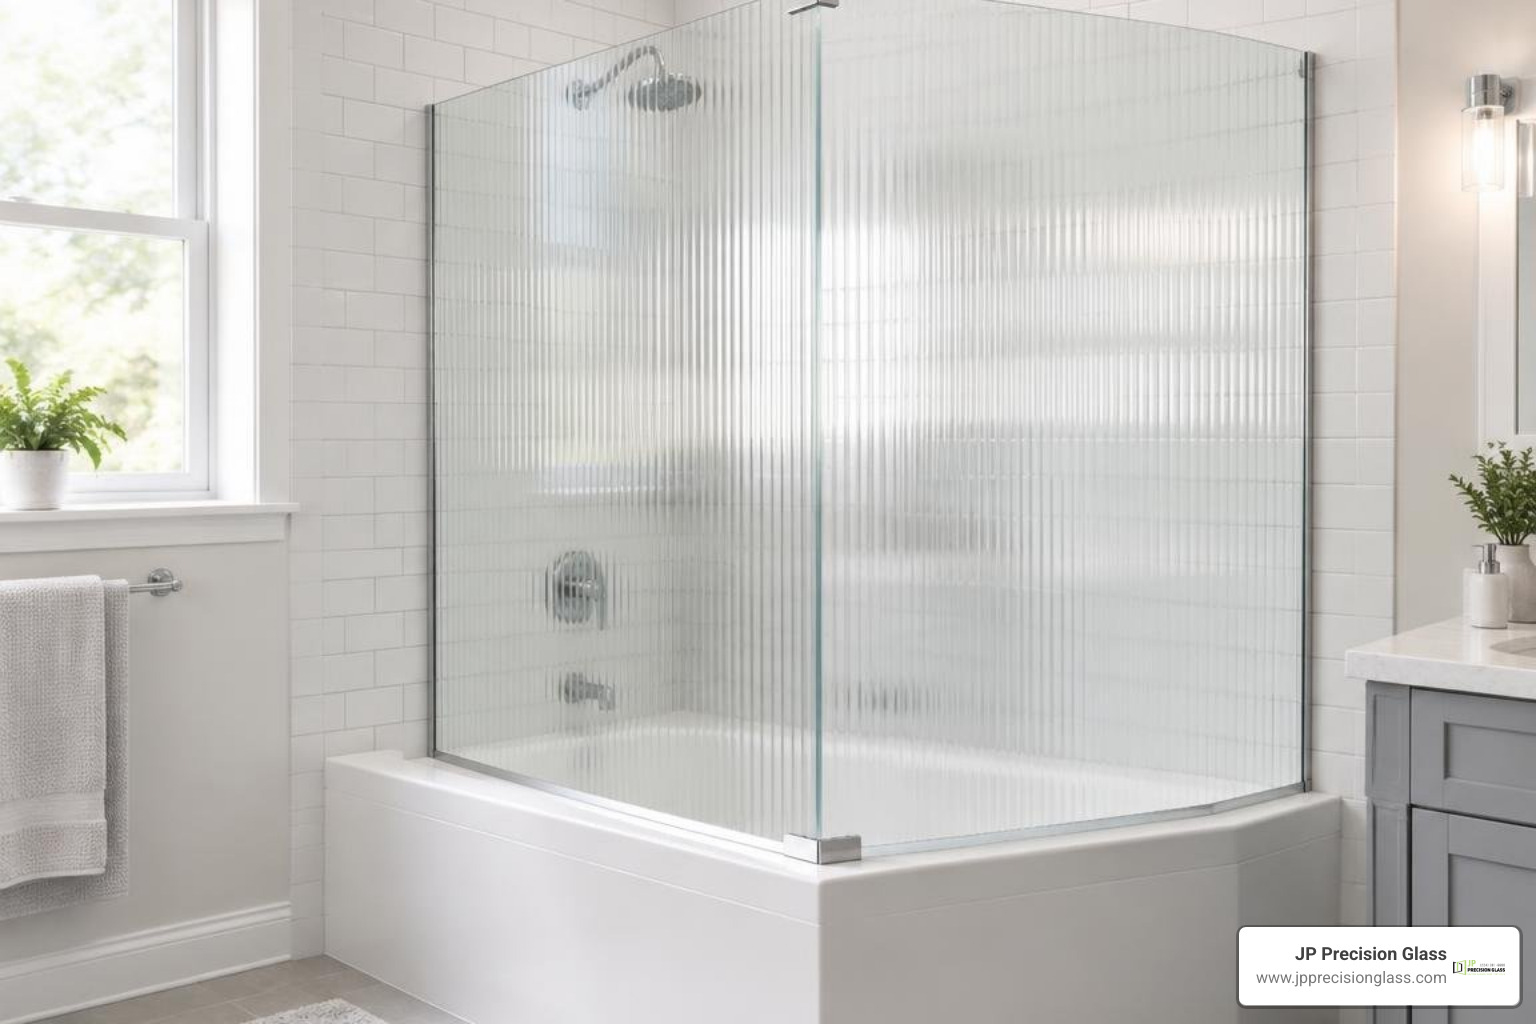
Textured fluted glass panel installed on a corner tub

Sliding vs. Hinged Systems for a Corner Tub Glass Enclosure

Choosing between sliding and hinged doors comes down to clearance space outside the tub:

  • Sliding Systems: In compact bathrooms where a vanity or linen closet sits right next to the tub edge, swinging doors can cause clearance conflicts. It is easy to see why sliding glass tub enclosures are making a major comeback. Modern sliding setups feature sleek, exposed top-roller tracks that glide effortlessly without intruding into the room. Dual-sliding configurations also allow entry from either side.
  • Hinged and Pivot Systems: If your floor plan offers ample clearance, hinged pivot doors provide a wide walk-in opening. High-grade pivot hinges mount directly to the wall or stationary glass panels, equipped with magnetic latching vinyl seals that snap closed to keep water inside. Many models also offer reversible door swings, allowing you to mount the handle on whichever side best matches your natural traffic flow.

Clear, Frosted, and Fluted Glass Finishes

The style and texture of your glass set the overall tone of the space:

  • Clear and Low-Iron Glass: Clear tempered glass is the standard choice for modern designs. It lets natural light travel unhindered, creating an open feeling in compact bathrooms. Low-iron glass removes the subtle green tint found in standard glass, offering pristine clarity.
  • Fluted (Ribbed) Glass: Inspired by classic Art Deco architecture, fluted glass features vertical grooves that refract light beautifully while obscuring direct views inside. It adds architectural depth and high-end style to any corner configuration.
  • Frosted Glass: If maximum privacy is your top priority in a busy household, upgrading your tub with frosted glass doors creates an opaque, satin-like barrier that hides water spots while diffusing soft light.

3. Structural Essentials: Glass Thickness and Wall Adjustability

A durable corner glass installation depends on robust materials and precise alignment. Because glass panels meet at custom angles along the tub rim, understanding glass thickness and wall plumbness is critical.

Feature 1/4-Inch (6 mm) Tempered Glass 3/8-Inch (10 mm) Tempered Glass
Structural Profile Lightweight, ideal for semi-frameless sliding systems Heavyweight, rigid, ideal for fully frameless designs
Hardware Requirement Aluminum wall profiles, u-channels, and top guide rails Solid brass heavy-duty hinges and structural clamps
Out-of-Plumb Flexibility High (often up to 3/4 inch per side via wall jambs) Low to none (requires plumb walls or custom-cut glass)
Visual Aesthetic Slim, framed or semi-framed modern profile Substantial, luxury frameless presence
Impact Resistance Certified safety tempered, standard residential grade Certified safety tempered, maximum residential strength

Balancing 1/4-Inch and 3/8-Inch Tempered Safety Glass

Tempered safety glass is manufactured through extreme thermal heating and rapid cooling, making it up to four times stronger than standard annealed glass. If broken, it crumbles into small, blunt granular chunks rather than dangerous jagged shards.

  • 1/4-Inch (6 mm) Glass: Standard for framed and semi-frameless sliding enclosures. Its lighter weight reduces wear on rolling hardware and simplifies installation while meeting all residential safety building codes.
  • 3/8-Inch (10 mm) Glass: The gold standard for fully frameless corner enclosures. This heavier glass provides superior structural rigidity, eliminating flex in stationary return panels and delivering a premium, solid feel when closing the door.

Managing Out-of-Plumb Walls in a Corner Tub Glass Enclosure

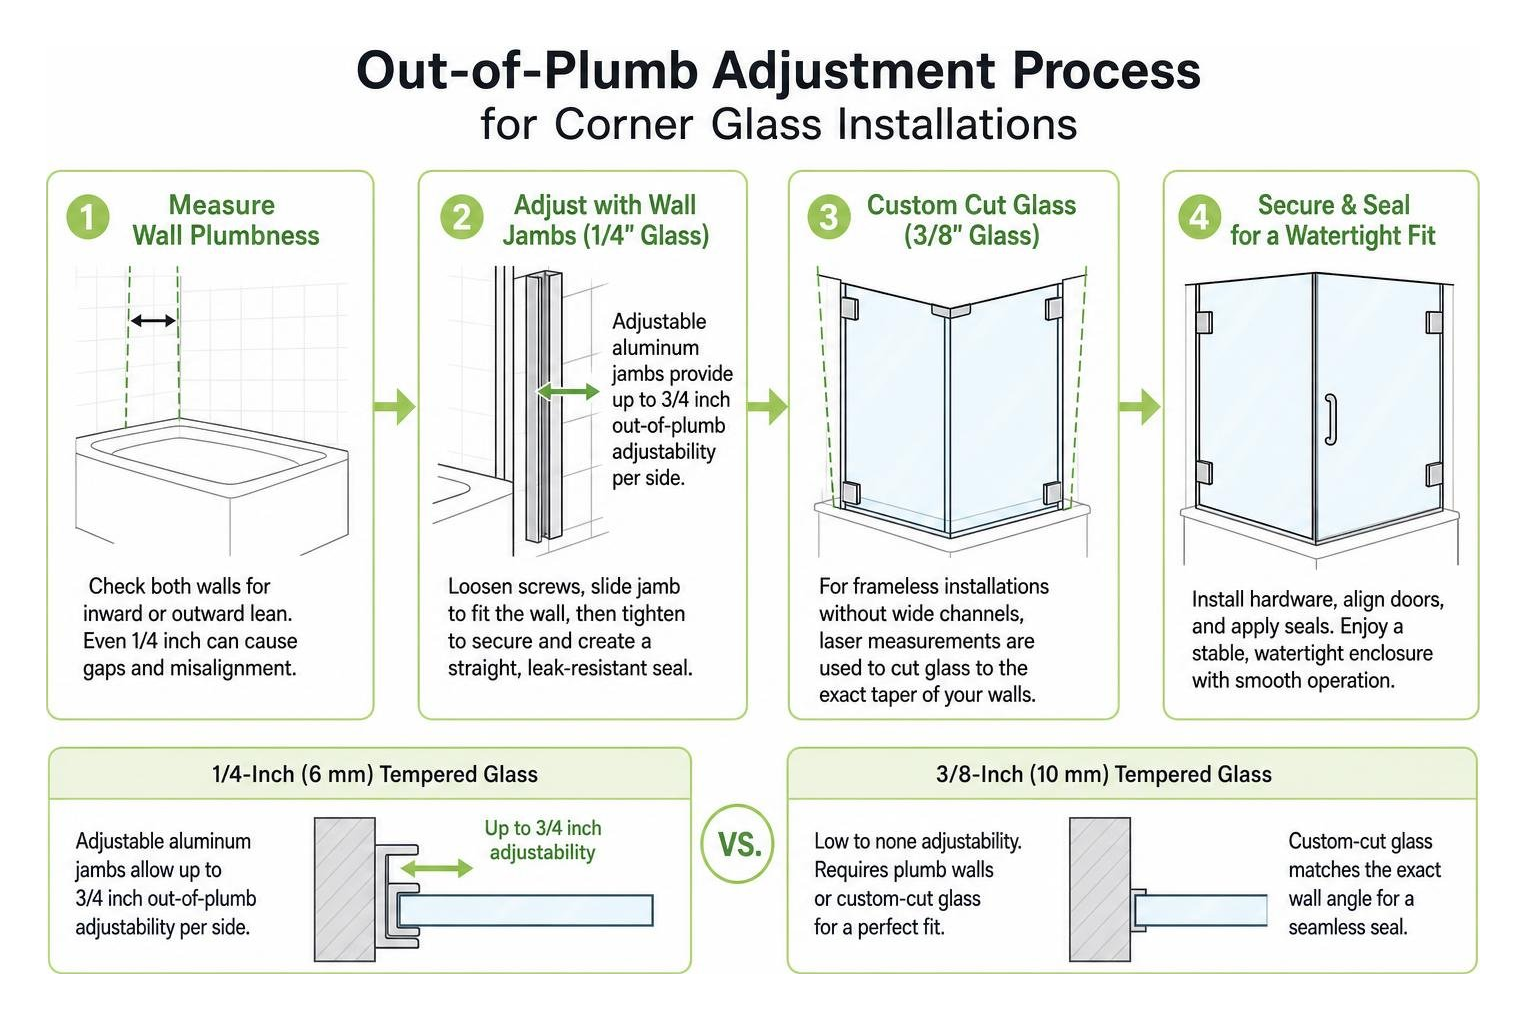
Bathroom walls are rarely perfectly plumb, especially in older homes. If a wall leans inward or outward by even 1/4 inch, a rectangular piece of glass will leave an uneven gap, causing water leaks and misaligned latches.

Out-of-plumb adjustment process for corner glass installations

Many pre-engineered kits manage uneven surfaces by using adjustable aluminum wall jambs that provide up to 3/4-inch out-of-plumb adjustability per side. Think of out-of-plumb adjustability like leveling the legs of a table on an uneven floor—it absorbs minor imperfections without compromising stability. For fully frameless 3/8-inch installations that do not use wide metal channels, our team takes custom laser measurements to cut the glass to the exact taper of your wall, guaranteeing a watertight perimeter seal.

4. Hardware Finishes and Easy-Clean Glass Coatings

The finishing touches define both the daily look and long-term maintenance of your enclosure.

  • Hardware Coordination: Match your glass hardware with your existing plumbing fixtures. Matte black delivers bold, modern contrast against white subway tile; polished chrome offers timeless reflection and pairs well with classic aesthetics; and brushed brass adds warm elegance. High-grade solid brass or stainless steel internal components prevent rust in high-moisture environments.
  • Factory-Applied Protective Coatings: Untreated glass is naturally porous, allowing hard water minerals, soap scum, and limescale to bond to the surface over time. High-performance hydrophobic coatings (such as ClearMax technology) seal these microscopic valleys, creating an ultra-smooth shield that causes water to bead up and roll off instantly. This can cut routine cleaning time by up to 40%.
  • Routine Upkeep: To maintain your glass, avoid abrasive scouring pads or harsh bleach-based chemicals that can degrade protective coatings and corrode hardware finishes. Keep a silicone squeegee in the shower to wipe down the glass after the last shower of the day, followed by a quick wipe with a microfiber cloth.

Frequently Asked Questions About Corner Tub Glass Layouts

Can a corner glass enclosure be installed on an existing bathtub?

Yes, as long as your existing bathtub features a flat, level rim with adequate width (typically at least 2 to 3 inches) to support the bottom glass channels or guide tracks. The tub must be securely anchored to the framing with no flex, and the surrounding walls must be finished with waterproof tile or acrylic panels.

How do out-of-plumb adjustments work on uneven bathroom walls?

In semi-frameless systems, an aluminum wall profile attaches to the wall, and the glass panel slides inside a telescoping channel. By shifting the glass deeper into or farther out of the channel (often allowing up to 3/4 inch of play), installers ensure the door hangs plumb even if the wall leans. For frameless installations, out-of-plumb walls are accommodated by custom-cutting the glass at an angle to match the wall’s precise slope.

What is the easiest way to clean and protect treated corner glass?

Daily maintenance takes less than 30 seconds: simply wipe the panels with a silicone squeegee after each use to prevent standing water droplets from evaporating and leaving mineral deposits. For weekly cleaning, use warm water with a drop of mild dish soap or a dedicated non-abrasive, pH-neutral glass cleaner, applied with a soft microfiber cloth.

Conclusion

Styling a corner tub enclosure is all about balancing smart geometry, durable materials, and refined design. Whether you opt for a modern neo-angle footprint to save floor space, a sliding system with exposed rollers, or an open walk-in shield, investing in certified tempered glass and precision installation elevates your entire bathroom.

At JP Precision Glass, we specialize in custom-tailored glass solutions designed to fit your unique space. If you are planning a bathroom renovation, explore our expert shower door installation in Chicago to discover how precision-crafted glass can transform your home.

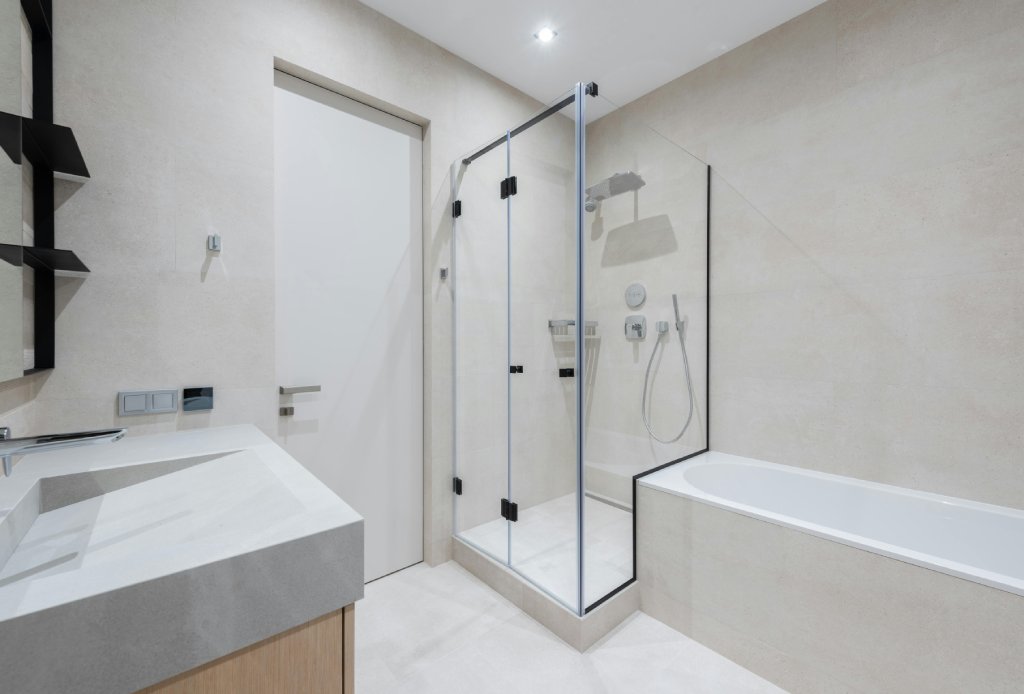
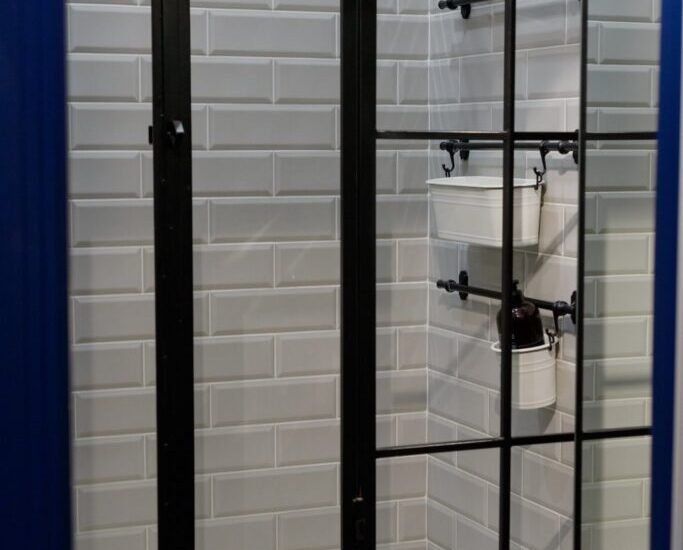
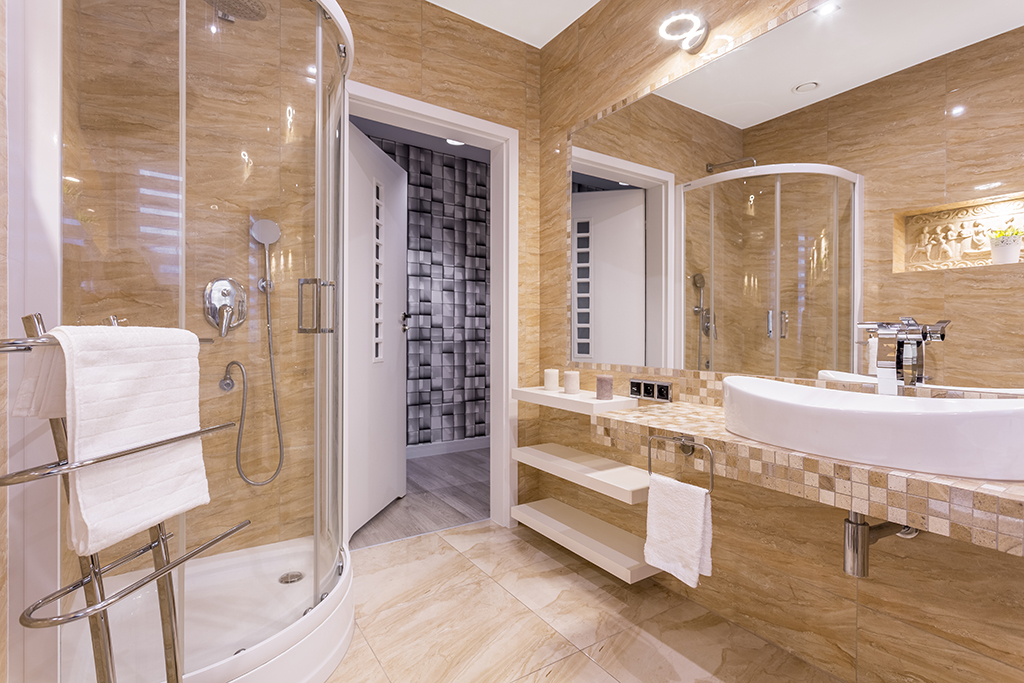
bathroom cubicle glass door

No More Leaks: Sealing Your Bathroom Cubicle Glass Door Perfectly

Seal a Bathroom Cubicle Glass Door to Stop Leaks

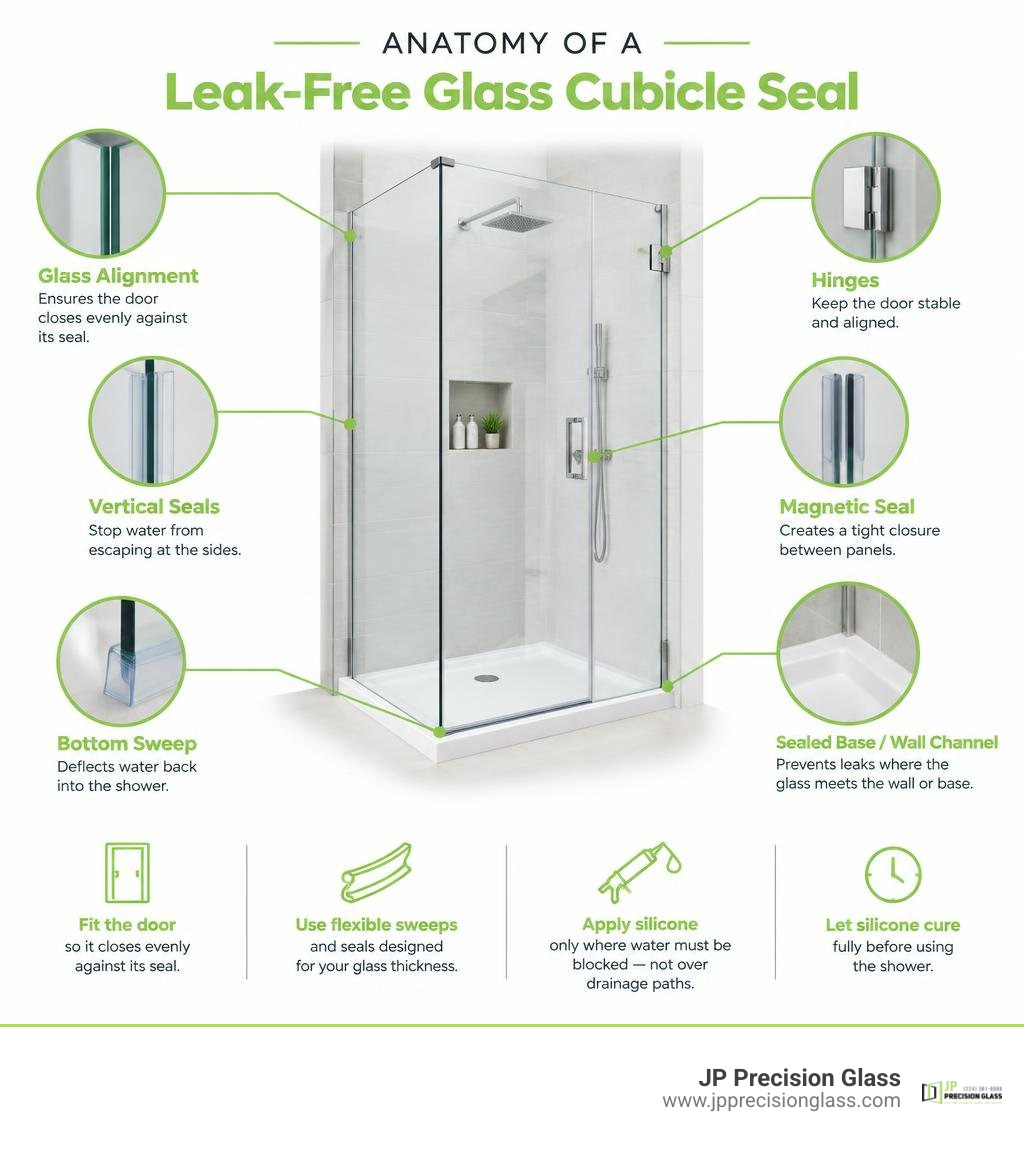
A leak-free bathroom cubicle glass door depends on three things: correct glass alignment, the right edge seals, and a properly sealed shower base or wall channel. If water is reaching the bathroom floor, inspect the bottom sweep, vertical seals, door gap, and silicone joints first.

For the best result:

  1. Fit the door so it closes evenly against its seal.
  2. Use a flexible bottom sweep and side or magnetic seals designed for the glass thickness.
  3. Apply sanitary-grade silicone only where water must be blocked – never over drainage paths.
  4. Let new silicone cure fully before using the shower.

Even a sleek frameless enclosure needs precise gaps and water-deflecting hardware. Glass may be toughened or laminated for strength, but leak prevention comes down to the fit of each panel, hinge, sweep, and seal.

anatomy of a leak-free glass cubicle seal infographic

Key bathroom cubicle glass door vocabulary:

Why Bathroom Enclosures Leak: Common Seal and Alignment Failures

When water escapes past your enclosure, it rarely means the glass has failed. Instead, the problem almost always points to degraded vinyl seals, shifting hardware, or improper slope. Over time, heat, hard water minerals, and daily use take a toll on moving parts and flexible strips.

worn shower door sweep and water pooling on floor

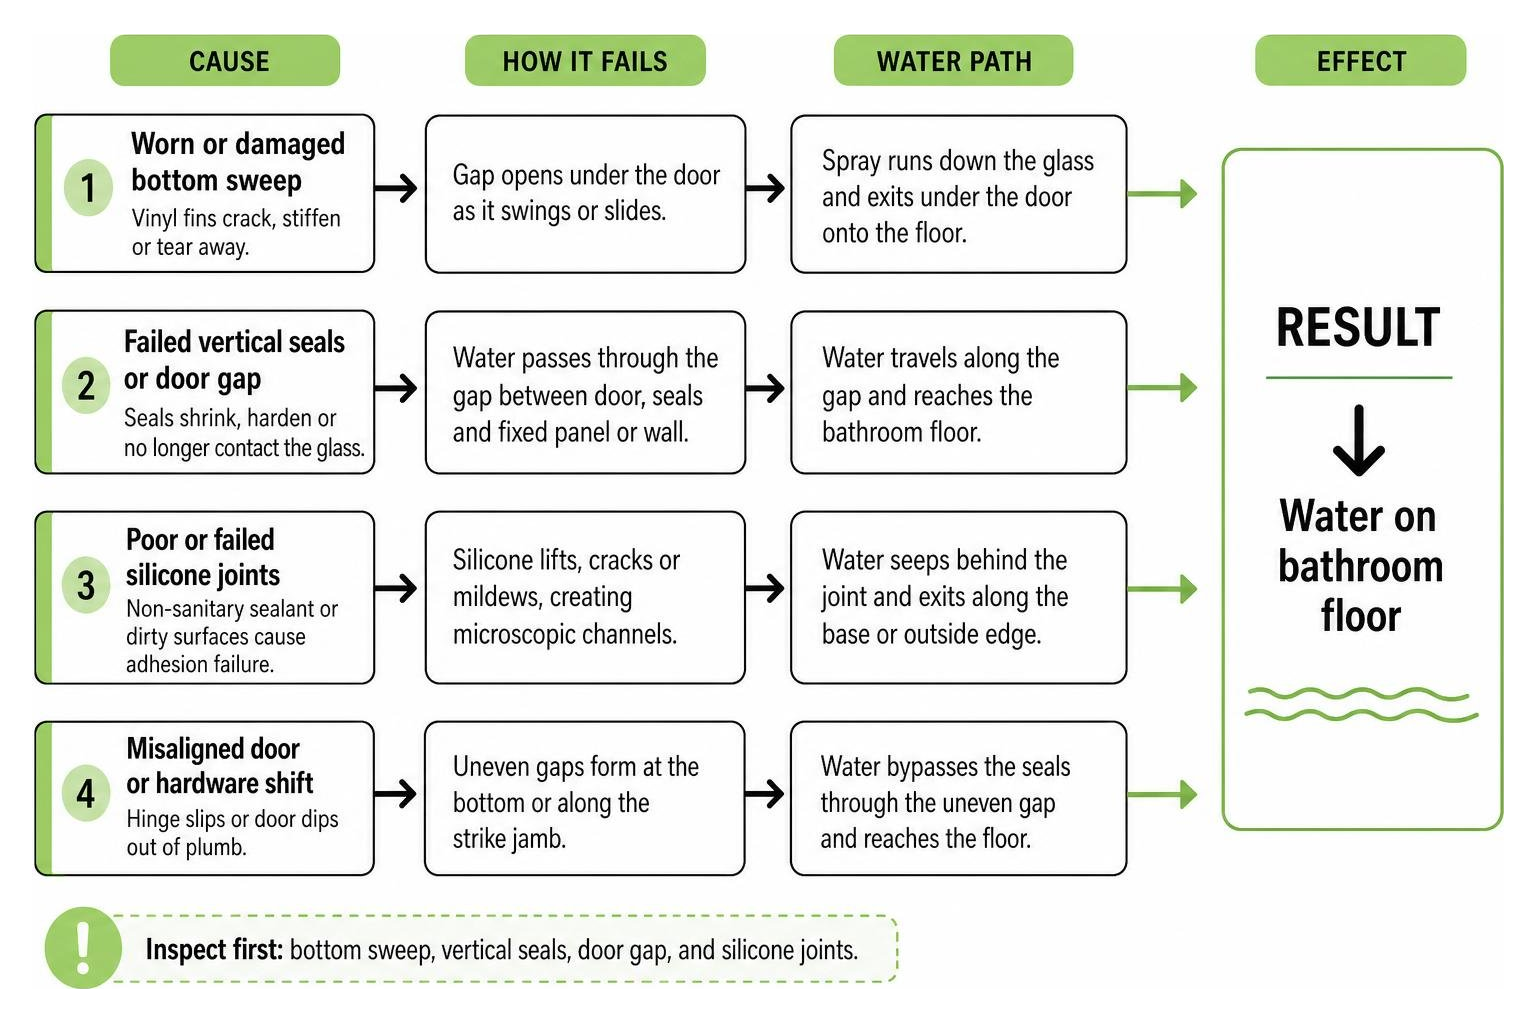
The most frequent culprit is a deteriorated bottom sweep. As doors swing or slide, these sweeps scrape against curbs or floor tiles. Eventually, the flexible vinyl fins crack, stiffen, or tear away, allowing water spraying off your body to sheet down the glass and bypass the curb entirely.

Silicone joint failure is another major issue. When non-sanitary sealants are applied—or when surfaces are dirty during installation—the silicone lifts from the tile or glass edge. Mildew burrows behind the bead, creating microscopic tunnels that channel water out of the shower.

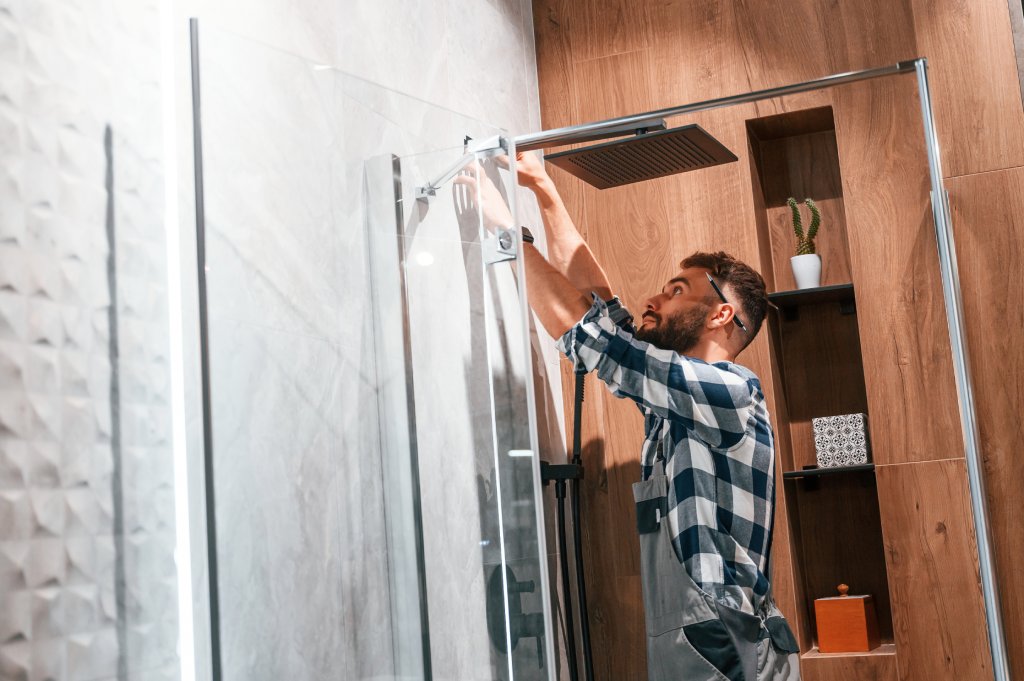
Mechanical movement causes hidden leaks too. Heavy glass doors place continuous load on wall mounts. If a hinge slips by even an eighth of an inch, the door dips out of plumb, causing an uneven floor gap and breaking the seal along the strike jamb. If you are experiencing persistent sagging or sticking panels, scheduling professional shower door repair in Chicago can restore alignment before moisture compromises your subfloor.

shower leak cause and effect chain

Choosing the Right Bathroom Cubicle Glass Door for Leak Prevention

Selecting the right glass and structural style is vital for stopping leaks before they start. Heavier, thicker glass panels vibrate less under high water pressure and stay rigid, maintaining consistent tolerances against perimeter seals.

Modern enclosures rely heavily on rigorous manufacturing standards. Premium systems utilize laminated toughened glass standards up to 15.52 mm thick with low-iron formulations that eliminate green tinting while maximizing structural rigidity and long-term durability.

Understanding your glass options helps you balance aesthetic goals with water containment:

Glass Type & Thickness Structural Rigidity Water Deflection Performance Ideal Enclosure Application
8 mm Toughened Float Glass Moderate Good (best for standard shower heights) Semi-frameless and framed cubicles
10 mm Toughened Glass High Excellent (minimal flex under direct spray) Frameless pivot and sliding doors
12 mm Toughened Monolithic Superior Exceptional (remains perfectly plumb) Large custom frameless enclosures
11.52 mm – 15.52 mm Toughened Laminated Maximum Ultimate (heavy-duty stability) High-traffic, commercial, or wet-room cubicles

Frameless vs Fully Framed Glass Enclosures

A fully framed enclosure uses an anodized aluminum perimeter channel equipped with continuous vinyl gaskets. Fully framed doors provide exceptional water containment because the frame physically blocks spray from exiting the perimeter.

On the other hand, custom frameless showers in Chicago offer an airy, modern aesthetic. Because frameless enclosures lack thick metal framing, they rely entirely on precision engineering, clear polycarbonate profiles, and exact clearances. For compact layouts where outward-swinging doors might hit vanities or drip onto dry floors, smooth sliding shower doors glide along an overhead track, directing water straight back into the drainage pan.

Heavy-Duty Hardware and Precision Alignment

No seal can do its job if the hardware fails to hold the glass square. High-quality enclosures incorporate self-closing hinges with hydraulic dampening mechanisms. These hinges pull the door completely flush against magnetic stops or bulb seals every single time, eliminating the gap left by casual closures.

Advanced installations take inspiration from architectural glass cubicle specifications, which utilize anti-finger trap hinges, concealed fixings, and corrosion-proof stainless steel or satin anodized aluminum components. When anchored alongside fixed glass shower panels, top-tier hardware ensures the door maintains its factory-set plumbness for decades, preventing sagging that ruins watertight seals.

Essential Water Seals and Hardware for Watertight Enclosures

A watertight glass cubicle relies on a network of clear vinyl and polycarbonate components acting as barriers. Selecting the right shower glass accessories ensures a tight seal without compromising visual clarity.

shower door sweeps and magnetic profile seals

Types of Seals for a Bathroom Cubicle Glass Door

Different edges of the door demand different sealing profiles:

  • Bottom Sweeps with Drip Rails: These snap onto the bottom edge of the glass. They feature an angled deflector fin that sheds running water back into the pan, accompanied by vertical wipe fins that seal against the threshold.
  • Magnetic Closure Profiles: Paired 90-degree or 180-degree vinyl extrusions containing polarized magnetic strips. When the door closes, the magnets snap together, sealing the vertical latch edge completely.
  • H-Jamb and Bulb Seals: Fitted along the hinge side or between inline panels. The soft bulb compresses when closed to block high-pressure water jets from penetrating hinge gaps.
  • Star and Fin Seals: Multi-finned strips that slide into channel gaps to prevent splash-out along perimeter walls.

Drip Rails, Deflectors, and Threshold Bars

A bottom sweep works best when paired with a low-profile threshold dam or water bar. Anodized aluminum or acrylic threshold dams mount directly onto the shower curb beneath the door.

As water sheets down the inside face of the glass, the integrated drip fin guides it over the threshold bar. Even if a strong stream hits the base of the door, the physical barrier stops outward pooling. If an older door lacks an integrated deflector, it may be time to upgrade or replace your glass shower door hardware to incorporate modern splash guards.

How to Install and Maintain Watertight Cubicle Seals

Proper installation ensures your seals stay mold-free, functional, and clear.

Step-by-Step Guide to Resealing a Bathroom Cubicle Glass Door

Follow this straightforward installation sequence to replace aged seals and restore a watertight fit:

  1. Remove Old Seals and Silicone: Gently pull the friction-fit vinyl channels off the glass. Use a plastic razor blade and silicone remover to scrape away old caulk along fixed channels without scratching the glass or tile.
  2. Clean and Degrease: Scrub the glass edges and curb with isopropyl alcohol. Ensure surfaces are completely dry, free of soap scum, and bare of residue.
  3. Measure and Cut New Profiles: Measure your door width and vertical height. Cut the new polycarbonate sweeps to length using a fine-toothed hand saw or heavy-duty snips, notching around hinge cutouts where necessary.
  4. Snap On Friction Profiles: Push the new seals firmly onto the glass edges from bottom to top until fully seated.
  5. Apply Sanitary Silicone to Fixed Joints: Apply a continuous, smooth bead of 100% mold-resistant silicone sealant along the exterior perimeter of fixed channels.
  6. Allow Full Cure Time: Keep the enclosure dry and untouched for a full 24 hours while the silicone vulcanizes.

Preventative Care and Cleaning Best Practices

To keep vinyl seals supple and prevent cloudy discoloration:

  • Squeegee Daily: Run a squeegee down the glass and bottom sweep after every shower to prevent standing water deposits.
  • Avoid Harsh Chemicals: Bleach, ammonia, and abrasive scouring powders degrade vinyl, turning it brittle and yellow. Use mild, pH-neutral soap or diluted white vinegar.
  • Check Elasticity Annually: Inspect your bottom fins and magnetic strips once a year. If the fins feel stiff or remain bent out of shape, swap them out to maintain a tight seal.

Frequently Asked Questions About Bathroom Cubicle Glass Doors

How often should seals be replaced on a glass cubicle door?

On average, vinyl sweeps and edge seals last between one and three years depending on water hardness, shower frequency, and cleaning habits. Replace them as soon as you notice yellowing, hardening, cracking, or water pooling outside the enclosure.

What causes water to leak past a magnetic cubicle seal?

Leaks through magnetic seals typically stem from door sagging, which pulls the magnetic strips out of parallel alignment. If the magnets do not meet evenly along their entire vertical length, the magnetic bond weakens, leaving air gaps that allow shower spray to escape.

Can clear silicone prevent all leaks around glass partitions?

Silicone alone cannot solve all leaks. It must be applied correctly to stationary joints—primarily along the exterior edges of fixed glass channels. Never silicone the inside bottom of an operable door, as doing so traps moisture and blocks the natural drainage path into the shower pan.

Conclusion

Achieving a leak-free bathroom starts with precision engineering, durable glass, and high-performance sealing hardware. By choosing the right door style, maintaining flexible sweeps, and using high-grade sanitary sealants, you protect your home from water damage while enjoying an open, elegant aesthetic.

When you are ready to upgrade your space with tailor-made glass built to exact specifications, trust our team for expert shower doors Chicago installation services to ensure a watertight fit for years to come.